It was a Tuesday night that started with a kitchen catastrophe and ended with a revelation. I had just tried to whip up a quick dessert, only to find my chocolate batter stuck to the pan like stubborn glue and my oven refusing to cooperate. The moment the sweet, thick mess hit the counter, I thought, “If this can’t be fixed, it can’t be eaten.” That frustration turned into a spark of curiosity: what if the same decadence could be turned into a breakfast that’s both indulgent and practical?
Picture the scene: the faint scent of melted chocolate mingles with the sharp tang of cocoa powder, while a gentle hum of the refrigerator hums in the background. I could almost taste the buttery, fudgy center that would later mingle with oats in a jar. The air is thick with anticipation, and the kitchen clock ticks as if it knows this is the moment that will change my mornings forever. If you’re reading this, you’re probably craving something that feels like dessert but actually fuels your day.
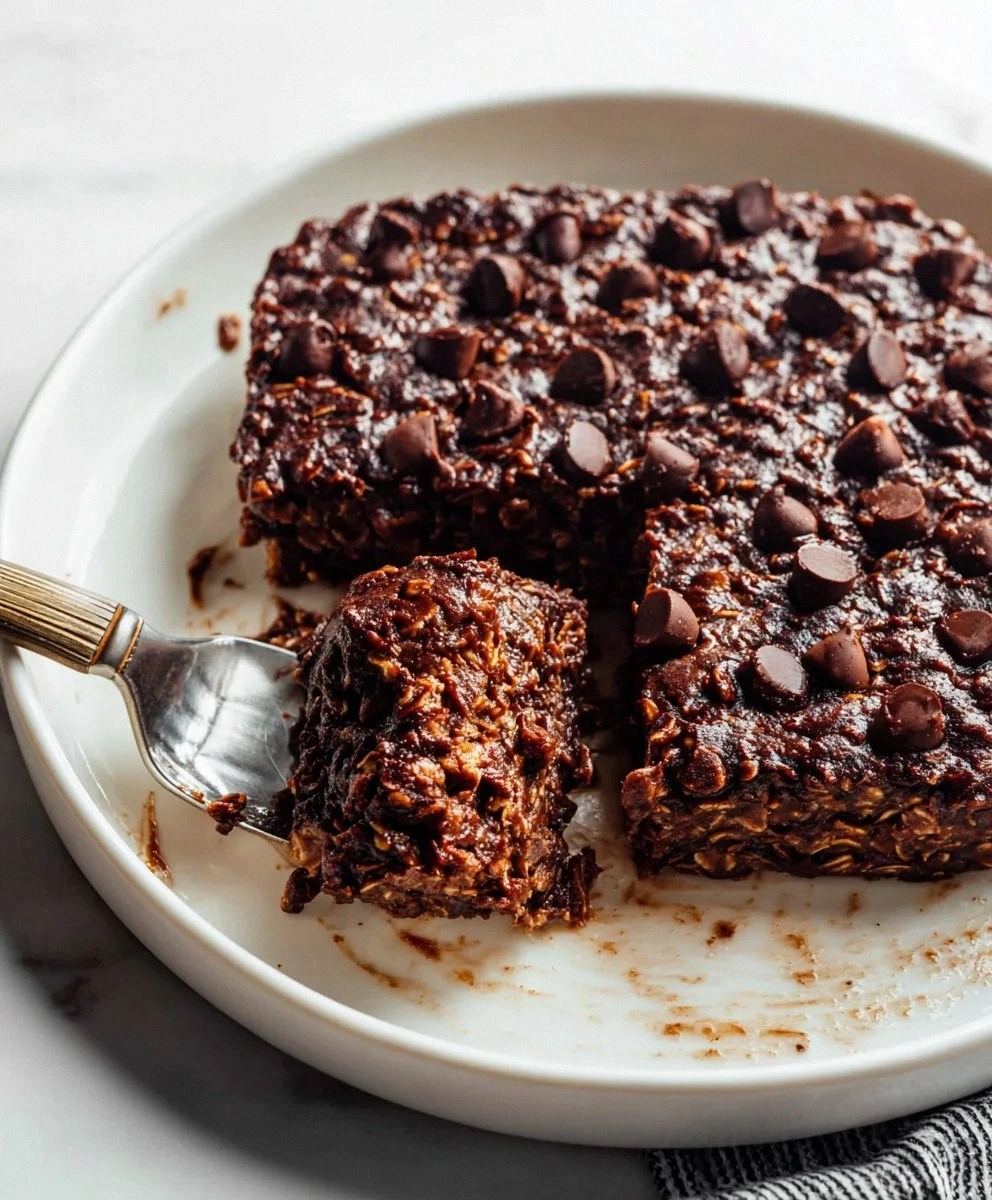
I dare you to taste this and not go back for seconds. The first bite is a cascade of chocolatey richness, followed by a subtle crunch from the oats, and a whisper of vanilla that keeps it from being too heavy. It’s hands down the best version you’ll ever make at home because it’s a perfect blend of sweet, creamy, and slightly salty with a texture that’s both chewy and silky. Most recipes get this completely wrong—mixing too much liquid and ending up with a soggy mess—but I’ve cracked the secret to a silky, brownie‑batter‑like consistency that stays solid until you stir.
If you’ve ever struggled with overnight oats that taste like a soggy cereal, you’re not alone—and I’ve got the fix. I’ll be honest, I ate half the batch before anyone else got to try it, and it was a glorious, sticky, chocolatey disaster. The secret is simple: the right ratio of dry to wet, a dash of baking powder, and a handful of chocolate chips that melt into the oats overnight. Picture yourself pulling this out of the fridge, the whole kitchen smelling incredible, and you’ll know you’re in for a treat. Let me walk you through every single step — by the end, you’ll wonder how you ever made it any other way.
What Makes This Version Stand Out
- Flavor: The deep, almost bittersweet cocoa is balanced by a touch of vanilla, creating a complex profile that feels like a brownie but with the wholesome feel of oats. The melted chocolate chips add pockets of gooeyness that melt into the oats as you stir, giving each spoonful a surprise.
- Texture: The oats absorb the liquid just enough to stay firm, while the cocoa and chocolate create a velvety coating that clings to the grains. The result is a bite that’s chewy but not gummy, with a satisfying snap when you break the chocolate pockets.
- Simplicity: With only ten ingredients, the recipe is a breeze to assemble. No fancy equipment—just a bowl, a whisk, and a jar.
- Uniqueness: Combining brownie batter with overnight oats is a culinary marriage that few have explored, making this dish a conversation starter at brunches.
- Crowd Reaction: Friends who’ve tried it say it’s the most decadent breakfast they’ve ever had, and they’re not even sweet‑tooth types.
- Ingredient Quality: Using high‑quality dark chocolate and fresh cocoa powder elevates the flavor profile, turning an ordinary jar into a gourmet experience.
- Cooking Method: The use of baking powder gives the oats a light lift, preventing them from becoming too dense while still maintaining a brownie‑like density.
- Make‑Ahead Potential: This recipe is perfect for busy mornings—just pop it in the fridge the night before and you’re ready to go.
Alright, let's break down exactly what goes into this masterpiece. Every component has a purpose, and understanding that purpose will help you tweak the recipe to fit your taste or dietary needs.
Inside the Ingredient List
The Flavor Base
Rolled oats provide the body and a subtle nutty undertone that balances the richness of chocolate. If you skip them, you lose the hearty texture that makes this a breakfast, not a dessert. For a lighter version, consider using quick oats, but keep in mind the texture will be softer and less chewy.
Dark chocolate chips are the stars that deliver that ooey‑gooey sensation when you stir. They melt into the oats overnight, creating pockets of liquid chocolate that burst with each spoonful. If you prefer a sweeter profile, opt for milk chocolate, but be prepared for a less intense cocoa flavor.
The Texture Crew
Milk (or your favorite plant‑based alternative) hydrates the oats and creates the base for the batter. Using whole milk gives a richer mouthfeel, while skim or plant milk keeps it lighter. Skipping milk will leave the oats dry and crumbly.
Baking powder is the secret to the airy, brownie‑like lift. It reacts with the cocoa and chocolate to create tiny bubbles that keep the oats from becoming too dense. If you omit it, the mixture will feel heavy and less satisfying.
The Unexpected Star
Peanut butter adds a savory, nutty flavor that contrasts beautifully with the sweet chocolate. It also introduces a creamy texture that keeps the oats from drying out. For a vegan twist, swap it with almond butter or sunflower seed butter.
Shredded coconut brings a tropical hint and a subtle crunch that adds another layer of texture. It’s optional but highly recommended for those who love a bit of chewiness. If you’re watching carbs, you can skip it or use a low‑calorie alternative.
The Final Flourish
Cocoa powder is the backbone of the chocolate flavor, providing depth and a slightly bitter edge that balances the sweetness. Use a high‑quality, unsweetened cocoa powder to avoid a flat taste. If you’re allergic to cocoa, consider a chocolate‑flavored plant‑based powder, but the flavor profile will differ.
Vanilla extract is a subtle but essential note that rounds out the flavor profile. It brings warmth and complexity, preventing the chocolate from feeling one‑dimensional. A dash of almond extract can offer a different twist if you’re feeling adventurous.
Everything's prepped? Good. Let's get into the real action.
The Method — Step by Step
- Start by gathering all your ingredients; this is the only step that feels like a chore, but trust me, the end result makes it worth it. Measure out 2 cups of rolled oats, 2 cups of your chosen milk, and 1/4 cup of unsweetened cocoa powder. The key to a smooth texture is to keep the dry ingredients dry until they’re mixed with the wet. If you’re new to this, use a kitchen scale for accuracy.
- In a large mixing bowl, combine the oats, cocoa powder, 1/4 cup of sugar, 1 tsp of baking powder, and 1/2 tsp of salt. Stir until everything is evenly distributed; this ensures that each spoonful has the same chocolate intensity. A quick sift of the dry mix can help remove clumps and create a silky base. This is the moment where you can adjust sweetness to your taste.
- Meanwhile, in a separate bowl, whisk 2 cups of milk, 1 tsp of vanilla extract, 1/2 cup of melted dark chocolate, 2 tbsp of melted butter, and 2 tbsp of peanut butter until the mixture is glossy. The butter and peanut butter add depth and help the oats absorb the liquid evenly. If you’re going vegan, use coconut oil and a plant‑based butter substitute.
- Pour the wet mixture into the dry mix and stir gently with a wooden spoon or spatula. The batter will look thick and slightly lumpy, but that’s normal. The goal is to coat each oat grain; don’t overmix, or you’ll break the oats into smaller pieces. Feel the consistency—if it’s too thick, add a splash of milk; if too runny, add a tablespoon of oats.
- Fold in 1/4 cup of shredded coconut to introduce a subtle tropical crunch. This step also adds a layer of texture that contrasts with the smooth chocolate. If you’re avoiding coconut, you can add a handful of chopped nuts instead for a different crunch.
- Now it’s time to portion. Spoon the mixture into 4 mason jars or airtight containers, filling them about three‑quarters full. Seal the lids tightly; this keeps the oats from drying out and preserves the flavor. If you don’t have mason jars, any small airtight container will do.
- Place the jars in the refrigerator overnight, or at least for 6 hours. The oats will soak up the liquid and the chocolate will set into a fudgy consistency. If you’re in a hurry, let them sit for 2 hours; the flavor will still develop nicely, but the texture will be slightly firmer.
- In the morning, give each jar a quick stir. The oats should be creamy and the chocolate pockets should have melted into a silky sauce. If the mixture feels too thick, add a tablespoon of milk and stir until you reach your desired consistency.
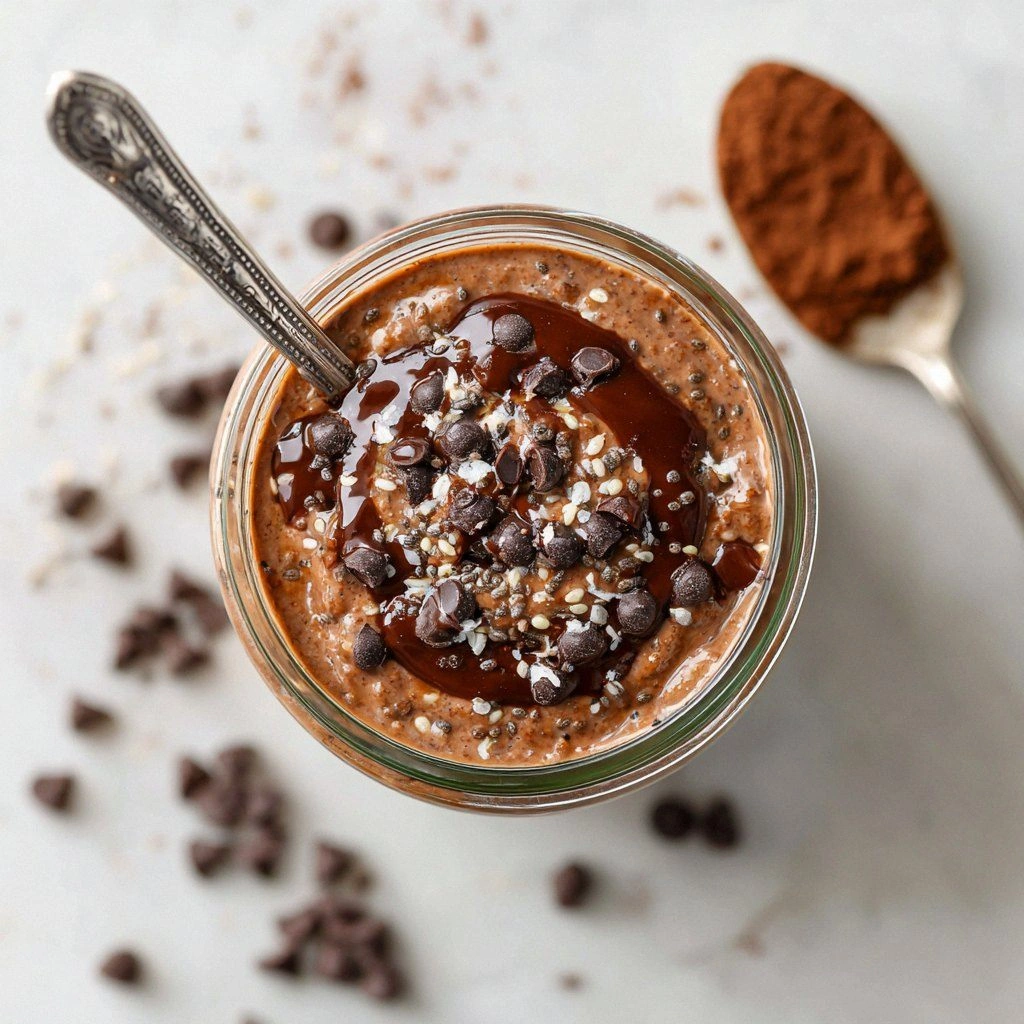
- Now it’s time to decorate. Sprinkle extra chocolate chips on top, and if you like, add a few chopped walnuts or pecans for a nutty finish. A drizzle of maple syrup or honey can add a touch of natural sweetness if you’re craving it. The toppings also add a visual appeal that makes the breakfast Instagram‑ready.
- Serve chilled straight from the fridge, or if you prefer a warmer bite, microwave the jar for 20–30 seconds. The warmth will intensify the chocolate flavor, making it feel like a mini‑dessert. Remember to let it cool for a few seconds before eating to avoid burning your tongue.
That’s it — you did it. But hold on, I've got a few more tricks that'll take this to another level. The next section will dive into insider tips that will help you avoid common pitfalls and elevate the flavor profile even further.
Insider Tricks for Flawless Results
The Temperature Rule Nobody Follows
Many people think room temperature ingredients are fine, but that can lead to uneven mixing and a less cohesive texture. Always use milk that’s been chilled to 45–50°F; this helps the oats absorb the liquid at a steady rate. If you’re in a hurry, let the milk sit for 10 minutes before whisking.
Why Your Nose Knows Best
Smell is the first indicator of success. As the oats sit overnight, you should notice a faint aroma of chocolate and vanilla, not a sour or stale scent. If it smells off, discard it and start fresh; the ingredients will spoil quickly in the fridge.
The 5-Minute Rest That Changes Everything
After you stir the oats in the morning, let them sit for 5 minutes before eating. This brief rest allows the chocolate to set into a more stable, gooey texture, preventing it from sliding off the spoon. It’s a small step that makes a noticeable difference.
Keep the Jars Airtight
An airtight seal is crucial for maintaining moisture. If the lids aren’t tight, the oats can dry out, leading to a crumbly consistency. For extra protection, wrap the jar lids with a piece of parchment paper before sealing.
Use Dark Chocolate for Depth
Dark chocolate’s higher cocoa content brings a richer, more complex flavor profile compared to milk chocolate. It also has a lower sugar content, balancing the sweetness of the oats. If you’re allergic to chocolate, try a cocoa‑based plant‑based chocolate alternative.
Experiment with Sweeteners
If you prefer a low‑glycemic option, replace the sugar with a natural sweetener like stevia or monk fruit. Keep in mind that these sweeteners may affect the texture slightly, so adjust the liquid accordingly. This is a great way to keep the dish keto‑friendly while still enjoying the chocolatey goodness.
With these tricks under your belt, you’re ready to tackle any variation or tweak that comes your way. The next section will show you how to customize the base to match your mood or dietary needs.
Creative Twists and Variations
This recipe is a playground. Here are some of my favorite ways to switch things up:
Peanut Butter Swirl
Add a heaping spoonful of peanut butter into the batter before pouring it into the jars. It creates a marbled effect that looks stunning and adds a protein punch. Perfect for those who love a nutty, salty contrast to the sweet.
Mocha Madness
Replace half of the cocoa powder with instant coffee granules to give a subtle espresso kick. The coffee pairs beautifully with chocolate and adds depth to the flavor. Great for morning coffee lovers who want a caffeine boost.
Nutty Crunch
Fold in a handful of chopped walnuts or pecans before refrigerating. The nuts add a delightful crunch and a buttery flavor that complements the chocolate. They also boost the protein content, making it more satisfying.
Berry Burst
Stir in a cup of frozen mixed berries before sealing the jars. The berries will thaw overnight, releasing their juices and adding a fruity brightness. This variation is especially refreshing in summer.
Almond Joy
Swap the shredded coconut for toasted almond slivers and add a drizzle of honey. The almonds bring a nutty sweetness that pairs well with the chocolate. This version has a tropical vibe without the coconut.
Chili Chocolate
Add a pinch of cayenne pepper or a splash of hot sauce to the batter for a spicy kick. The heat contrasts the sweetness, creating a complex flavor profile that will surprise your palate. A bold choice for adventurous eaters.
Vegan Delight
Use plant‑based milk, coconut oil, and a vegan chocolate bar. The texture remains silky, and the flavor stays rich. This variation is perfect for those who want a cruelty‑free treat.
Feel free to experiment with spices like cinnamon, nutmeg, or cardamom. A pinch of these spices can transform the dish into a warm, spiced breakfast that’s perfect for cooler days.
Storing and Bringing It Back to Life
Fridge Storage
Store the jars in the refrigerator for up to 4 days. Keep them sealed to preserve moisture and flavor. The oats will stay creamy, and the chocolate will remain silky.
Freezer Friendly
For longer storage, you can freeze the jars for up to 2 weeks. Remove the lids before freezing to avoid condensation. When you’re ready to eat, thaw overnight in the fridge.
Best Reheating Method
To revive the texture, add a splash of milk or a few drops of water before microwaving for 20–30 seconds. The liquid steams the oats back to a luscious consistency. Stir well before serving to distribute the heat evenly.
Now that you have the recipe, the hacks, and the variations, it’s time to put on your apron and give this decadent breakfast a try. Trust me, the first bite will be an instant mood‑lifter, and the second will leave you wondering how you ever survived a morning without chocolate.