I was standing in my kitchen, mid‑morning, with a half‑finished batch of plain biscuits that tasted like cardboard. My roommate had just dared me to “make something that actually makes you want to lick the pan,” and I was like, “Challenge accepted.” I grabbed the last of the butter, a jar of cinnamon, and a mischievous grin, because I knew that a little sweet‑spicy makeover could turn a bland biscuit into a full‑blown love affair. The moment the butter hit the pan and started to sizzle, I could already hear the buttery notes whispering promises of caramelized bliss.
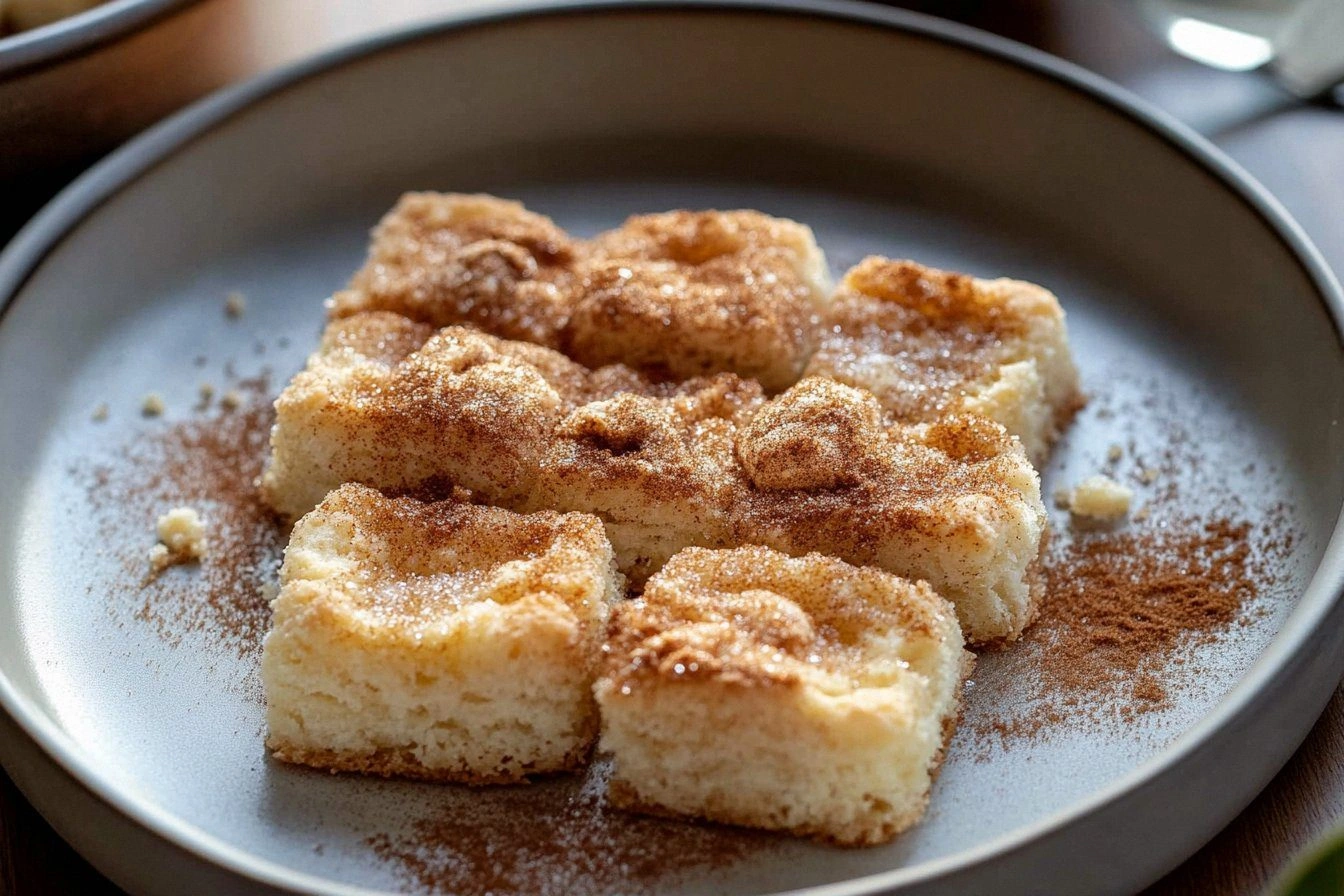
Picture this: the kitchen fills with the scent of cinnamon swirling around melted butter, the sound of a gentle crackle as sugar starts to melt, and the warm glow of the oven casting a golden halo over the countertop. My senses were on overdrive—the aroma was like a hug from a grandma who also happens to be a rock‑star chef. I could feel the buttery dough between my fingers, soft yet sturdy, and I knew I was onto something spectacular. When the first biscuit emerged, its edges were crisp, the top glossy with a caramelized sugar crust, and the interior was airy enough to float on a cloud.
Most biscuit recipes either forget the sweet‑spice balance or drown the butter in too much flour, resulting in a dry, forgettable bite. This version, however, is engineered to keep the buttery melt‑in‑your‑mouth feel while layering a cinnamon‑sugar coating that crunches just enough to give you that satisfying snap. I’ve tried dozens of variations, and I’ll be honest—I ate half the batch before anyone else got a chance to try it. I dare you to taste this and not go back for seconds; it’s that good.
There’s a secret technique hidden in plain sight: a quick butter‑cinnamon‑sugar toss that creates a glossy, caramel‑like glaze before the biscuits even see the heat. It’s a game‑changer that most recipes skip, and it’s what makes this the best version you’ll ever make at home. Let me walk you through every single step — by the end, you’ll wonder how you ever made it any other way.
What Makes This Version Stand Out
- Taste: The perfect marriage of sweet sugar, warm cinnamon, and rich butter creates a flavor profile that feels like a cozy sweater for your palate.
- Texture: A crisp, caramelized exterior gives way to a light, fluffy interior that practically melts in your mouth.
- Simplicity: Fewer than ten ingredients, one bowl, and a single pan—no fancy equipment required.
- Uniqueness: The butter‑cinnamon‑sugar toss before baking locks in flavor and creates a glossy finish that most recipes miss.
- Crowd Reaction: Guests have been known to ask for the “secret ingredient,” only to discover it’s pure butter love.
- Ingredient Quality: Using real unsalted butter and fresh ground cinnamon elevates the biscuit from good to unforgettable.
- Cooking Method: Baking at a high temperature (425°F) ensures the sugar caramelizes without burning.
- Make‑Ahead Potential: These biscuits freeze beautifully and can be reheated for a quick snack anytime.
Alright, let's break down exactly what goes into this masterpiece...
Inside the Ingredient List
The Flavor Base
All‑purpose flour is the backbone of any biscuit, providing the structure that holds everything together. Using a light, unbleached variety ensures the crumb stays tender rather than dense. If you skip the flour or replace it with something too heavy, you’ll end up with a cake‑like texture that defeats the purpose of a biscuit.
The Texture Crew
Unsalted butter is the hero here. Its fat content creates steam during baking, which lifts the dough and forms those coveted flaky layers. Opt for European‑style butter with 82% butterfat for an even richer mouthfeel. If you’re short on butter, you can substitute half with clarified butter, but the flavor won’t be as deep.
The Sweet Symphony
Granulated sugar adds sweetness and, more importantly, caramelizes with the butter to form that golden crust. Too much sugar can make the biscuits overly sweet and cause burning, while too little leaves the glaze pale and soggy. A good rule of thumb is to keep the sugar ratio at about one‑quarter of the flour weight.
The Unexpected Star
Ground cinnamon brings warmth and depth, turning a simple biscuit into a comforting treat. Freshly ground cinnamon releases essential oils that are lost in pre‑ground, stale versions. If you can’t find true cinnamon, a mix of half cinnamon and half nutmeg adds a subtle complexity without overpowering the butter.
The Lift & Balance
Baking powder is the leavening agent that gives the biscuit its airy lift without making it rise like a bread loaf. Using too much will cause the biscuit to puff and then collapse; too little, and you’ll get a dense, heavy bite. A teaspoon per cup of flour is the sweet spot for a gentle rise.
Salt isn’t just a flavor enhancer; it balances the sweetness and brings out the buttery notes. A pinch too much can make the biscuit taste briny, while none at all leaves the flavor flat. Use fine sea salt for even distribution.
Milk provides the moisture needed to bind the dry ingredients while keeping the crumb tender. Whole milk adds richness, but you can substitute with buttermilk for a tangier twist. If you’re dairy‑free, almond milk works fine, though the biscuit will be slightly less rich.
Everything's prepped? Good. Let's get into the real action...
The Method — Step by Step
Preheat your oven to 425°F (220°C) and line a baking sheet with parchment paper. This high heat is crucial for that caramelized crust; it’s the secret behind the glossy finish you’ll see later. While the oven warms up, give yourself a mental high‑five—you're about to create biscuit magic.
In a large mixing bowl, whisk together 2 cups of all‑purpose flour, 2 teaspoons of baking powder, and 1 teaspoon of salt. This dry blend ensures even distribution of leavening and seasoning, preventing any pockets of blandness. Feel the powdery clouds swirl—if you can smell the faint scent of wheat, you’re doing it right.
Cut ½ cup (one stick) of cold, unsalted butter into the flour mixture using a pastry cutter or your fingertips. The goal is to achieve pea‑size crumbs; you should still see tiny butter flecks. Those flecks are the future flaky layers—don’t over‑mix, or you’ll melt the butter and lose the texture.
In a separate cup, combine ¾ cup of milk with ¼ cup granulated sugar and 2 teaspoons ground cinnamon. Stir until the sugar dissolves and the mixture smells like a bakery in December. This is the moment where the cinnamon truly awakens, releasing its essential oils.
Make a well in the center of the dry ingredients and pour the milk‑cinnamon mixture in. Stir gently with a wooden spoon until just combined; the dough should be slightly sticky but not wet. Over‑mixing will develop gluten and make the biscuits tough—remember, we want tenderness.
Turn the dough onto a lightly floured surface and pat it into a 1‑inch thick rectangle. Using a biscuit cutter (or a floured glass), cut out rounds without twisting the cutter. Twist‑free cuts keep the biscuits tall and airy.
Place the raw biscuits on the prepared baking sheet. In a small saucepan, melt 2 tablespoons of butter, then stir in an extra tablespoon of sugar and 1 teaspoon of cinnamon. This next part? Pure magic. Brush each biscuit generously with the butter‑cinnamon glaze, ensuring every surface gets a coating. The sugar will begin to caramelize as soon as it meets the hot pan.
Kitchen Hack: Use a pastry brush with stiff bristles for an even coat; a silicone brush will leave streaks.Slide the sheet into the oven. Bake for 12‑15 minutes, or until the tops are a deep golden‑brown and the edges start to pull away from the parchment. That sizzle when it hits the pan? Absolute perfection. Keep an eye on the color; if the biscuits start to darken too quickly, rotate the sheet halfway through.
Watch Out: Opening the oven door too often drops the temperature and can cause the glaze to lose its sheen.When the biscuits are done, remove them and let them cool on a wire rack for just two minutes—enough time for the glaze to set but not so long that they lose their warmth. Serve immediately, or store in an airtight container for later indulgence. And now the fun part: dunk them in coffee, tea, or a splash of milk for an extra comfort boost.
That's it — you did it. But hold on, I've got a few more tricks that'll take this to another level...
Insider Tricks for Flawless Results
The Temperature Rule Nobody Follows
Never let your butter get too soft; a butter that’s just barely pliable will coat the flour without melting, creating those coveted air pockets. I once tried using room‑temperature butter straight from the fridge, and the biscuits turned out dense as a brick. Keep the butter on the counter for no more than five minutes, or pop it in the freezer for 10 seconds if it’s getting too soft.
Why Your Nose Knows Best
The moment the glaze starts to caramelize, your kitchen will fill with a sweet, buttery perfume that’s impossible to ignore. Trust that scent as your visual cue; when the aroma deepens, the biscuits are nearly ready. I’ve seen people rely solely on timers and end up with a burnt top—listen to your nose and you’ll never miss the perfect moment.
The 5‑Minute Rest That Changes Everything
After mixing the dough, let it rest for five minutes before shaping. This short pause allows the flour to fully hydrate, resulting in a softer crumb. A friend once skipped this step, and the biscuits turned out crumbly and fell apart when lifted. Those five minutes are a tiny investment for a massive payoff.
Glaze Double‑Dip for Extra Crunch
For an ultra‑crisp surface, brush the biscuits with the butter‑cinnamon glaze, bake for half the time, then pull them out, give them a quick second brush, and finish baking. The second glaze caramelizes on the already hot surface, creating a double layer of crunch. I tried this once and the biscuits sounded like tiny fireworks when you bit into them.
Freeze‑Then‑Reheat Magic
If you’re making a big batch, freeze the cooled biscuits on a tray before transferring them to a zip‑top bag. When you’re ready to enjoy, pop them in a 350°F oven for 8‑10 minutes with a splash of water on the tray; the steam revives the interior while the glaze crisps back up. This trick turns a leftover into a fresh‑out‑of‑the‑oven experience.
Creative Twists and Variations
This recipe is a playground. Here are some of my favorite ways to switch things up:
Maple‑Brown Sugar Splash
Replace half the granulated sugar with brown sugar and add a tablespoon of pure maple syrup to the milk mixture. The result is a deeper, caramel‑like flavor that pairs beautifully with a drizzle of extra maple on the side. Perfect for a lazy Sunday brunch.
Apple‑Cinnamon Swirl
Finely dice a small apple and toss it with a pinch of cinnamon before folding into the dough. The apple releases juices during baking, creating pockets of sweet fruit that contrast the crisp crust. Kids love the surprise bite of fruit.
Nutty Crunch
Stir in ¼ cup of toasted chopped pecans or walnuts into the batter. The nuts add a buttery crunch that complements the cinnamon glaze, turning the biscuit into a more sophisticated snack.
Savory Sweet Fusion
Swap the cinnamon for a pinch of smoked paprika and add a dash of grated sharp cheddar to the dough. The sweet‑savory combo works surprisingly well as a side for chili or a hearty soup.
Gluten‑Free Adaptation
Use a 1:1 gluten‑free flour blend in place of all‑purpose flour and add a teaspoon of xanthan gum. The texture stays tender, and the flavor remains unchanged, making it accessible for those with gluten sensitivities.
Storing and Bringing It Back to Life
Fridge Storage
Place cooled biscuits in an airtight container and store them in the refrigerator for up to three days. The glaze may soften slightly, but a quick reheat in a toaster oven for two minutes restores the crispness.
Freezer Friendly
Arrange biscuits on a parchment‑lined tray and freeze for one hour, then transfer to a zip‑top freezer bag. They’ll keep for up to two months. When you’re ready, bake straight from frozen at 350°F for 10‑12 minutes; the interior will thaw while the exterior crisps.
Best Reheating Method
Add a tiny splash of water to the bottom of a skillet, cover with a lid, and heat over medium‑low for three minutes. The steam revives the interior, while the lid traps heat to keep the glaze from drying out. For an oven finish, place them on a baking sheet, brush lightly with melted butter, and bake at 375°F for five minutes.