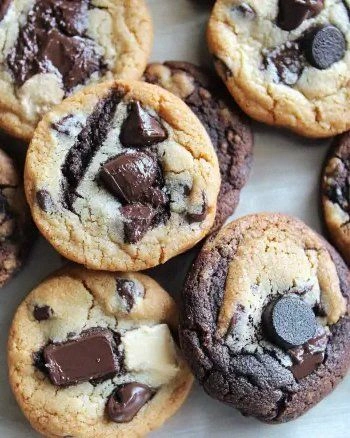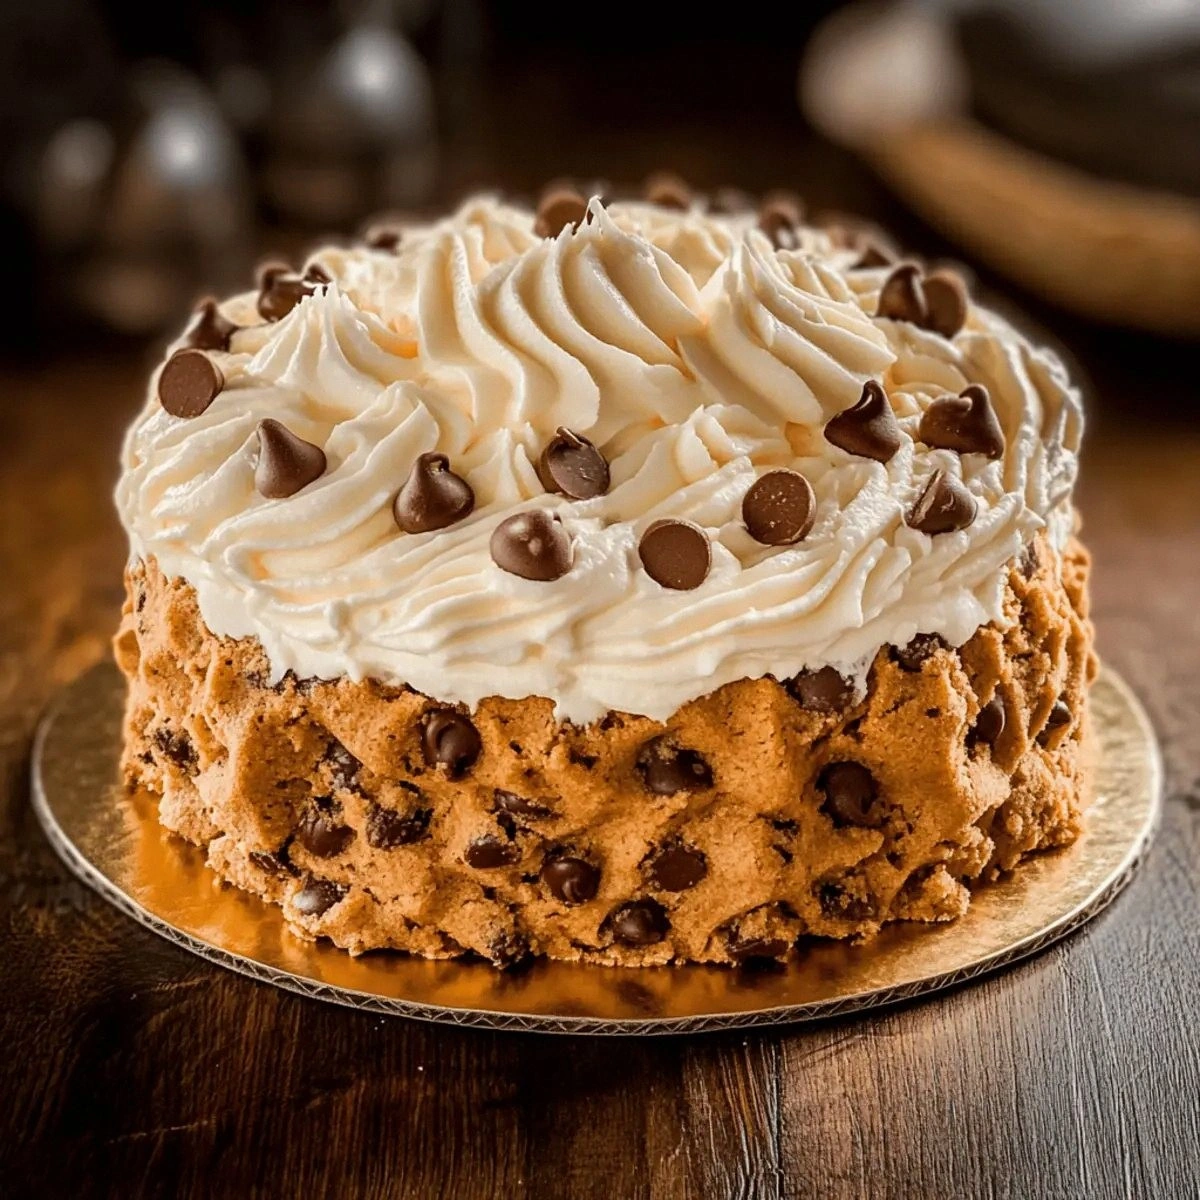
I was in the middle of a rainy Saturday night, scrolling through endless snack videos, when my roommate dared me to bake something that could settle a debate: “Is a cookie a cake or a cake a cookie?” I laughed, grabbed the nearest bag of chocolate chips, and set the oven to 350°F. The kitchen filled with the sound of butter softening in a bowl, the sweet scent of brown sugar caramelizing, and the faint crackle of the timer ticking down—an orchestra of comfort that made my heart race. I’ll be honest — I ate half the batch before anyone else got to try it, but the remaining half turned out so spectacular that I had to write this down before the memory faded. This isn’t just another hybrid; it’s the ultimate marriage of chewy, buttery cookie dough and the towering, slice‑able elegance of a cake, all crowned with a silky frosting that melts on your tongue like a dream.
Picture yourself pulling this out of the oven, the whole kitchen smelling incredible, the edges crisping like a golden sunrise while the center stays soft enough to sink a fork into without breaking. Most recipes get this completely wrong—either the cookie stays flat and dense, or the cake turns into a dry slab. Here’s what actually works: a balanced ratio of flour to butter, a two‑stage frosting that locks in moisture, and a secret technique involving chilling the dough before baking. I dare you to taste this and not go back for seconds; the contrast of crunchy edges and gooey middle will have you questioning every dessert you’ve ever known.
The twist? I’m swapping the usual all‑purpose butter for a blend of unsalted butter and a splash of heavy cream in the frosting, creating a texture that’s richer than any store‑bought frosting you’ll find. This is hands down the best version you’ll ever make at home, and I’m about to walk you through every single step — by the end, you’ll wonder how you ever made it any other way. Ready for the game‑changer? Let’s dive in.
What Makes This Version Stand Out
- Texture: The outer crust snaps like a fresh apple while the interior stays soft and chewy, a duality you rarely get in a single bake.
- Flavor Depth: Brown sugar and a pinch of sea salt amplify the chocolate chips, giving each bite a caramel‑kissed finish.
- Simplicity: Only eleven ingredients, most of which you already have in your pantry, make this a no‑stress weekend project.
- Unique Frosting: A butter‑powdered‑sugar blend with heavy cream creates a glossy, melt‑in‑your‑mouth topping that stays stable at room temperature.
- Crowd Reaction: Friends call it “the best thing since sliced bread” and keep asking for the recipe before the first slice even cools.
- Ingredient Quality: Using high‑quality semi‑sweet chocolate chips and real vanilla extract turns an ordinary dessert into a gourmet experience.
- Cooking Method: Chilling the dough before baking prevents spreading, giving you that perfect, cake‑like rise.
- Make‑Ahead Potential: The cake freezes beautifully, and the frosting can be whipped up the night before for a truly effortless presentation.
Alright, let's break down exactly what goes into this masterpiece...
Inside the Ingredient List
The Flavor Base
All‑purpose flour is the backbone, providing structure without weighing the cake down. Use a light hand when measuring—spoon the flour into the cup and level it off to avoid a dense crumb. If you skip this step, you’ll end up with a gummy texture that feels more like a brownie than a cookie‑cake hybrid.
Baking soda is the secret leavener that gives the cake its gentle rise and that signature crackly edge. A teaspoon is enough; too much will give a metallic aftertaste, while too little leaves the center flat. I always sift it together with the flour to ensure even distribution.
A pinch of salt may seem trivial, but it amplifies the sweetness and balances the richness of the butter and chocolate. Think of it as the conductor that brings all the flavors into harmony.
The Texture Crew
Unsalted butter (¾ cup) is melted and creamed with brown sugar, creating a caramel‑like foundation. The brown sugar adds moisture and a deep, molasses flavor that plain granulated sugar can’t match. If you substitute with all white sugar, the final product will lose that subtle chew.
Granulated sugar (½ cup) provides the initial sweetness and helps with the crisping of the outer crust. Together with the brown sugar, it creates a perfect sweet‑and‑crunch contrast.
Two large eggs act as binders and add a tender crumb. Beat them in one at a time to avoid curdling; this ensures the batter stays smooth and glossy.
Vanilla extract (1 tsp) is the aromatic heart of the batter, adding warmth that pairs beautifully with chocolate. Always use pure extract, not imitation, for a clean, authentic flavor.
The Unexpected Star
Semi‑sweet chocolate chips (1 to 1½ cups) are the hero, delivering pockets of molten chocolate that ooze as the cake bakes. I like to use a blend of mini and regular chips for varied texture. If you’re feeling adventurous, swap half the chips for chopped dark chocolate for a deeper cocoa punch.
The Final Flourish
For the frosting, a second half‑cup of butter is softened and whipped with powdered sugar, heavy cream, and a splash of vanilla. This creates a silky, spreadable frosting that sets without becoming too stiff. If you prefer a lighter frosting, replace half the butter with cream cheese for a tangy twist.
A pinch of salt in the frosting mirrors the salt in the batter, ensuring each bite is balanced and never overly sweet.
Everything's prepped? Good. Let's get into the real action...
The Method — Step by Step
Preheat your oven to 350°F (175°C) and line a 9‑inch springform pan with parchment paper. This ensures the cake releases cleanly and the edges get that coveted golden crunch. While the oven heats, gather all your dry ingredients in a medium bowl: flour, baking soda, and that pinch of salt. The moment you feel the warm air swirling in the kitchen, know you’re about to create something unforgettable.
In a large mixing bowl, cream together the unsalted butter (¾ cup) and both sugars until the mixture is light, fluffy, and the color has shifted to a pale caramel. This should take about 3‑4 minutes on medium speed; the texture will look like fine sand and smell irresistibly sweet. Pro tip: Scrape down the sides of the bowl often to incorporate every buttery speck.
Beat in the eggs one at a time, allowing each to fully incorporate before adding the next. Then stir in the vanilla extract. The batter should look glossy and slightly thick—this is the foundation for that perfect rise. If the mixture looks curdled, keep mixing; the emulsification will smooth out within a minute.
Gradually fold the dry ingredients into the wet, using a spatula and a gentle hand. Over‑mixing can develop gluten, leading to a tough crumb, so stop as soon as you no longer see streaks of flour. Finally, stir in the chocolate chips, ensuring they’re evenly distributed without breaking them apart.
Transfer the batter into the prepared springform pan, smoothing the top with a dampened offset spatula. This is the moment of truth—watch the batter spread just a touch, then press the edges down gently to create a slight rim. Kitchen Hack: Sprinkle a handful of extra chocolate chips on the surface before baking for an extra‑gooey top layer.
Slide the pan onto the middle rack and bake for 25‑30 minutes. You’ll know it’s done when the edges pull away from the pan, the top is a deep amber, and a toothpick inserted into the center comes out with a few moist crumbs but no wet batter. The aroma at this stage is so intense it might make you want to lick the spoon—resist, because the frosting is coming.
While the cake bakes, whisk together the frosting ingredients: softened butter, powdered sugar, heavy cream, vanilla, and a pinch of salt. Beat on low until the sugar is mostly dissolved, then increase speed to high for 2‑3 minutes until the frosting is light, fluffy, and holds soft peaks. Kitchen Hack: If the frosting looks too thick, add a teaspoon of milk; if too runny, add a little more powdered sugar.
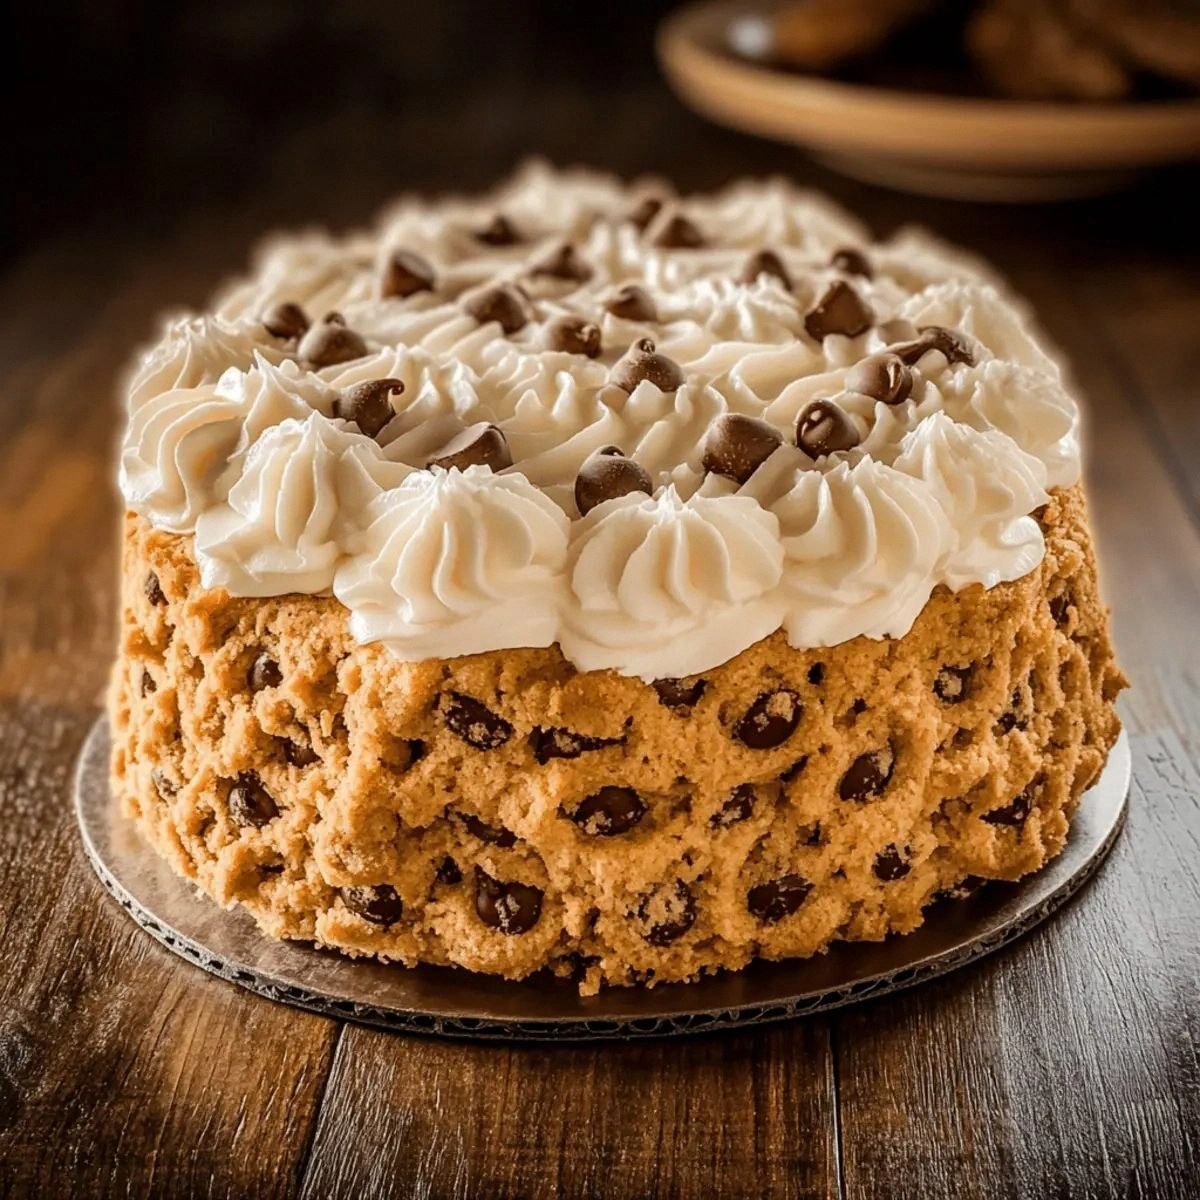
Allow the cake to cool in the pan for 10 minutes, then run a thin knife around the edge and release the springform. Transfer the cake to a wire rack and let it cool completely—this prevents the frosting from melting on contact. Once cool, spread the frosting in an even layer, using an offset spatula to create a smooth finish or a rustic swirl for visual flair.
Serve immediately or store as instructed below. The first slice should reveal a glossy, chocolate‑strewn top, a crackly edge, and a soft, melt‑in‑your‑mouth interior. That sizzle when it hits the pan? Absolute perfection. And now the fun part: slice, snap, and watch your guests’ faces light up.
That's it — you did it. But hold on, I've got a few more tricks that'll take this to another level...
Insider Tricks for Flawless Results
The Temperature Rule Nobody Follows
Never bake this cake straight from the fridge. Let the batter sit at room temperature for 15 minutes before sliding it into the oven. This small pause prevents the batter from shocking the oven, which can cause uneven rising and a gummy center. A friend tried skipping this step once — the cake rose unevenly and the texture was off. Trust me, this tiny wait makes a world of difference.
Why Your Nose Knows Best
When the cake is about 20 minutes into baking, lean in and inhale the aroma. If you detect a buttery, caramel scent with a hint of toasted chocolate, you’re on the right track. If the smell is still raw or overly sugary, give it an extra 2‑3 minutes. Trusting your nose is more reliable than a timer alone.
The 5‑Minute Rest That Changes Everything
After frosting, let the cake sit for at least five minutes before slicing. This short rest allows the frosting to set just enough so it doesn’t slide off the slice. It also gives the interior a chance to finish its steam‑settling process, resulting in a more cohesive crumb.
Frosting Consistency Control
If you prefer a glossy, glaze‑like finish, whisk the frosting for an extra minute on high speed; air incorporation creates that shine. For a more rustic, spreadable frosting, stop at soft peaks. Adjusting the speed is a quick way to customize the final look without changing any ingredients.
Freezing Without Sacrificing Texture
When you freeze the cake, wrap it tightly in plastic wrap, then aluminum foil. Thaw it in the refrigerator overnight, and give the frosting a quick whip before serving. This method locks in moisture and prevents freezer burn, ensuring each slice tastes as fresh as the day you baked it.
Creative Twists and Variations
This recipe is a playground. Here are some of my favorite ways to switch things up:
Double‑Chocolate Delight
Replace half of the semi‑sweet chips with dark chocolate chunks and add 2 tablespoons of cocoa powder to the dry mix. The result is a richer, more intense chocolate experience that will satisfy any cocoa‑craving crowd.
Salted Caramel Swirl
Drizzle a homemade salted caramel sauce over the batter before baking, then swirl with a knife. The caramel adds a buttery, salty ribbon that contrasts beautifully with the chocolate chips.
Nutty Crunch
Fold in ½ cup of toasted chopped pecans or walnuts for added crunch and a subtle earthiness. Nuts also bring a dose of healthy fats, making the dessert feel a little less guilty.
Cinnamon Spice Kick
Add 1 teaspoon of ground cinnamon and a pinch of nutmeg to the flour mixture. This warm spice blend pairs wonderfully with chocolate, especially on cooler evenings.
Mini Bite‑Size Cakes
Divide the batter among a muffin tin, filling each cup three‑quarters full. Bake for 15‑18 minutes, then frost each mini cake individually. Perfect for parties, potlucks, or a grab‑and‑go treat.
Storing and Bringing It Back to Life
Fridge Storage
Cover the cooled cake loosely with a sheet of parchment and then a reusable silicone lid. It will stay fresh for up to 5 days. The frosting may firm up a bit, so let it sit at room temperature for 10 minutes before serving.
Freezer Friendly
Wrap the entire cake tightly in plastic wrap, then place it in a freezer‑safe bag. It freezes well for up to 2 months. When you’re ready to enjoy, thaw in the refrigerator overnight and give the frosting a quick whisk to restore its silkiness.
Best Reheating Method
To revive a slice, preheat your oven to 300°F (150°C), place the slice on a parchment‑lined tray, and add a tiny splash of water (about a teaspoon) around the edges. Cover loosely with foil and heat for 8‑10 minutes. The steam generated brings back that melt‑in‑your‑mouth softness without drying the cake out.