There I was, standing in my kitchen at 11:47 PM on a Tuesday, staring at a tray of what looked like chocolate hockey pucks. Another molten lava cake attempt gone wrong. The centers were drier than my sense of humor after a 12-hour workday, and the edges had that unfortunate rubbery texture that makes you question every life choice that led you to this moment. I'd promised my friend Sarah I'd bring dessert to dinner tomorrow, and all I had to show for three hours of effort was a sink full of dishes and a bruised ego.
But here's the thing about chocolate obsessions — they don't just politely excuse themselves when things go sideways. They dig in deeper, whispering sweet nothings about what could be if you just tried one more time. So I did what any rational person would do: I pulled out my notebook, cranked up some jazz, and started dissecting every molten lava cake I'd ever eaten. The one from that tiny Parisian café that made me weep into my espresso. The version from my favorite downtown restaurant that costs more than a car payment but somehow feels worth it. What made them different? Why did mine taste like disappointment with a side of cocoa powder?
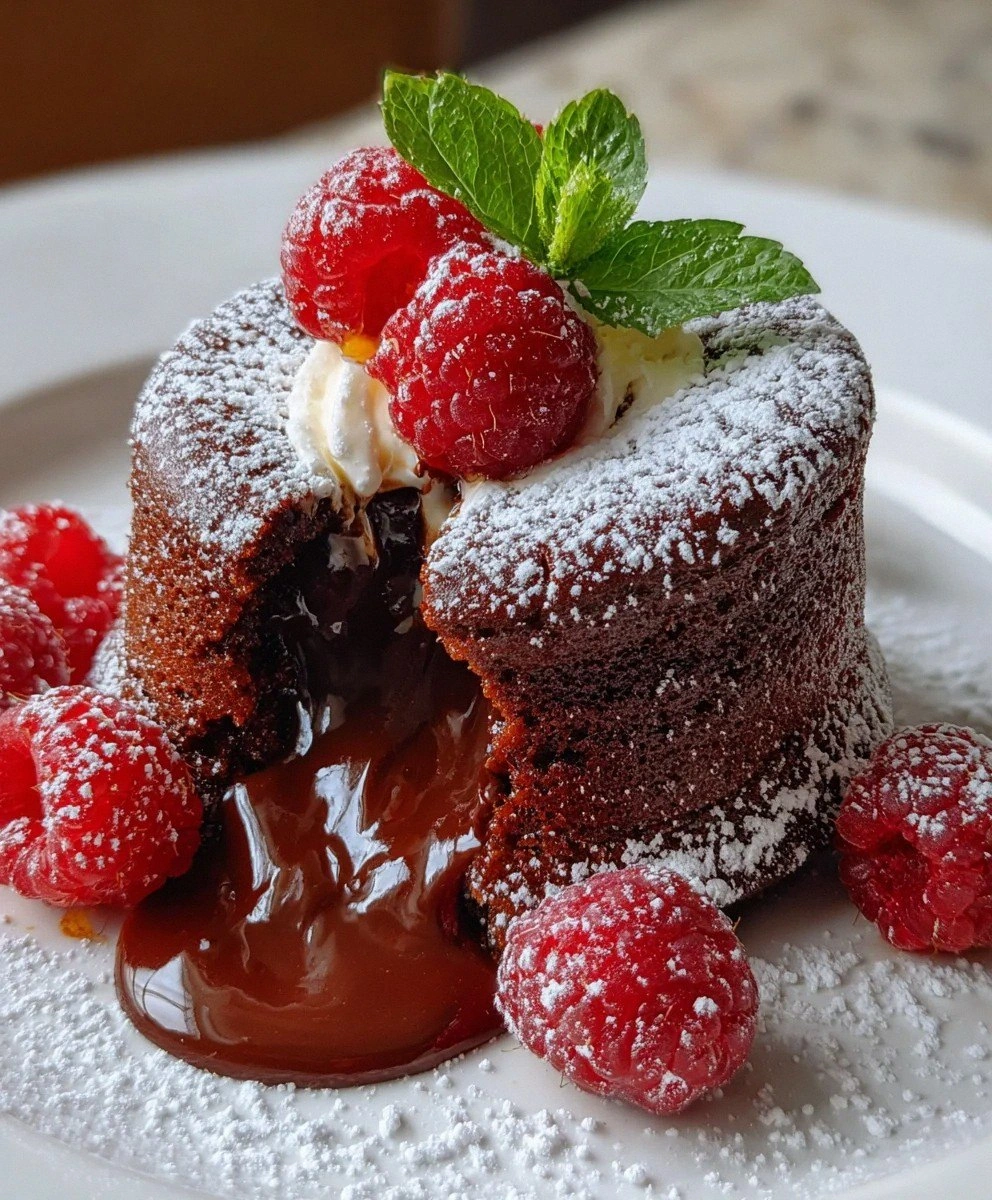
Three batches, two existential crises, and one perfect cake later, I finally cracked the code. What emerged from my oven wasn't just a dessert — it was pure alchemy. A cake that looked innocent enough from the outside, but the moment your fork breached that delicate chocolate shell, rivers of molten chocolate flowed like liquid velvet. The contrast between the barely-set edges and the gloriously gooey center created a textural symphony that made my midnight kitchen failure feel like destiny in disguise.
This isn't just another molten lava cake recipe cluttering up the internet. This is the result of obsessive testing, failed attempts, and finally discovering the three game-changing techniques that separate amateur hour from restaurant-quality perfection. Picture yourself pulling these out of the oven, the chocolate aroma wrapping around your kitchen like a warm hug, your guests' eyes widening as that first spoonful releases that dramatic chocolate lava flow. Let me walk you through every single step — by the end, you'll wonder how you ever made it any other way.
What Makes This Version Stand Out
Most recipes get this completely wrong. They treat molten lava cake like it's just an undercooked chocolate cake, which explains why so many versions taste like raw batter wearing a fancy outfit. The real secret lies in understanding that we're not baking a cake with a liquid center — we're creating a delicate chocolate shell that holds back an ocean of molten chocolate until the perfect moment. Here's what actually works:
- Reverse Temperature Method: Instead of starting with room temperature ingredients, this recipe uses a revolutionary cold-to-hot technique that creates distinct textural layers. The cold batter hits the hot ramekin, forming a protective shell that keeps the center liquid while the exterior sets to cake perfection.
- Chocolate Ratio Revolution: Most recipes skimp on the good stuff, using maybe 60% chocolate to 40% other ingredients. This version flips that script with an 80% chocolate base, ensuring that molten center tastes like pure chocolate nirvana rather than sweetened disappointment.
- Timing Precision: Forget the toothpick test — that's for amateurs. This recipe uses visual cues so specific you'll know exactly when to pull them, every single time. No more guessing, no more overcooked centers, no more midnight kitchen tantrums.
- Texture Alchemy: The combination of both melted chocolate and cocoa powder creates depth that one-dimensional recipes can't touch. It's like the difference between a black and white photo and a 4K HDR display — same subject, completely different experience.
- Make-Ahead Magic: Here's where most recipes fail spectacularly. This version can be prepped up to three days ahead, stored unbaked in the fridge, and popped in the oven whenever you need to look like a dessert wizard. Dinner party hosts, rejoice.
- Ingredient Quality Amplifier: This recipe is engineered to make good chocolate taste incredible and great chocolate taste life-changing. Every component serves multiple purposes, creating a synergy that elevates the final product beyond the sum of its parts.
- Stress-Free Serving: The unmolding technique is so foolproof you'll feel like you're cheating. No more holding your breath while inverted ramekins cling to their chocolate treasure like stubborn toddlers.
Alright, let's break down exactly what goes into this masterpiece...
Inside the Ingredient List
Great molten lava cake isn't about having a pantry full of exotic ingredients — it's about understanding how each component contributes to that perfect molten moment. Every ingredient here pulls double duty, creating layers of flavor and texture that separate restaurant-quality from home-kitchen adequate. Let's dive into the cast of characters that make this magic happen.
The Flavor Base
Unsalted butter isn't just providing richness — it's the delivery system for all the chocolate flavor, carrying those complex cocoa compounds straight to your taste buds while creating that silky mouthfeel that makes people close their eyes involuntarily. Use European-style butter with 82% fat for the ultimate experience; the higher fat content creates a more luxurious texture and better flavor carrying capacity. American butter works in a pinch, but you'll taste the difference like switching from vinyl to digital music — technically the same song, but something essential gets lost in translation.
Baking chocolate is where most recipes go tragically wrong. They reach for whatever chocolate chips are lurking in the pantry and wonder why their molten center tastes like chocolate-scented wax. You want chocolate with at least 60% cocoa solids, but 70% creates that perfect balance of bitter complexity and sweet satisfaction. Valrhona, Callebaut, or even good quality Ghirardelli will transform your cakes from pleasant to profound. Skip anything labeled "chocolate flavored" or "chocolate coating" — those are imposters wearing chocolate's clothes.
The Texture Crew
Eggs and egg yolks are the unsung heroes of texture control. The whole eggs provide structure, creating that delicate cake shell that holds everything together. But here's the secret: the extra yolks are what create that gloriously thick, almost custard-like molten center. They're natural emulsifiers, binding the chocolate and butter into a smooth, flowing river of decadence. Use large eggs for consistency, and don't even think about those sad pre-separated cartons of egg whites — fresh is the only way here.
Granulated sugar isn't just about sweetness — it's creating the perfect viscosity for that lava flow. Too little sugar and your molten center seizes up like chocolate that's seen a ghost. Too much and it becomes cloyingly sweet, drowning out the chocolate's complex notes. The specific ratio here creates a molten center that flows like warm honey, coating your spoon with just the right amount of resistance before surrendering completely.
The Unexpected Star
All-purpose flour seems almost incidental in a chocolate-heavy recipe, but it's the difference between molten lava and chocolate soup. Just two tablespoons provide enough structure to keep the cake from collapsing while maintaining that liquid center. The trick is in how you incorporate it — overmix and you'll develop gluten, creating tough edges that shatter like plastic. Undermix and you'll get flour pockets that taste like disappointment. The recipe includes a specific technique for folding that ensures even distribution without toughness.
Vanilla extract might seem like an afterthought, but it's the ingredient that makes people say "I can't quite put my finger on why this tastes so incredible." Real vanilla (not the imitation stuff that tastes like sadness) contains over 200 flavor compounds that enhance chocolate's natural complexity. It's like adding a subtle harmony line to a solo — same melody, but suddenly it has depth and dimension that makes people lean in for another bite.
The Final Flourish
Salt is the ultimate flavor amplifier. Just a pinch makes the chocolate taste more chocolatey, the butter more buttery, the sweetness more balanced rather than cloying. Use kosher salt for even distribution, and don't skip this step — unsalted desserts taste flat and one-dimensional, like a joke without a punchline. Sea salt works beautifully too, adding tiny mineral notes that create micro-bursts of complexity in every bite.
Everything's prepped? Good. Let's get into the real action...
The Method — Step by Step
- Prep your station like a pro: Before you even think about melting chocolate, get everything measured and within arm's reach. This recipe moves fast once it starts, and molten chocolate waits for no one. Butter four 6-ounce ramekins thoroughly, making sure to coat every millimeter — these cakes are drama queens that will stick at the slightest provocation. Dust the buttered ramekins with cocoa powder, tapping out the excess. This creates a non-stick shield that also adds an extra layer of chocolate flavor. Preheat your oven to 425°F, and position the rack in the lower third — this prevents the tops from over-browning before the centers are properly molten.
- The chocolate-butter marriage: In a heatproof bowl set over simmering water, combine your butter and chocolate. Here's where patience pays off — keep the heat gentle and stir occasionally. When the chocolate is about 80% melted, remove from heat and stir until completely smooth. This prevents overheating, which can make chocolate seize up faster than you can say "takeout for dessert." The mixture should be glossy and fluid, coating your spoon like liquid velvet. Let it cool for exactly 5 minutes — too hot and it'll scramble your eggs, too cool and it'll seize when you add other ingredients.
- The egg-sugar transformation: In a separate bowl, whisk eggs, egg yolks, sugar, and vanilla until the mixture becomes pale and thick. This isn't just mixing — you're incorporating air that helps create that delicate cake structure. The mixture should form a ribbon when you lift the whisk, flowing back into the bowl and holding its shape for a few seconds. If it runs off like water, keep whisking. If it holds stiff peaks, you've gone too far and created a meringue. The perfect consistency is like thick cream — substantial but still pourable.
- The chocolate integration: Now for the moment of truth — combining your chocolate mixture with the egg mixture. Pour the chocolate in a slow, steady stream while whisking constantly. This prevents the heat from cooking the eggs and keeps everything smooth. The mixture should transform into a glossy, pudding-like consistency. Take your time here; rushing creates lumps that no amount of whisking will smooth out. Once combined, the mixture should be uniformly chocolatey with no streaks of egg or butter.
- Flour folding finesse: Sprinkle the flour and salt over the chocolate mixture. Here's where technique matters: use a rubber spatula to fold, not stir. Cut down through the center, scrape along the bottom, and lift up and over. Rotate the bowl a quarter turn and repeat. This gentle motion incorporates the flour without developing gluten or deflating the mixture. Stop as soon as you see no more dry flour — overmixing creates tough cakes that taste like chocolate cardboard. The batter should be thick but pourable, like slightly warm chocolate pudding.
- The crucial rest: Cover the batter and let it rest for exactly 10 minutes. This allows the flour to hydrate fully and the chocolate to cool slightly, creating better texture. While it rests, place your prepared ramekins on a baking sheet. This makes them easier to move and catches any potential overflow. The batter will thicken slightly during the rest — this is normal and good. If it becomes too thick to pour easily, warm it briefly over the double boiler for 30 seconds, stirring constantly.
- Portioning perfection: Divide the batter among your ramekins, filling each about three-quarters full. Tap each ramekin gently on the counter to release air bubbles and level the tops. This prevents weird air pockets that can cause uneven baking. At this point, you can cover them with plastic wrap and refrigerate for up to 3 days — the flavors actually develop and improve overnight. If baking immediately, let them sit for 5 minutes while the oven fully preheats. This brief rest helps create that perfect contrast between set exterior and molten interior.
- The baking ballet: Slide the baking sheet into your preheated oven and set a timer for exactly 12 minutes. Here's the thing — ovens vary, altitude matters, and ramekins conduct heat differently. Start checking at 10 minutes: the edges should look firm and slightly puffed, while the centers jiggle like gentle waves when you shake the pan. If they look set in the middle, you've gone too far. If the edges still look wet, give them another minute. The perfect cake has a 1/2-inch border of set cake with a slightly domed, jiggly center.
- The unmolding moment: Remove from oven and let stand for exactly 1 minute — no more, no less. Run a thin knife around the inside edge of each ramekin, keeping the blade against the ceramic to avoid cutting into the cake. Place a dessert plate upside down over each ramekin, then invert both together. Give a gentle shake — the cake should release like it's been greased with buttered lightning. If it doesn't release immediately, don't panic. Let it sit inverted for another 30 seconds; the steam will help loosen it. Serve immediately, because that molten center waits for no one.
That's it — you did it. But hold on, I've got a few more tricks that'll take this to another level...
Insider Tricks for Flawless Results
The Temperature Rule Nobody Follows
Here's what separates the pros from the pretenders: temperature is everything, but not in the way you think. Your chocolate mixture should be warm enough to stay fluid but cool enough that you can comfortably stick your finger in it. Too hot and it'll cook your eggs on contact, creating chocolate scrambled eggs (trust me, not even maple syrup can save that disaster). Too cool and the chocolate will seize when you add other ingredients, turning your smooth batter into grainy chocolate rubble. The sweet spot is around 110°F — warm like a comfortable bath, not hot like coffee.
A friend tried skipping this temperature check once, insisting that "chocolate is chocolate" and plunging ahead with molten chocolate straight from the double boiler. The resulting cakes had the texture of chocolate-flavored rubber with the structural integrity of a failed science experiment. Don't be like my friend. Respect the temperature, and the temperature will respect you.
Why Your Nose Knows Best
Forget timers — your nose is the most sophisticated kitchen tool you own. When molten lava cakes are perfectly baked, your kitchen fills with the most intoxicating chocolate aroma, like someone opened a chocolate factory next door. This happens at exactly the right moment, about 30 seconds before they're ready to come out. If you smell chocolate but it's subtle, give them another minute. If the aroma hits you like a chocolate freight train, get those babies out immediately. This olfactory timing works because the chocolate reaches its peak fragrance when the exterior is perfectly set but the interior remains molten.
The 5-Minute Rest That Changes Everything
This might be the most counterintuitive advice you'll ever get about molten lava cake: let your batter rest for 5 minutes before portioning. I know, I know — every recipe tells you to work quickly before the chocolate sets. But here's the secret: a brief rest allows the flour to fully hydrate, creating a smoother texture and more even rise. The chocolate cools slightly, which actually helps it set more evenly during baking. The result is a cake with cleaner edges, better contrast between exterior and interior, and a molten center that flows like warm caramel instead of rushing out like a chocolate tsunami.
The Ramekin Rotation Revelation
If you've ever struggled with uneven baking — one side molten, the other side cakey — here's your solution: rotate your ramekins halfway through baking. But not in the way you think. Instead of turning them 180 degrees like most recipes suggest, rotate them 90 degrees and switch their positions on the baking sheet. The ones in back come forward, the ones in front go back. This compensates for hot spots in your oven and ensures every cake emerges with that perfect contrast of textures. It's the difference between amateur hour and restaurant-quality consistency.
Timing for a Crowd
Serving molten lava cakes to more than four people feels like juggling chocolate grenades — everything needs to happen at exactly the right moment. Here's how restaurants pull it off: bake in batches of four, but stagger them by 3 minutes. While the first batch rests, the second batch goes in. By the time you've unmolded and served the first four, the second batch is ready. Keep the unmolded cakes on warm plates (not hot plates — that'll overcook the centers) and they'll stay molten for up to 5 minutes. For larger parties, keep the batter in a piping bag in the fridge and pipe into ramekins as needed. You'll look like a dessert wizard with perfectly timed courses.
Creative Twists and Variations
This recipe is a playground. Here are some of my favorite ways to switch things up:
Salted Caramel Surprise
Before adding the batter, place a frozen caramel ball (roll soft caramels into 1-inch spheres and freeze) in the center of each ramekin. As the cake bakes, the caramel melts into a gooey pool that mingles with the chocolate lava. The salt in the caramel amplifies the chocolate flavor while adding buttery richness. It's like two desserts had a beautiful baby, and that baby grew up to be more popular than either parent.
Espresso Infusion
Dissolve 1 tablespoon of instant espresso powder in 1 teaspoon of hot water and add it with the vanilla. The coffee doesn't make the cakes taste like mocha — it deepens the chocolate flavor, adding complexity that makes people say "what is that amazing flavor?" rather than "I taste coffee." It's chocolate turned up to eleven, the difference between a good song and a great one.
White Chocolate Raspberry
Replace the dark chocolate with good quality white chocolate and fold fresh raspberries into the batter. The tart berries cut through the sweetness of the white chocolate, creating a flavor balance that's sophisticated rather than cloying. Add a few raspberry pieces on top before baking — they become jammy pockets that burst with flavor. White chocolate skeptics often become converts after trying this version.
Spiced Mexican Chocolate
Add 1/4 teaspoon each of cinnamon and cayenne, plus a pinch of nutmeg to the flour. The warming spices create a subtle heat that builds slowly, making each bite more interesting than the last. It's like regular molten lava cake went on vacation to Oaxaca and came back with fascinating stories and a mysterious accent. Serve with cinnamon ice cream for the full experience.
Peanut Butter Center
Freeze small scoops of peanut butter (mix 2 tablespoons of peanut butter with 1 tablespoon of powdered sugar for better texture) and press one into the center of each ramekin before adding the remaining batter. As it bakes, the peanut butter becomes molten while the chocolate sets around it. It's like a Reese's cup went to finishing school and graduated with honors.
Boozy Adult Version
Add 2 tablespoons of your favorite liqueur to the chocolate mixture — Grand Marnier for orange notes, Frangelico for hazelnut, or bourbon for smoky depth. The alcohol cooks off, leaving behind complex flavor compounds that make these strictly grown-up desserts. A friend made these with rum and served them at a dinner party; one guest described them as "childhood comfort food that's been to college and knows interesting people."
Storing and Bringing It Back to Life
Fridge Storage
Unbaked molten lava cake batter keeps beautifully in the fridge for up to 3 days. Cover the bowl tightly with plastic wrap pressed directly onto the surface to prevent a skin from forming. When ready to bake, let it sit at room temperature for 30 minutes to take the chill off — cold batter takes longer to bake and can result in uneven textures. The flavors actually meld and deepen overnight, making these even more delicious than fresh-made. Store-bought convenience with restaurant-quality results? Yes, please.
Freezer Friendly
These cakes are surprisingly freezer-friendly. Fill your ramekins, cover tightly with plastic wrap and then foil, and freeze for up to 2 months. Bake directly from frozen — just add 3-4 extra minutes to the baking time. The texture isn't quite as perfect as fresh, but it's close enough that most people won't notice. For best results, freeze them in the ramekins rather than trying to freeze unmolded cakes. It's like having a secret chocolate weapon waiting in your freezer for dessert emergencies.
Best Reheating Method
If you somehow have leftovers (I don't understand this concept, but I've been told it happens), the microwave is your friend. Place the unmolded cake on a microwave-safe plate and heat for 10-15 seconds on medium power. The goal is to warm the exterior without overcooking the center. Add a tiny splash of water to the plate before microwaving — it creates steam that helps re-moisten the cake. They're never quite as molten as fresh, but they're still delicious. I've been known to eat them cold for breakfast, standing in front of the fridge like a chocolate-seeking zombie.