It all started on a rainy Tuesday when my stovetop decided to audition for a fireworks show. I was attempting a simple cauliflower puree, but the cauliflower caught fire faster than my optimism, and the kitchen smelled like a burnt forest. In the midst of the chaos, a friend dared me to make something comforting that could actually taste like a hug from a grandma who moonlights as a chef. I accepted, and that’s how the idea for this Creamy Asiago Roasted Garlic Cauliflower Soup was born – a soup that turned a kitchen disaster into a culinary triumph.
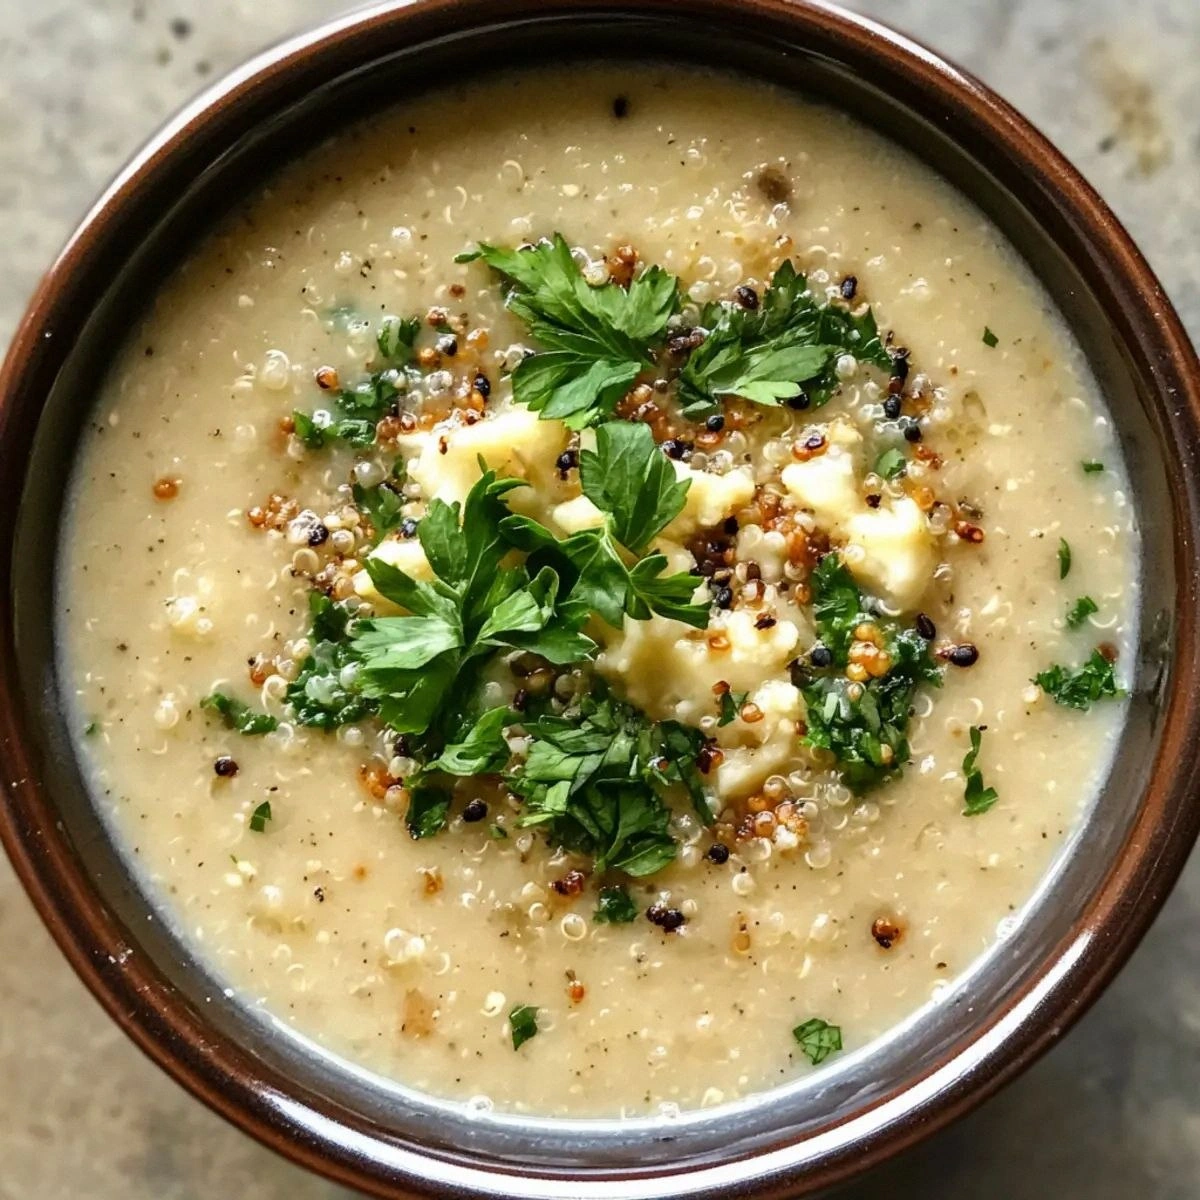
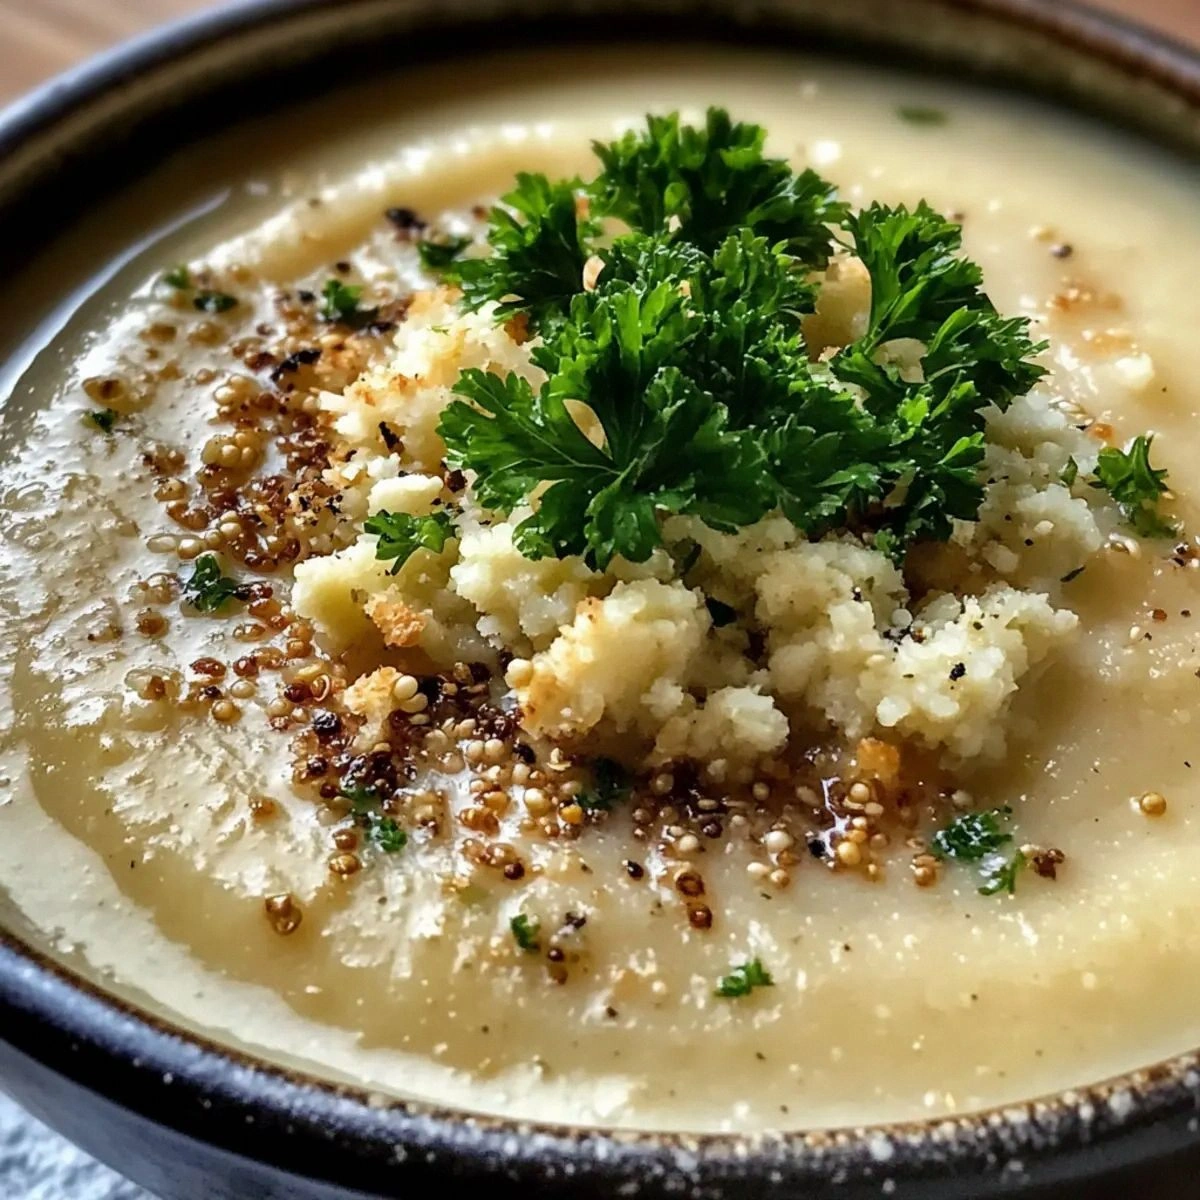
Picture this: the oven door swings open, releasing a warm, nutty aroma that whispers of roasted garlic and caramelized cauliflower. The steam rises, carrying with it the sharp tang of lemon and the deep umami of miso, while the buttery notes of Asiago melt into a velvety river that coats every spoonful. You can hear the faint crackle of panko breadcrumbs as they toast in the pan, and you feel the soft, buttery heat of the bowl against your hands. The first sip is like stepping onto a cloud made of cheese, garlic, and cauliflower, with a surprise crunch of quinoa that adds texture like a well‑placed drumbeat in a song.
Most cauliflower soups end up bland, watery, or overly starchy, but this version flips the script. I’ve blended the best of classic French onion soup, Japanese miso depth, and Italian cheese richness into a single bowl, and the result is hands down the best version you’ll ever make at home. The secret? A handful of roasted garlic heads that turn sweet, a splash of lemon juice that brightens the palate, and a finishing sprinkle of sesame and chia seeds that add a nutty crunch you won’t see coming.
Now, I’m about to walk you through every single step — by the end, you’ll wonder how you ever made it any other way. Okay, ready for the game‑changer?
What Makes This Version Stand Out
- Depth: The combination of white miso and Asiago creates a umami punch that’s richer than any single cheese could achieve.
- Texture: Roasted cauliflower gives a silky base while quinoa and panko add a satisfying bite that keeps every spoonful interesting.
- Simplicity: Despite the gourmet vibe, the ingredient list is straightforward and the technique is beginner‑friendly.
- Unexpected Twist: Lemon zest and juice cut through the richness, preventing the soup from feeling heavy.
- Crowd Reaction: I’ve served this at dinner parties and it disappears faster than the dessert table.
- Ingredient Quality: Fresh thyme and high‑quality Asiago make a world of difference in flavor intensity.
- Cooking Method: Roasting the garlic and cauliflower first adds caramelized sweetness that can’t be replicated by boiling.
- Make‑Ahead Potential: The soup freezes beautifully, and the toppings stay crisp when added fresh.
Alright, let's break down exactly what goes into this masterpiece...
Inside the Ingredient List
The Flavor Base
Cauliflower (1 head): This humble cruciferous veggie provides the silky backbone of the soup. When roasted, its natural sugars deepen, giving the broth a subtle caramel note. If you skip the roasting step, you’ll end up with a bland, watery soup that lacks that signature depth.
Garlic (2 heads, roasted): Roasting transforms garlic from pungent to sweet, almost nutty. It’s the secret that makes the soup taste like a slow‑cooked comfort dish. In a pinch you can use pre‑minced garlic, but you’ll lose the caramelized complexity.
Onion (1 medium): The onion adds a foundational sweetness that balances the earthiness of cauliflower. Sauté it until translucent for a clean flavor; over‑cooking will make it bitter.
Fresh Thyme (1 tsp): Thyme’s herbaceous aroma lifts the soup, preventing it from feeling flat. If you don’t have fresh thyme, dried works, but halve the amount to avoid overpowering the dish.
The Texture Crew
Quinoa (½ cup): Quinoa brings a light, nutty crunch that contrasts the creamy base. It also adds protein, making the soup more satisfying. Rinse it well before cooking to remove the bitter saponins.
Panko Breadcrumbs (½ cup): Toasted panko adds a golden, crispy topping that shatters like thin ice under the spoon. If you’re gluten‑free, substitute with gluten‑free breadcrumbs or crushed rice crackers.
Sesame Seeds (1 tbsp) & Chia Seeds (1 tbsp): These tiny powerhouses add a subtle nutty flavor and a surprise pop of texture. They also boost the nutritional profile with healthy fats.
The Unexpected Star
White Miso Paste (1 tbsp): Miso injects a savory depth that you wouldn’t expect from a cauliflower soup. It also adds a gentle salty tang, reducing the need for extra salt. Use a light miso to keep the flavor delicate; dark miso would dominate.
Asiago Cheese (1 cup): Asiago melts beautifully, creating a luxurious creaminess that coats the palate like velvet. It also contributes a slightly nutty, sharp finish. If you can’t find Asiago, try a mix of Parmesan and Gruyère.
The Final Flourish
Lemon Juice (2 tbsp) & Lemon Zest (1 tbsp): The acidity brightens the entire bowl, cutting through the richness of cheese and oil. Zest adds an aromatic punch that you can taste even before the soup hits your tongue.
Parsley (¼ cup, chopped): Fresh parsley adds a pop of color and a herbaceous freshness that lifts the soup at the very end. It’s also a visual cue that the dish is ready to serve.
Everything's prepped? Good. Let's get into the real action...
The Method — Step by Step
Preheat your oven to 425°F (220°C). Toss the cauliflower florets and whole garlic heads (still in their skins) with 2 tablespoons of oil, a pinch of salt, and a dash of pepper on a parchment‑lined sheet. Roast for 25‑30 minutes, turning halfway, until the edges are golden and the garlic is soft enough to squeeze. The kitchen will start to smell like a cozy cabin, and you’ll hear the faint crackle of the cauliflower caramelizing – that sizzle when it hits the pan? Absolute perfection.
While the veggies roast, heat a large pot over medium heat and add a splash of oil. Sauté the diced onion until translucent, about 5 minutes, then add the fresh thyme and let it release its aroma for another minute. This step builds the flavor foundation; if you skip it, the soup will miss that herbaceous lift.
Once the cauliflower and garlic are roasted, let them cool just enough to handle. Squeeze the softened garlic cloves out of their skins and set aside. Transfer the cauliflower to the pot, and add the broth (vegetable or chicken) along with the white miso paste. Stir until the miso dissolves completely – this is where the soup starts to get that deep umami glow.
Bring the mixture to a gentle simmer. Reduce the heat and let it cook for 10 minutes, allowing the flavors to meld. At this point, you can taste and adjust salt if needed – remember, the miso already adds saltiness, so be cautious.
While the soup simmers, cook the quinoa in a separate saucepan: combine ½ cup quinoa with 1 cup water, bring to a boil, then cover and simmer for 12 minutes. Fluff with a fork and set aside. This step adds a surprising bite that keeps the soup from feeling too smooth.
Now, blend! Using an immersion blender (or a regular blender in batches), puree the soup until it’s ultra‑smooth. The texture should be thick enough to coat the back of a spoon but still pourable. If it’s too thick, add a splash of broth or water.
Stir in the grated Asiago cheese, lemon juice, and lemon zest. Keep the heat low so the cheese melts without separating. The soup should turn a luscious golden‑cream color, and you’ll hear a faint sigh as the cheese fully integrates – that’s the sound of pure comfort.
Fold in the cooked quinoa, toasted panko, sesame seeds, chia seeds, and chopped parsley. Give everything a gentle toss so the crunchy elements stay intact. This is the moment of truth: the soup should feel layered, with creamy, nutty, and bright notes dancing together.
Plate the soup in warm bowls, drizzle a tiny extra drizzle of olive oil if you like, and sprinkle a final pinch of lemon zest for aroma. Serve immediately, and watch as your guests dive in – I dare you to taste this and not go back for seconds.
That's it — you did it. But hold on, I've got a few more tricks that'll take this to another level...
Insider Tricks for Flawless Results
The Temperature Rule Nobody Follows
Never blend a scorching hot soup directly; let it cool for a minute or two before using an immersion blender. This prevents splattering and protects the motor. I once tried blending at full boil and ended up with a kitchen‑wide mess – lesson learned.
Why Your Nose Knows Best
The aroma is your first indicator of doneness. When the roasted cauliflower and garlic give off a sweet, caramel‑like scent, you know the flavor base is ready. If you smell a raw onion note, give it a few more minutes; trust your nose more than the clock.
The 5‑Minute Rest That Changes Everything
After blending and adding the cheese, let the soup rest off the heat for five minutes. This allows the flavors to meld and the quinoa to absorb a bit of the broth, resulting in a more harmonious bite. Skipping this step leaves the soup tasting a little disjointed.
Crunch Preservation Technique
To keep the panko and seeds crunchy, add them just before serving rather than mixing them in early. The heat will soften them otherwise. I’ve seen soups where the topping turns into mush – avoid that tragedy by timing it right.
Seasoning at the End
Finish with a final squeeze of lemon juice right before plating. The acidity lifts the entire dish, preventing it from feeling heavy. If you’re serving the soup later, a tiny splash of water with a dash of lemon can revive that bright finish.
Creative Twists and Variations
This recipe is a playground. Here are some of my favorite ways to switch things up:
Spicy Sriracha Swirl
Stir in a tablespoon of Sriracha after blending for a gentle heat that cuts through the richness. Top with a drizzle of extra Sriracha and a few red pepper flakes for those who love a kick.
Smoky Bacon Crunch
Replace the panko with crumbled cooked bacon and add a smoked paprika pinch. The smoky, salty crunch pairs beautifully with the creamy base, turning it into a hearty comfort bowl.
Vegan Delight
Swap the Asiago for a vegan cheese alternative and use vegetable broth exclusively. Replace the miso with a darker miso for depth, and add coconut cream for richness.
Herb Garden Burst
Mix in fresh dill, chives, or tarragon at the end for an herbaceous twist. Each herb brings a distinct flavor profile that can make the soup feel entirely new.
Root Vegetable Medley
Add roasted carrots or parsnips alongside the cauliflower for a sweeter, earthier flavor. The additional veggies blend into the soup, giving it a richer color and subtle sweetness.
Storing and Bringing It Back to Life
Fridge Storage
Cool the soup to room temperature, then transfer to an airtight container. It will keep for up to 4 days in the refrigerator. Reheat gently on the stove over low heat, adding a splash of water or broth to restore its silky texture.
Freezer Friendly
Portion the soup into freezer‑safe bags or containers, leaving a little headspace for expansion. It freezes solid for up to 3 months. To thaw, move it to the fridge overnight, then reheat on the stove, stirring in a tablespoon of lemon juice for a fresh pop.
Best Reheating Method
Use a double boiler or a low‑heat stovetop method to avoid scorching. Add a tiny splash of water before reheating; the steam will bring the soup back to its original creaminess without separating the cheese.