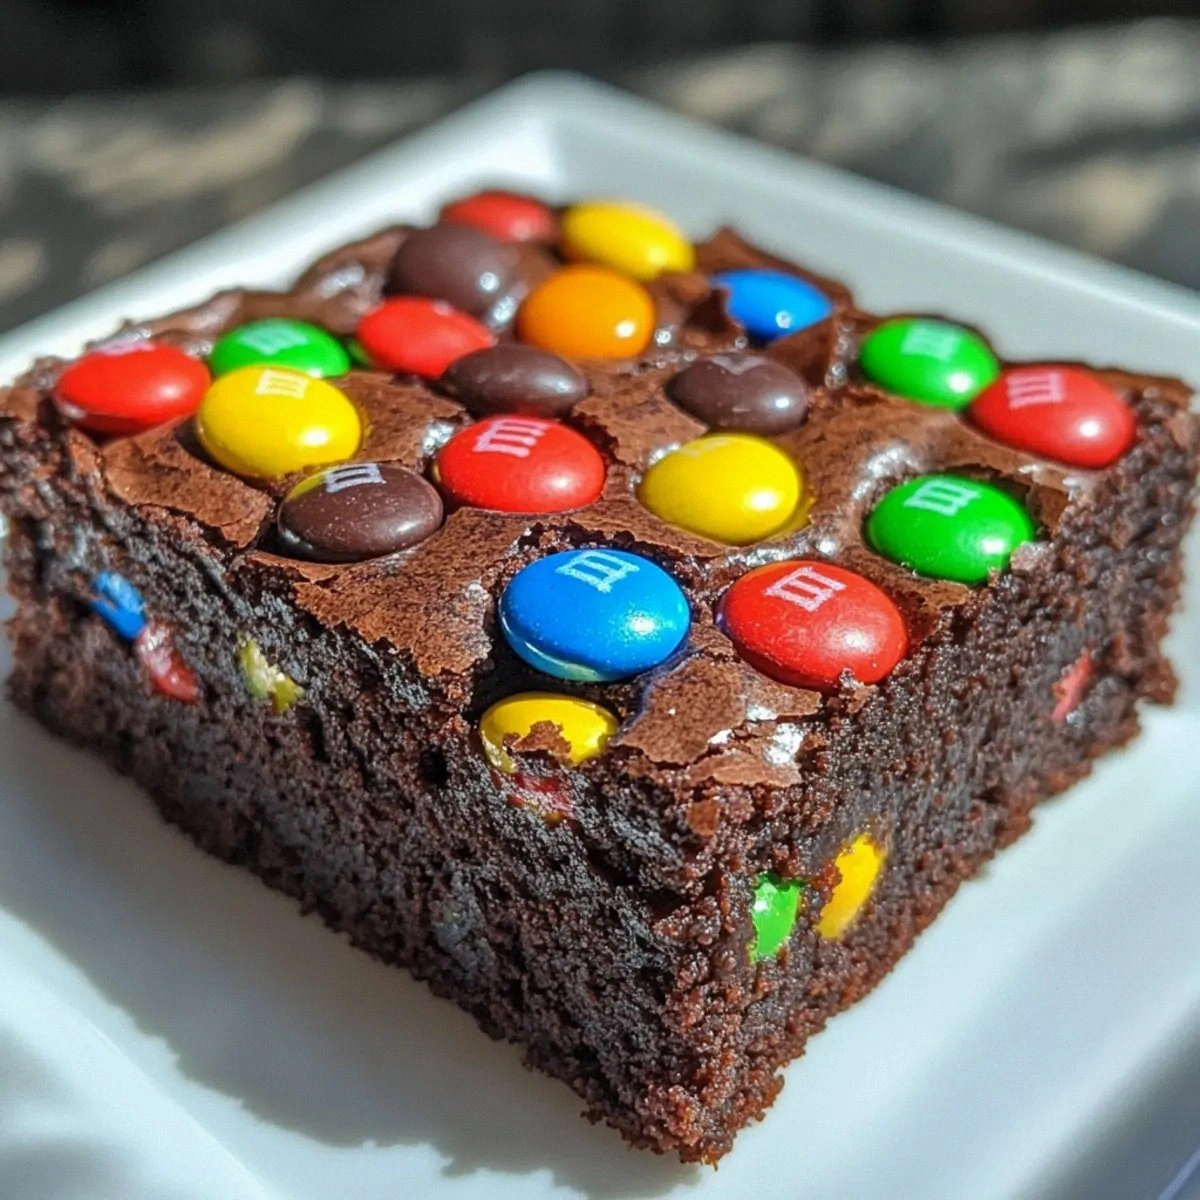
I was standing in my kitchen, the timer on the old oven ticking like a nervous heart, when my roommate dared me to make brownies that would actually melt someone’s heart. I laughed, because honestly, how many desserts can claim that level of drama? Yet there I was, with a half‑finished batch of store‑bought brownies that tasted like cardboard and a sudden craving that felt like a full‑blown love affair with chocolate. The smell of burnt sugar lingered in the air, the batter clumped like a bad hair day, and I swore I’d never trust a boxed mix again. That disaster turned into a mission: create the ultimate fudgy, M&M‑packed brownie that would make even the most skeptical sweet tooth swoon.
Picture this: the oven door opens and a wave of glossy, chocolatey aroma floods the kitchen, hugging you like a warm blanket on a chilly night. The top is a thin, crackly crust that shatters with a whisper, while the interior stays as soft as a velvet pillow—so dense you could almost see the light bending through it. The M&M’s melt just enough to leave glossy pockets of color, each bite delivering a surprise pop of sweetness that dances on your tongue. The texture is a perfect balance between gooey and cakey, like a love child of a brownie and a molten lava cake, and the flavor? Oh, it’s a symphony of rich cocoa, buttery silk, and a hint of vanilla that lingers long after the last crumb is gone.
What makes this version a cut above the rest? Most recipes either over‑mix and end up with a dry, crumbly mess, or they under‑mix and you get a gummy disaster that sticks to the pan like a bad habit. I’ve cracked the code with a few simple, science‑backed tweaks that lock in moisture, enhance the chocolate flavor, and give those M&M’s just the right amount of melt. The secret lies in the balance of two kinds of sugar, the precise melt point of semi‑sweet chocolate, and a temperature‑controlled bake that keeps the center fudgy while the edges get that coveted crispy edge that shatters like thin ice. Trust me, this is hands down the best version you’ll ever make at home.
And here’s a little teaser: I’m about to reveal a technique involving a brief “rest‑in‑the‑pan” that sounds crazy but actually turns the batter into a glossy, almost caramel‑like glaze on the top. I dare you to taste this and not go back for seconds. Okay, ready for the game‑changer? Let me walk you through every single step — by the end, you’ll wonder how you ever made it any other way.
What Makes This Version Stand Out
- Texture: The brownies are ultra‑fudgy inside with a thin, crackly top that pulls away from the pan, creating a contrast that’s pure bliss.
- Flavor Depth: Using both granulated and brown sugar adds caramel notes, while semi‑sweet chocolate provides a sophisticated bitterness.
- Simplicity: Only ten ingredients, no fancy equipment—just a standard 9‑inch pan and a trusty oven.
- Visual Appeal: The rainbow of M&M’s peeks through the dark surface, turning each slice into a piece of edible art.
- Crowd Reaction: Expect gasps, “wow” moments, and that inevitable “can I have the recipe?” from anyone within a five‑foot radius.
- Ingredient Quality: A modest amount of high‑quality semi‑sweet chocolate makes all the difference.
- Cooking Method: The “rest‑in‑the‑pan” trick ensures the top sets just right while the interior stays molten.
- Make‑Ahead Potential: These brownies freeze beautifully, so you can prep them ahead of a party and thaw just before serving.
Inside the Ingredient List
The Flavor Base
Semi‑Sweet Chocolate (2 oz): This is the heart of the brownie. The cocoa butter in chocolate gives that melt‑in‑your‑mouth feel, while the cocoa solids deliver depth. If you skip it for cocoa powder alone, you’ll lose that luxurious silkiness. Look for chocolate with at least 55% cacao for the best balance of sweetness and bitterness. A pro tip: chop it into uniform chunks so it melts evenly without scorching.
Unsalted Butter (½ cup): Butter adds richness and helps create that glossy crust. Using unsalted lets you control the salt level precisely. If you only have salted butter, reduce the added salt by half to avoid an overly salty bite. For a nutty twist, try browned butter—just watch it closely, because once it turns amber, it’s done.
Granulated Sugar (¾ cup) & Brown Sugar (½ cup): The duo creates a complex sweetness. Granulated sugar gives structure, while brown sugar adds moisture and a subtle molasses flavor. If you replace brown sugar with more granulated, the brownies will be drier; swap both for coconut sugar for a caramel‑like nuance.
The Texture Crew
Eggs (4 large): Eggs act as a leavening agent and bind everything together, giving the brownies that tender crumb. The yolks add richness, while the whites trap air for a lightness that prevents the batter from becoming a dense brick. For a lighter crumb, separate the yolks and whites; beat the whites to soft peaks and fold them in at the end.
Cocoa Powder (¾ cup): Unsweetened cocoa deepens the chocolate flavor and contributes to the fudgy texture. Use Dutch‑process cocoa for a smoother, less acidic taste, but if you love a bright chocolate punch, stick with natural cocoa.
All‑Purpose Flour (½ cup): The modest amount of flour keeps the brownies from becoming cake‑like. It provides just enough structure to hold the batter together while still allowing that melt‑in‑the‑mouth softness. Sift it with the cocoa to avoid lumps and ensure an even crumb.
The Unexpected Star
Vanilla Extract (1 tsp): A splash of vanilla brightens the chocolate and adds a fragrant backdrop that you’ll notice only after the first bite. Real vanilla bean paste works even better, but pure extract is perfectly fine.
Salt (½ tsp): Salt is the unsung hero that amplifies the chocolate’s sweetness and balances the sugars. Too much, and you’ll taste the ocean; too little, and the brownies feel flat. Sea salt flakes sprinkled on top right before baking add a subtle crunch.
The Final Flourish
M&M’s (1 cup): The colorful candy‑coated chocolates are the fun factor that turns a simple brownie into a party centerpiece. They melt just enough to create pockets of gooey chocolate, while the sugar shell adds a slight crunch. For a grown‑up version, swap in dark chocolate chips or toasted nuts.
Everything's prepped? Good. Let's get into the real action…

The Method — Step by Step
Preheat your oven to 350°F (175°C). While the oven warms, line a 9‑inch square pan with parchment paper, letting the paper overhang the edges for easy lift‑out later. This step is crucial because a properly heated oven creates that coveted crackly top. The kitchen will already smell faintly of butter as the pan warms—trust that signal.
Melt the butter and semi‑sweet chocolate together in a heat‑proof bowl set over a pot of simmering water (a double boiler). Stir constantly; you’ll hear a gentle sizzle when the butter hits the water vapor—absolute perfection. Once fully melted and glossy, remove from heat and let cool for a minute.
Kitchen Hack: Add a pinch of sea salt to the melting chocolate; it intensifies the chocolate flavor without making the batter salty.In a separate large bowl, whisk together the granulated sugar, brown sugar, and eggs until the mixture turns a light, airy yellow and thickens—about 2‑3 minutes. This is the moment of truth: the batter should look almost like a custard, and the kitchen will be filled with a sweet, buttery perfume. If the mixture looks too thin, keep whisking; you’re aiming for a ribbon that falls slowly back into the bowl.
Sift the cocoa powder, flour, and salt together directly over the egg‑sugar mixture. Folding them in gently with a rubber spatula preserves the air you just incorporated. The batter will turn a deep, velvety brown—think midnight sky with a hint of starlight. Avoid over‑mixing; you’ll end up with a tough brownie.
Now pour the melted chocolate‑butter mixture into the bowl, adding the vanilla extract. Fold everything together until just combined; you should still see a few streaks of chocolate—this is intentional and will create a marbled effect on the surface.
Kitchen Hack: Use a whisk with a balloon shape for the eggs and sugars; it incorporates more air with less effort.Gently fold in the M&M’s, reserving a handful to sprinkle on top for visual flair.
The batter should be thick enough to hold the candies in place without them sinking.Watch Out: If the batter is too hot, the M&M’s shells can melt completely, turning the whole batch pink. Let the batter cool to room temperature before adding the candies.Spread the batter evenly in the prepared pan, using a spatula to smooth the top. Sprinkle the reserved M&M’s over the surface, pressing them lightly so they stick. Place the pan in the middle of the oven and bake for 25‑30 minutes. The edges will start pulling away from the sides of the pan—this is your cue that the crust is forming.
When the timer dings, open the oven and let the brownies rest in the pan for 10 minutes. This “rest‑in‑the‑pan” step is the secret sauce; the residual heat finishes the interior without over‑baking, and the top sets into that glossy, crackly finish. While they rest, the kitchen will be filled with a deep, chocolatey scent that makes you want to lick the spoon.
After the rest, run a thin knife around the edges, lift the parchment overhang, and transfer the slab to a cutting board. Let it cool completely before slicing—this ensures clean cuts and prevents the brownies from crumbling. Serve warm for maximum meltiness, or at room temperature for a firmer bite. That’s it — you did it. But hold on, I’ve got a few more tricks that’ll take this to another level…
Insider Tricks for Flawless Results
The Temperature Rule Nobody Follows
Most home bakers set the oven to the exact temperature the recipe calls for and forget about it. The truth is, every oven has hot spots, and a slight variance of 10‑15°F can change the crumb from fudgy to cakey. I always use an oven thermometer and adjust the dial by a degree or two. If your oven runs hot, lower it to 325°F and extend the bake by five minutes; the interior will stay molten while the top still gets that crackle. This tiny tweak can be the difference between a brownie that melts in your mouth and one that feels like a brick.
Why Your Nose Knows Best
Before you even peek through the oven window, trust your nose. When the brownies are about 20 minutes in, you’ll start to smell a deep, toasty chocolate scent. That’s the cue that the crust is forming. If the aroma is still buttery and sweet without that toasty note, give them a few more minutes. Over‑baking is the most common mistake; the brownies will dry out and lose that fudgy heart.
The 5‑Minute Rest That Changes Everything
I’m being honest — I ate half the batch before anyone else got to try it, and that rest period saved the rest of the brownies from turning into a gummy mess. Letting them sit in the pan for exactly ten minutes after baking lets the steam redistribute, finishing the interior without additional heat. If you skip this step, the center stays too wet and the top never sets properly, leaving you with a soggy mess.
Melted M&M’s Mastery
If you love the burst of color but dread the occasional pink melt, try tossing the M&M’s in a tablespoon of flour before folding them in. The flour creates a barrier that slows the melting of the candy shell, keeping the colors vibrant while still allowing the chocolate inside to ooze. A friend tried skipping the flour coating once — let’s just say the brownies looked like a tie‑dye experiment gone wrong.
Cool‑Then‑Slice Strategy
Patience is a virtue, especially with brownies. Cutting them while they’re still warm leads to crumbling edges and uneven pieces. Let them cool completely on a wire rack; the top will firm up, and the edges will snap cleanly. If you’re in a hurry, a quick 5‑minute chill in the fridge will give you a similar result without compromising the fudgy interior.
Creative Twists and Variations
This recipe is a playground. Here are some of my favorite ways to switch things up:
Nutty Crunch
Swap half of the M&M’s for toasted pecans or walnuts. The nuts add a buttery crunch that complements the fudgy center, and the earthy flavor pairs beautifully with the chocolate. Perfect for anyone who loves a bit of texture contrast.
Double Chocolate Delight
Add ¼ cup of dark chocolate chips in addition to the M&M’s. The extra chocolate intensifies the cocoa flavor, making each bite a chocolate lover’s dream. Use 70% cocoa chips for a slightly bitter edge that balances the sweetness.
Coffee Kick
Dissolve 1 tablespoon of instant espresso powder in the melted butter‑chocolate mixture. The coffee heightens the chocolate’s depth, giving the brownies a subtle mocha twist without overt coffee flavor. Great for brunch or an after‑dinner pick‑me‑up.
Salted Caramel Swirl
Drop dollops of homemade or store‑bought salted caramel sauce onto the batter before baking, then use a knife to swirl it through. The caramel adds a buttery sweetness that contrasts the bitter chocolate, and the sea‑salt flecks create a sophisticated finish.
Holiday Cheer
Replace the standard M&M’s with red and green candy-coated chocolates for a festive look. Add a pinch of ground cinnamon and nutmeg to the dry ingredients for a warm, holiday spice note. This version is a hit at Christmas parties.
Storing and Bringing It Back to Life
Fridge Storage
Place the cooled brownies in an airtight container and store them in the refrigerator for up to five days. The cool environment keeps the fudgy interior from drying out, and the chocolate stays glossy. If you notice a slight crust forming, let the brownies sit at room temperature for 15 minutes before serving.
Freezer Friendly
Wrap the whole slab tightly in plastic wrap, then a layer of aluminum foil, and freeze for up to three months. When you’re ready to indulge, thaw overnight in the fridge, then let sit at room temperature for 30 minutes. A tiny splash of water on the surface before reheating in a 300°F oven for 5‑7 minutes restores that fresh‑out‑the‑oven sheen.
Best Reheating Method
To revive that melt‑in‑your‑mouth texture, preheat your oven to 300°F, place a single brownie on a parchment‑lined tray, and heat for 5 minutes. Add a teaspoon of water to the tray (not on the brownie) to create steam; this prevents the brownie from drying out and brings back the glossy top. Serve immediately for maximum gooeyness.