I still remember the day I accidentally created what my family now calls "the dessert that ended all other desserts." It started with a craving so fierce it could only be satisfied by two things: the crispy, ricotta-filled joy of cannoli, and the creamy decadence of cheesecake. But here's the twist — I was out of cannoli shells, my springform pan had mysteriously vanished (thanks, house guests), and it was already 9 PM on a Tuesday. Most people would give up. I saw opportunity knocking with a wooden spoon in hand.
What happened next was pure kitchen alchemy. As I stood there in my tiny apartment kitchen, the scent of vanilla extract wafting through the air like liquid comfort, I started experimenting. The ricotta cheese I'd bought for cannoli filling was calling my name. The cream cheese I'd planned for a basic cheesecake was practically vibrating with potential. And in that moment of culinary chaos, something magical happened — a dessert that captures everything we love about Italian pastry shops and New York cheesecake joints, all in one glorious, sliceable form.
The first forkful was a revelation. The creamy filling had that unmistakable ricotta lightness that makes cannoli so addictive, but with the rich depth that only cream cheese can provide. The crust — oh, the crust — I'd used crushed pizzelle cookies mixed with butter and a touch of orange zest, creating a base that tastes like someone took the best parts of your favorite Italian bakery and compressed them into a golden, crumbly foundation. When my roommate wandered into the kitchen, drawn by the scent of cinnamon and citrus, she took one bite and literally did a happy dance. I'm talking full-on, arms-flailing, can't-stop-smiling dance moves in mismatched socks.
Here's what makes this cannoli cheesecake different from every other recipe floating around the internet: it's not just cannoli filling poured into a graham cracker crust (boring!), and it's definitely not a plain cheesecake with chocolate chips tossed in (lazy!). This is a carefully balanced creation that respects both desserts equally. The filling incorporates traditional cannoli flavors — ricotta, orange, cinnamon, and those tiny chocolate chips that provide delightful bursts of bittersweet chocolate — but with the silk-smooth texture of a properly made cheesecake. I dare you to taste this and not go back for seconds. Actually, I dare you to taste this and not hide the leftovers from your family.
What Makes This Version Stand Out
Texture Perfection: Most cannoli cheesecakes get this completely wrong — they either end up grainy from the ricotta or rubbery from over-baking. This version uses a specific ratio of ricotta to cream cheese that creates a texture so smooth, it coats your tongue like velvet. The secret? Room temperature ingredients and a water bath that prevents that dreaded crack down the center.
Authentic Flavor Profile: Instead of relying on artificial extracts, this recipe uses real orange zest, actual cinnamon, and high-quality ricotta. The result tastes like someone transported your favorite cannoli shop directly into cheesecake form. That moment when the citrus hits your taste buds? Pure magic.
Crust Innovation: Traditional graham cracker crusts are fine, but they're boring. This recipe uses crushed pizzelle cookies mixed with butter and orange zest, creating a base that's essentially the best parts of Italian cookies compressed into a golden, crumbly foundation. Your kitchen will smell like Sunday at Nonna's house.
Make-Ahead Champion: Unlike many cheesecakes that taste best the day they're made, this beauty actually improves overnight. The flavors meld and intensify, making it the perfect dessert for dinner parties or holidays when you want to get ahead of the game.
Crowd-Pleasing Showstopper: I'll be honest — I ate half the batch before anyone else got to try it. But when I finally shared, the reactions were priceless. Even friends who claim they "don't like cheesecake" or "aren't into cannoli" went back for seconds. One friend actually tried to take the rest home in her purse.
Beginner-Friendly Technique: If you've ever struggled with cheesecake, you're not alone — and I've got the fix. This recipe walks you through every step with specific visual cues and timing, so you'll never wonder "is it done yet?" again. The water bath might sound fancy, but it's just a roasting pan with hot water.
Ingredient Quality Matters: This isn't the place for bargain basement cheese. Spring for the good ricotta (whole milk, please) and real vanilla extract. You can taste every upgrade, and this dessert is worth the splurge.
Alright, let's break down exactly what goes into this masterpiece...
Inside the Ingredient List
The Flavor Foundation
The ricotta cheese is the star of our show, and this is absolutely not the place to grab that sad plastic tub from the back of the supermarket shelf. You want whole milk ricotta that's creamy and thick, not watery and grainy. When you taste it plain, it should taste like fresh milk with a subtle sweetness that makes you want to eat it with a spoon. The ricotta provides that unmistakable cannoli flavor and light texture that sets this cheesecake apart from its denser cousins. If you can only find part-skim, line a fine-mesh strainer with cheesecloth and let it drain for an hour — your taste buds will thank you.
Cream cheese forms the structural backbone of our filling, creating that classic cheesecake richness while the ricotta keeps things light and authentic. Make sure it's fully softened — I'm talking leave-it-on-the-counter-for-at-least-two-hours soft. Cold cream cheese will leave you with lumps that no amount of mixing will eliminate, and lumpy cheesecake filling is a tragedy we simply cannot accept. The full-fat version is non-negotiable here; fat equals flavor, and we're not about to sacrifice taste for a few calories.
The Sweetness Squad
Granulated sugar sweetens the deal, but we're not going overboard. The beauty of this dessert is that it's sweet enough to satisfy your dessert cravings without overwhelming the delicate ricotta flavor. I've tested versions with powdered sugar and even honey, but nothing dissolves as cleanly as regular sugar. The key is adding it gradually while the mixer runs, ensuring every grain dissolves completely into the filling. Nobody wants a gritty cheesecake — it's like sand at the beach, but in your mouth.
Orange zest provides that bright, citrusy note that makes cannoli so addictive. Use a microplane to zest just the orange part of the peel, avoiding the bitter white pith underneath. When you zest properly, the oils spray into the air, releasing this incredible orange perfume that makes your kitchen smell like you're living inside an Italian pastry shop. Fresh zest is essential here — dried orange peel tastes like potpourri and will ruin everything.
The Texture Team
Eggs are the binding agents that transform our creamy mixture into a sliceable dessert, but they're also the easiest way to ruin the texture. Too many eggs and you get a rubbery cheesecake that bounces when you drop it (yes, I tested this so you don't have to). Room temperature eggs incorporate more smoothly, preventing those weird white streaks that happen when cold eggs meet room temperature dairy. Beat them lightly before adding, and never over-mix once they're in — this introduces air that causes cracks during baking.
Heavy cream adds richness and helps create that silky texture we're after. It thins the filling just enough to pour easily into the crust while adding fat that carries all the flavors. Don't substitute milk or half-and-half — they don't have enough fat to create the luxurious mouthfeel that makes this dessert special. The cream should be cold when you add it; it helps maintain the structure of the filling before baking.
The Unexpected Stars
Mini chocolate chips are the surprise guests that make this cheesecake feel like you're eating a cannoli in dessert form. Regular-sized chips sink to the bottom and create chocolate puddles (delicious but not what we want), while mini chips distribute evenly throughout the filling. Toss them in a teaspoon of flour before folding them in — this prevents them all from sinking to the bottom like chocolate chip submarine captains. The bittersweet chocolate provides little bursts of flavor that complement the sweet ricotta perfectly.
Cinnamon might seem like a background player, but it adds that warm, spicy note that screams "authentic cannoli filling." Just a pinch does the trick — we're not making cinnamon rolls here. The key is using fresh cinnamon, not that jar that's been sitting in your spice cabinet since the Clinton administration. Fresh cinnamon should smell warm and sweet, not like dusty potpourri from grandma's house.
Everything's prepped? Good. Let's get into the real action...
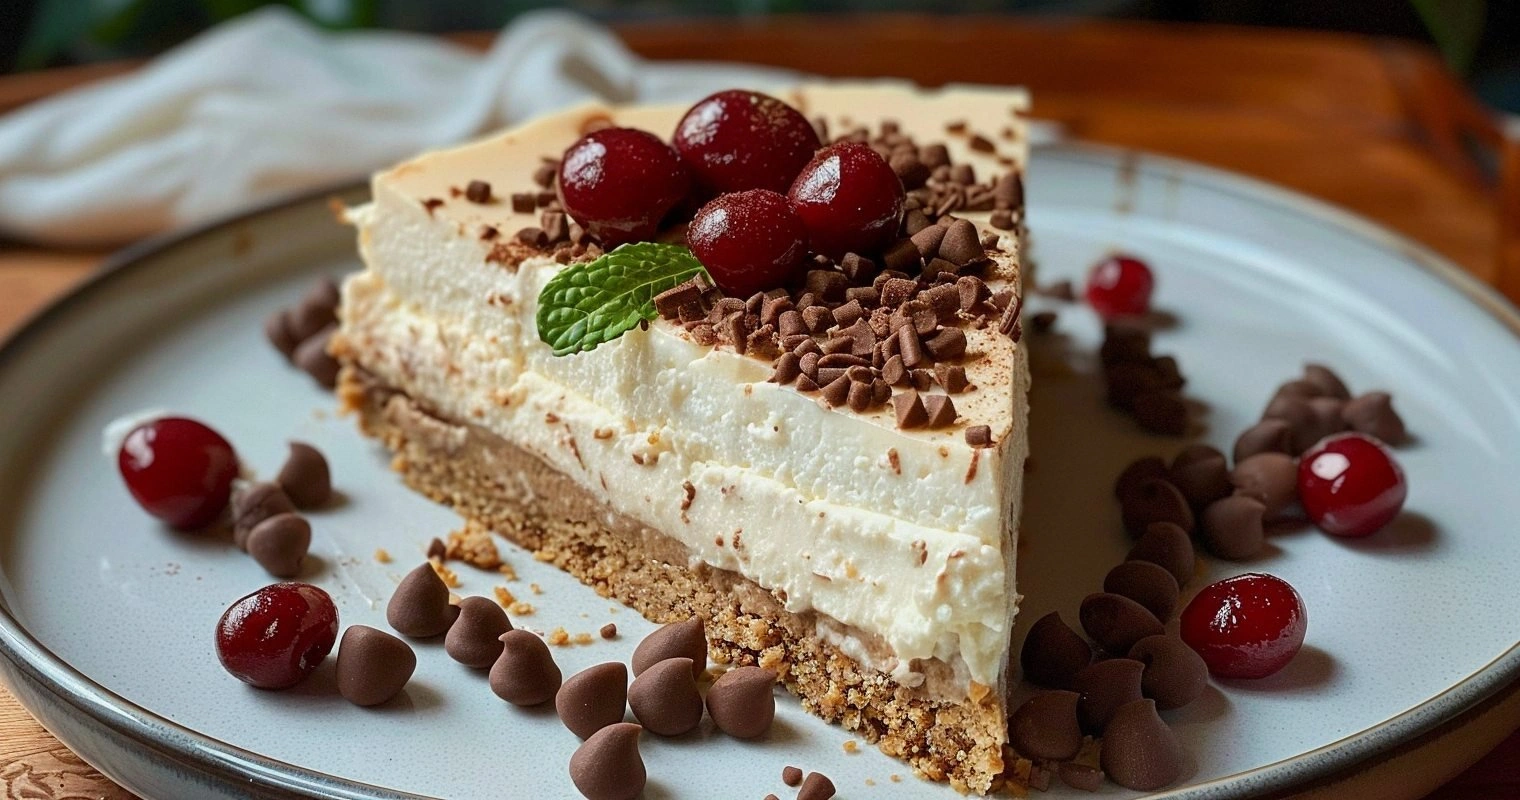
The Method — Step by Step
- Start with the crust magic: Preheat your oven to 325°F and position the rack in the center. Crush your pizzelle cookies in a food processor until they resemble coarse sand with some pea-sized pieces for texture. Mix in the melted butter, orange zest, and a pinch of salt until the mixture looks like wet sand that holds together when squeezed. Press this mixture into the bottom and halfway up the sides of a 9-inch springform pan, using the bottom of a measuring cup to pack it down firmly. The crust should be about 1/4-inch thick — any thinner and it'll crumble when you slice, any thicker and it overpowers the delicate filling. Picture yourself at the beach, building the perfect sand castle base, except this one will taste like heaven.
- Create the perfect base: Bake the crust for 8-10 minutes until it's just starting to turn golden at the edges. Your kitchen will start smelling like an Italian bakery, and that's your cue to pull it out. Let it cool completely while you make the filling — a warm crust will melt the filling and create a soggy mess that no amount of wishful thinking can fix. This step sets the foundation for everything that follows, creating a crust that's crisp enough to provide contrast but not so hard that it shatters when you slice.
- Beat the cream cheese to perfection: In your stand mixer with the paddle attachment (or a large bowl with a hand mixer), beat the cream cheese on medium speed for 3 full minutes until it's completely smooth and fluffy. This is the moment of truth — don't rush it. Stop and scrape down the bowl at least twice, making sure no lumps remain. The cream cheese should look like thick whipped cream and should coat the back of a spoon. If you see any lumps, keep beating. This step determines whether your cheesecake has the texture of silk or cottage cheese.
- Introduce the ricotta gradually: Add the ricotta cheese in three additions, beating well after each addition. Don't just dump it all in — this prevents lumps and ensures everything incorporates smoothly. The mixture should look like thick Greek yogurt when you're done. If you're using part-skim ricotta, you might notice it's slightly grainy — that's normal, just beat a bit longer. The goal is to eliminate any visible ricotta curds while maintaining that light, airy texture that makes this dessert special.
- Sweeten and flavor with finesse: With the mixer on low, gradually add the sugar in a slow, steady stream. Once incorporated, add the orange zest, vanilla, cinnamon, and salt. Mix just until combined — over-mixing here incorporates too much air, which causes cracks during baking. The filling should taste like the best cannoli filling you've ever had, with a perfect balance of sweetness and citrus brightness. Resist the urge to eat it all with a spoon (okay, maybe just one taste for quality control).
- Add eggs like a pro: Beat the eggs in a small bowl until the whites and yolks are completely combined. With the mixer on low, add the eggs in three additions, mixing just until each addition disappears. This is where most people go wrong — they beat the eggs in too aggressively, creating a foamy mixture that bakes up tough and rubbery. The filling should be smooth and pourable, like thick pancake batter. If you see any white streaks, stop and fold them in gently with a spatula.
- Finish with cream and chocolate: Slowly pour in the cold heavy cream while mixing on low speed. Once incorporated, stop the mixer and fold in the mini chocolate chips by hand. The cream lightens the filling, while the chocolate chips provide those delightful bursts of flavor that make each bite interesting. The chips should be evenly distributed but not over-mixed — we want them suspended throughout, not sunk to the bottom like chocolate chip submarines.
- Assemble with care: Pour the filling into your cooled crust, smoothing the top with an offset spatula. Tap the pan gently on the counter to release any air bubbles — you'll see them rise to the surface like tiny cheesecake volcanoes. Place the springform pan inside a large roasting pan and create a water bath by pouring hot water into the roasting pan until it comes halfway up the sides of the springform. This steamy environment prevents the top from cracking and ensures even baking. The water should be hot from the tap, not boiling — we're creating a gentle steam, not cooking lobster.
- Bake low and slow: Bake for 60-70 minutes at 325°F until the edges are set but the center still jiggles slightly when you gently shake the pan. Don't wait for it to be completely firm — it continues cooking from residual heat as it cools. The top should be lightly golden with no cracks. If the edges start pulling away from the pan and the center moves as one unit, it's ready. This is the difference between a creamy cheesecake and one that tastes like sweet cardboard.
- Cool with patience: Turn off the oven, crack the door open, and let the cheesecake cool inside for 1 hour. This gradual cooling prevents the dramatic temperature change that causes cracks. Remove from the water bath and cool completely on a wire rack, then refrigerate for at least 4 hours or overnight. I know waiting is torture, but good things come to those who wait. The filling firms up as it chills, transforming from pourable to perfectly sliceable.
That's it — you did it. But hold on, I've got a few more tricks that'll take this to another level...
Insider Tricks for Flawless Results
The Temperature Rule Nobody Follows
Here's the thing that separates good bakers from great ones: temperature matters more than your grandmother's secret ingredient. Every dairy product in this recipe must be at room temperature, not just the cream cheese. Cold eggs don't incorporate properly, leading to a filling that's streaky and uneven. Cold ricotta creates lumps that no amount of mixing will eliminate. Set everything out on the counter at least two hours before you start, or better yet, overnight. Yes, I know it's tempting to skip this step when you're in a hurry, but a friend tried cutting corners once — let's just say her cheesecake had the texture of cottage cheese mixed with concrete. Don't be that friend.
Why Your Nose Knows Best
Your sense of smell is the most underutilized tool in baking. When the cheesecake is nearly done, you'll start smelling the most incredible aroma — sweet cream, vanilla, and orange dancing together in perfect harmony. That's your cue to start checking for doneness. If your kitchen smells like a bakery and your mouth is watering uncontrollably, you're probably within five minutes of perfection. The edges should be set but the center should still have a slight wobble, like gentle waves on a lake. Trust your senses — they evolved for exactly this purpose, even if our ancestors weren't baking cannoli cheesecake in caves.
The 5-Minute Rest That Changes Everything
After baking, your cheesecake needs to cool in the oven with the door cracked for exactly one hour. Not 45 minutes, not 75 minutes — 60 minutes. This gradual cooling prevents the dramatic temperature drop that causes cracks and ensures the filling sets properly. Set a timer and walk away. Resist the urge to peek or poke or otherwise interfere with the cooling process. During this hour, the proteins in the eggs relax, the filling firms up, and the flavors meld together into something greater than the sum of their parts. It's like meditation for your dessert — the cheesecake needs this time to find its inner peace.
The Overnight Transformation
I know waiting until tomorrow to eat dessert feels like cruel and unusual punishment, but this cheesecake actually gets better overnight. During those long hours in the refrigerator, the ricotta flavor intensifies while the texture becomes firmer and more sliceable. The orange zest has time to perfume the entire cheesecake, and those mini chocolate chips provide delightful textural contrast. If you absolutely must taste it the same day, give it at least four hours in the refrigerator, but honestly? Make it the day before you need it. Future you will thank present you for your patience and foresight.
The Clean Slice Secret
Picture yourself pulling this out of the oven, the whole kitchen smelling incredible, and you can't wait to serve it to your guests. But when you slice into it, the knife drags and creates ugly, messy cuts that look nothing like those pristine restaurant slices. The solution is so simple it's almost embarrassing: heat your knife. Dip a long, sharp knife in hot water, wipe it dry, then slice in one confident motion. The heat melts through the filling cleanly, creating picture-perfect slices that will make your guests think you trained at Le Cordon Bleu. Between cuts, wipe the knife clean and reheat. Yes, it's an extra step, but the presentation is worth it.
Creative Twists and Variations
This recipe is a playground. Here are some of my favorite ways to switch things up:
Coffee Lover's Dream
Add 2 tablespoons of instant espresso powder dissolved in 1 tablespoon of hot water to the filling along with the vanilla. The coffee enhances the chocolate chips and creates a mocha-cannoli hybrid that tastes like someone took your favorite coffee shop and Italian bakery and merged them into one glorious dessert. Top with chocolate-covered espresso beans for extra crunch. Coffee addicts will lose their minds over this version — it's like tiramisu and cannoli had a beautiful, creamy baby.
Salted Caramel Indulgence
Swirl 1/2 cup of good quality salted caramel sauce into the filling just before baking, using a knife to create marbled patterns. The sweet-salty combination plays beautifully against the ricotta, and the caramel adds depth that makes this taste like a sophisticated restaurant dessert. Drizzle extra caramel on top just before serving for that "I spent hours on this" look that actually took thirty seconds.
Chocolate Orange Decadence
Replace the mini chocolate chips with dark chocolate chunks and add 1/4 cup of cocoa powder to the filling. The result tastes like those chocolate-orange candies but in cheesecake form — rich, sophisticated, and completely addictive. This version is perfect for chocolate lovers who think regular cheesecake isn't chocolatey enough. The orange zest prevents it from becoming too heavy, creating perfect balance.
Nutty Pistachio Version
Fold 1/2 cup of chopped pistachios into the filling along with the chocolate chips, and replace the orange zest with lemon zest. Top with more chopped pistachios before serving. This creates a flavor profile similar to pistachio cannoli, with the nuts adding texture and a beautiful green color that makes the dessert look as good as it tastes.
Boozy Adult Edition
Add 2 tablespoons of Marsala wine or dark rum to the filling along with the vanilla. The alcohol bakes off, leaving behind complex flavors that make this taste like something you'd get in a fancy restaurant. Don't overdo it — too much liquid will prevent the cheesecake from setting properly. Serve this version at adult dinner parties and watch your guests try to guess your secret ingredient.
Mini Individual Servings
Instead of one large cheesecake, make individual mini cheesecakes in a muffin tin lined with cupcake papers. Reduce the baking time to 18-20 minutes and check for doneness by gently shaking the pan. These are perfect for parties where you want grab-and-go desserts, and they're dangerously easy to eat. Make a double batch — trust me, they'll disappear faster than you can say "cannoli cheesecake."
Storing and Bringing It Back to Life
Fridge Storage
Store your masterpiece in the refrigerator, covered loosely with plastic wrap or in an airtight container, for up to 5 days. After day 3, the texture starts to deteriorate and the crust becomes soggy, but honestly, I've never had one last that long. Keep it on the middle shelf where the temperature is most stable — the door is too warm and will cause condensation that ruins the texture. If you've already sliced it, press plastic wrap directly against the cut surfaces to prevent them from drying out.
Freezer Friendly
This cheesecake freezes beautifully, making it perfect for make-ahead entertaining. Wrap individual slices or the whole cheesecake (without toppings) in plastic wrap, then in foil, and freeze for up to 2 months. Thaw overnight in the refrigerator, not on the counter — slow thawing prevents condensation from forming and making the crust soggy. The texture will be slightly denser after freezing, but the flavor remains incredible. Pro tip: slice before freezing, then you can grab individual portions whenever the craving strikes.
Best Reheating Method
Cheesecake is best served cold, but if you prefer it slightly softened, let it sit at room temperature for 15-20 minutes before serving. Never microwave it — you'll end up with rubbery, melted mess that no amount of wishing will fix. If the crust has become soggy (usually from improper storage), place individual slices on a baking sheet in a 350°F oven for 5-7 minutes to crisp it up. The filling will warm slightly while the crust regains its crunch, creating the perfect textural contrast.