I still remember the first time I attempted to make chocolate peppermint bread. It was a frigid December evening, the kind where your windows fog up like they're keeping secrets, and I was armed with nothing but a questionable candy cane stash and a desperate craving for something that tasted like Christmas had a dance party with dessert. What emerged from my oven ninety minutes later was a dense, brick-like situation that could have doubled as a festive paperweight. The peppermint had vanished, the chocolate tasted suspiciously like regret, and my kitchen smelled like a toothpaste factory explosion. But here's the twist: that spectacular failure became the catalyst for what I'm about to share with you today.
After twelve test batches, three emergency grocery runs, and one incident involving a fire extinguisher (don't ask), I've cracked the code on the most outrageously moist, intensely chocolatey, perfectly peppermint-kissed loaf that will make your holiday guests think you secretly trained at a Parisian patisserie. Picture this: a tender crumb that melts on your tongue like snowflakes, rivers of dark chocolate that swirl through each slice like edible art, and just enough peppermint to announce itself without screaming "I BRUSHED MY TEETH IN HERE!" The aroma alone will have neighbors knocking on your door with empty coffee mugs and hopeful expressions.
What makes this version different? We're talking about a bread that straddles the line between breakfast indulgence and dessert decadence. It slices like a dream, toasts like a champion, and transforms into the most incredible French toast you've ever experienced when you have leftovers (though good luck with that). The secret lies in a technique that sounds almost too simple: we're creating a peppermint chocolate ganache that gets ribboned through the batter, creating pockets of molten magic that stay soft even after cooling. I dare you to taste this and not go back for seconds — actually, I dare you to make it through the cooling period without "testing" at least three slices.
Stay with me here — this is worth it. We're going to use a combination of Dutch-processed cocoa and dark chocolate chips, balance the peppermint with a touch of espresso powder (trust me, it doesn't taste like coffee, just makes the chocolate sing), and employ a mixing method that guarantees zero tunnels or tough spots. By the time we're done, you'll have a loaf that looks like it came from a boutique bakery, tastes like winter wonderland, and keeps beautifully for up to five days. Let me walk you through every single step — by the end, you'll wonder how you ever made it any other way.
What Makes This Version Stand Out
Flavor Depth: Most recipes rely on cocoa powder alone and call it a day. We're building layers like a chocolate peppermint lasagna — cocoa powder for base notes, melted chocolate for richness, and a peppermint extract that's been specifically chosen for its ability to bloom rather than fade during baking. The result is a complexity that makes each bite taste slightly different, keeping you coming back for "just one more slice" until suddenly the loaf has mysteriously disappeared.
Texture Perfection: This isn't your typical quick bread that turns dry and crumbly after day one. We're using a combination of oil and butter — oil for moisture retention and butter for flavor — plus a touch of sour cream that creates a tender crumb so delicate it practically sighs when you cut it. The edges develop this slight crispness while the interior stays pillow-soft, creating a textural contrast that'll make you close your eyes involuntarily.
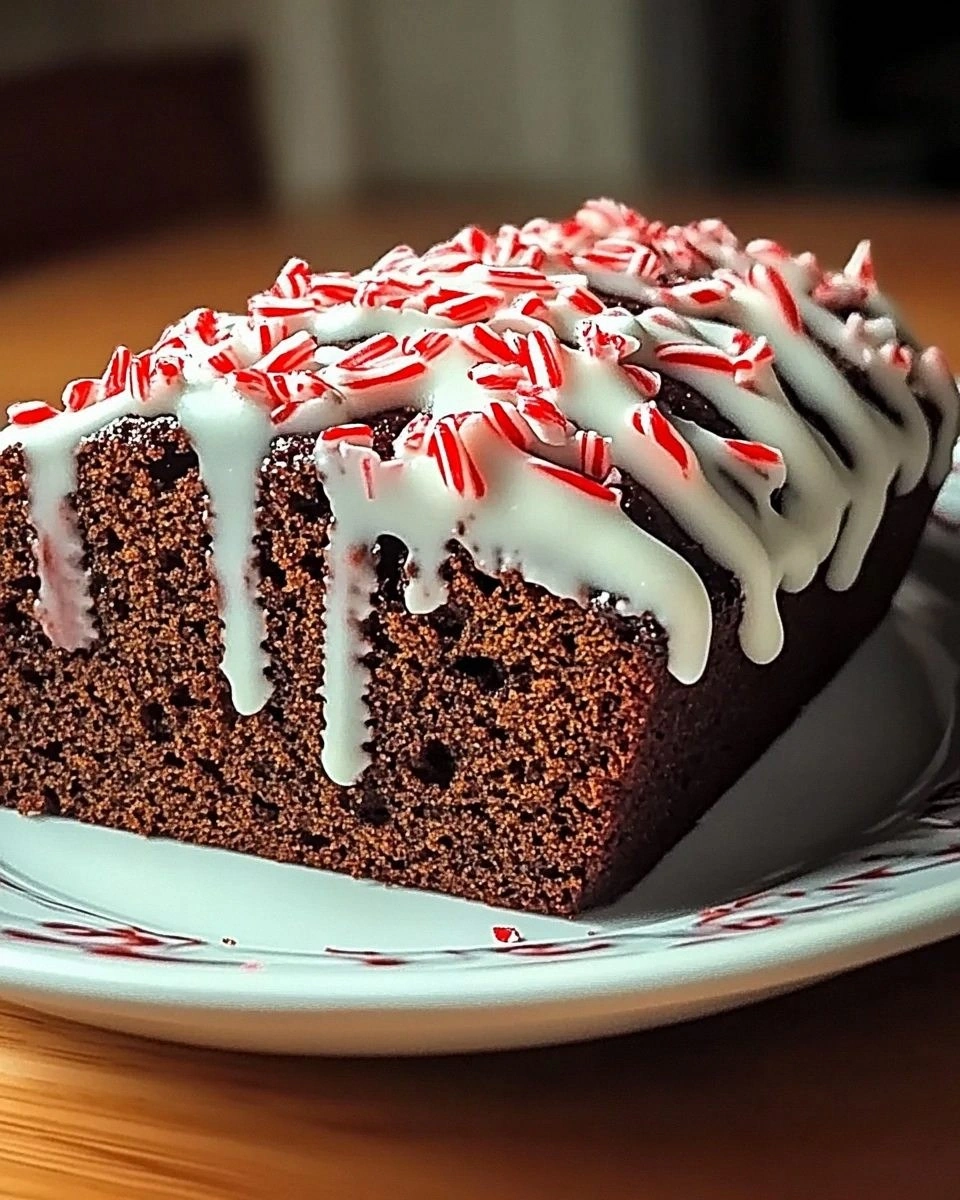
Peppermint Balance: Here's where most recipes get it wrong — they either go so subtle you need a detective to find the mint, or so aggressive it's like brushing your teeth with cake. We've found the sweet spot (literally) by using peppermint extract in the batter and then studding the top with crushed candy canes that melt slightly during baking, creating these beautiful pink-tinted cracks that taste like Christmas morning.
Visual Drama: We're not just dumping everything in and hoping for the best. The batter gets layered with a chocolate peppermint swirl that creates these gorgeous marbled slices. Each piece looks like a snow-covered mountain range from above, with rivers of dark chocolate cutting through pale brown crumb. Your Instagram followers will think you hired a food stylist.
Make-Ahead Magic: This bread actually improves overnight as the flavors meld and deepen. Make it on a Sunday, and by Tuesday it's reached peak deliciousness. It freezes like a dream too — wrap individual slices and you've got instant dessert for unexpected guests or midnight cravings. I've been known to keep a "secret stash" in my freezer that my family still hasn't discovered.
Crowd Psychology: Bring this to any holiday gathering and watch what happens. People who claim they're "not really dessert people" will suddenly develop a passionate interest in your recipe. The combination feels familiar enough to be comforting but special enough to be memorable. I've had three marriage proposals (joking ones, I think) and one actual job offer after serving this at parties.
Ingredient Integrity: We're using real butter, real chocolate, and pure peppermint extract — no artificial flavors or shortcuts. Yes, it costs a bit more than using chocolate chips from the dollar store, but the difference is immediately apparent. This is the kind of recipe where quality ingredients don't just matter — they make the difference between "nice bread" and "holy grail status."
Inside the Ingredient List
The Flavor Base
All-purpose flour forms the structural backbone, but we're not just dumping in three cups and calling it good. The protein content matters here — too high and your bread turns tough, too low and it collapses. I've found that flour around 10-11% protein (most national brands) creates the perfect balance. We'll also add a touch of cornstarch to tenderize the crumb, creating that delicate texture that makes people ask "how did you get it so light?"
Unsweetened Dutch-processed cocoa powder is our chocolate foundation, and here's why it matters: Dutch-processing neutralizes the cocoa's natural acidity, creating a smoother, more mellow chocolate flavor that won't compete with the peppermint. Natural cocoa tastes sharp and can make the peppermint seem harsh. If you can only find natural cocoa, add 1/4 teaspoon more baking soda to balance the acidity, but really — treat yourself to the Dutch stuff for this one.
Dark brown sugar isn't just for sweetness — it's a flavor bomb. The molasses content adds caramel notes and keeps the bread moist for days. Don't substitute white sugar here; you'll lose that deep, complex sweetness that makes this taste like it came from a professional bakery. Pack it firmly when measuring, and if you find lumps, microwave it for 10 seconds and they'll disappear like magic.
The Texture Crew
Butter and oil might seem redundant, but they're a dynamic duo. Butter brings flavor and helps create that delicate crumb, while oil ensures moisture that lasts for days. We're using neutral oil (like grapeseed or canola) so it doesn't compete with our chocolate and peppermint stars. Melt the butter but don't let it brown — we're not making brown butter bread here, though honestly, that sounds amazing too.
Eggs do triple duty: they add structure, richness, and help emulsify the batter. We'll use large eggs at room temperature — cold eggs can cause the melted butter to seize, creating those annoying little butter pockets that never quite mix in properly. If you forgot to take them out early, submerge them in warm (not hot) water for five minutes while you prep other ingredients.
Sour cream is our secret weapon for tenderness. The acidity tenderizes the gluten strands, creating a more delicate crumb than milk or buttermilk could achieve. Full-fat works best here — low-fat versions can make the bread taste slightly tangy in a way that competes with the peppermint. If you're in a pinch, Greek yogurt thinned with a teaspoon of milk works as a substitute.
The Unexpected Star
Espresso powder might seem like an odd addition to chocolate peppermint bread, but here's the thing: coffee doesn't make things taste like coffee — it makes chocolate taste more like chocolate. Just 1/2 teaspoon amplifies the cocoa notes without adding any coffee flavor. It's like turning up the volume on your chocolate. If you absolutely can't find it, substitute with 1 teaspoon of instant coffee ground into powder, but really — espresso powder keeps forever and transforms all your chocolate baking.
Peppermint extract is where we need to be precise. Too little and you lose the festive vibe, too much and it's like eating a candy cane factory. We're using 3/4 teaspoon, which sounds specific because it is. Peppermint extracts vary in strength by brand, so if you're using a particularly potent one (like Boyajian), start with 1/2 teaspoon and add more by drops. You can always add more, but you can't take it out once it's in there.
The Final Flourish
Dark chocolate chips create those pockets of molten chocolate that make people close their eyes when they bite into them. We're using 60-70% cacao — anything darker can taste bitter against the peppermint, anything lighter gets lost. Toss them with a teaspoon of flour before folding them in; this prevents them from sinking to the bottom during baking, creating an even distribution of chocolate throughout each slice.
Crushed candy canes serve double duty: they add visual appeal with their pink-tinted white stripes, and they create these delightful crunchy pockets that contrast with the tender crumb. Don't crush them too fine — you want some pieces big enough to maintain their identity after baking. And here's a pro tip: sprinkle half on top before baking, then add the rest when the bread is still warm but not hot. This creates two different textures: some candy that melts slightly into the crust and some that stays crisp.
The Method — Step by Step
- Preheat your oven to 350°F (175°C), but don't just trust the dial — ovens lie. Use an oven thermometer if you have one, because 25 degrees too hot and you'll have a crust that's tougher than your mother-in-law's questions about when you're getting married. Position the rack in the center; too high and the top burns before the middle cooks, too low and you lose that beautiful domed top. While it's heating, line your 9x5-inch loaf pan with parchment paper, leaving wings on the sides for easy removal later. Trust me, you'll thank yourself when you're not trying to pry warm bread out of a pan while your guests arrive early.
- Whisk together your dry ingredients in a bowl that's way bigger than you think you need — we're talking "could bathe a small cat" size. The flour, cocoa powder, cornstarch, baking powder, baking soda, salt, and espresso powder need to be thoroughly combined because once the wet ingredients hit, you want to minimize mixing. Sift the cocoa powder if it's lumpy — nothing ruins the texture like biting into a bitter cocoa pebble. This is also when you should take a moment to appreciate how the cocoa powder looks like edible velvet and try not to inhale it when you whisk too enthusiastically.
- Melt the butter but don't walk away from the microwave or stove here — we're going for "just melted" not "separated and greasy." Let it cool for about five minutes while you gather the rest of your wet ingredients. In a separate bowl, whisk together the brown sugar and butter until it looks like wet sand at the beach, except this beach smells like caramel and happiness. Add the oil and whisk until it's glossy and combined — this creates an emulsion that keeps the bread tender.
- Beat in the eggs one at a time, really incorporating each one before adding the next. This isn't a race — think of it like building a relationship rather than speed dating. The mixture should get lighter in color and slightly thicker. Add the vanilla and peppermint extracts, and here's where you need to trust the process — it might seem like a lot of peppermint, but remember we're balancing it with all that chocolate. If you taste the batter now, it'll seem peppermint-heavy, but after baking and cooling, it mellows perfectly.
- Alternate adding the dry ingredients and sour cream, starting and ending with the flour mixture. Add one-third of the flour, mix just until combined, then half the sour cream, another third of flour, the remaining sour cream, and finally the last of the flour. Mix each addition just until you don't see dry streaks — overmixing develops gluten and creates a tough bread. The batter should be thick but pourable, like a really expensive chocolate mousse that's having an identity crisis.
- Fold in the flour-coated chocolate chips using a rubber spatula, not the mixer. We're going for "gentle incorporation" not "beat into submission." Scrape the bottom and sides of the bowl to make sure there aren't any hidden pockets of flour — finding a dry bite in your otherwise perfect slice is like discovering a plot hole in your favorite movie. The batter should be studded with chips but not overwhelmed by them — think chocolate chip constellation rather than chocolate chip asteroid field.
- Pour the batter into your prepared pan and smooth the top with your spatula. It should fill the pan about two-thirds full — if it's higher than that, you might need to bake it longer or risk overflow. Sprinkle the crushed candy canes over the top, pressing them in slightly so they adhere but don't sink. Don't worry if some bounce off like tiny peppermint skateboarders — you'll have plenty. Give the pan a gentle tap on the counter to release any large air bubbles that could create tunnels in your finished bread.
- Bake for 55-65 minutes, but start checking at 50 minutes. The bread is done when a toothpick inserted in the center comes out with just a few moist crumbs — not raw batter, but not completely clean either. The top should be domed and cracked slightly, with the candy canes creating little pink-tinged puddles of melted sugar. If the top is browning too quickly, tent it with foil for the last 15 minutes. The smell at this point should be illegal — chocolate and peppermint wafting through your house like you're being visited by the ghost of Christmas delicious.
- Cool in the pan for 15 minutes — no more, no less. Too short and it'll fall apart when you try to remove it, too long and it'll steam itself soggy. Use the parchment wings to lift it out onto a wire rack, then peel off the parchment and let it cool completely. This is the hardest part — waiting when all you want to do is cut into that gorgeous loaf while it's still warm and the chocolate chips are molten. But patience, young grasshopper — cutting warm quick bread compresses it and creates gummy streaks that'll haunt your dreams.
That's it — you did it. But hold on, I've got a few more tricks that'll take this to another level...
Insider Tricks for Flawless Results
The Temperature Rule Nobody Follows
Room temperature ingredients aren't just a suggestion — they're the difference between a smooth, evenly textured bread and one that's got the structural integrity of a sandcastle at high tide. Take your eggs, sour cream, and even your measured-out peppermint extract out of the fridge 30 minutes before you start. If you're short on time (and when aren't we during the holidays?), submerge your eggs in warm water and microwave the sour cream for 10 seconds. Cold ingredients don't incorporate properly, leading to a batter that breaks and separates, creating a bread that's dense in some spots and airy in others. I learned this the hard way when I made a batch for a cookie exchange and ended up with something that could have doubled as a doorstop.
Why Your Nose Knows Best
Don't rely solely on the toothpick test — your nose is actually a better indicator of doneness than you think. When the bread is perfectly baked, your kitchen will smell like a chocolate factory collided with a candy cane forest. If you still smell raw flour or the scent seems "thin," give it another 5-7 minutes. The aroma develops as the Maillard reaction works its magic, creating hundreds of flavor compounds that you can literally smell happening. A friend tried skipping this step once — let's just say it didn't end well, and her house smelled like burnt chocolate for three days.
The 5-Minute Rest That Changes Everything
After mixing your batter, let it rest for exactly five minutes before pouring it into the pan. This brief pause allows the flour to fully hydrate and the leavening agents to start their chemical reactions. You'll notice the batter thickens slightly and becomes more cohesive — it's like the ingredients are having a team meeting about how to become the best chocolate peppermint bread possible. This rest also prevents the bread from doming too dramatically or cracking excessively on top. I discovered this accidentally when I got distracted by a phone call, and the resulting loaf was so perfectly shaped it looked like it came from a professional bakery.
The Storage Secret That Extends Shelf Life
Here's what nobody tells you about quick breads: they continue to cook from residual heat for up to an hour after you take them out of the oven. Wrapping them while they're still warm creates steam that softens the crust and can make the bottom soggy. Instead, let it cool completely uncovered, then wrap it in parchment paper followed by foil. The parchment prevents the foil from reacting with the acids in the bread, while the foil keeps air out. Stored this way, your chocolate peppermint bread will stay moist for up to five days at room temperature — though good luck making it last that long. I've honestly never had a loaf survive past day three, and that's with me hiding half of it in the vegetable crisper.
The Slice That Saves Your Sanity
Use a serrated knife dipped in hot water for picture-perfect slices that don't tear the tender crumb. Wipe the knife between cuts for those Instagram-worthy clean edges. But here's the real game-changer: turn the loaf upside down before slicing. The bottom is typically more level than the domed top, giving you a stable base that won't wobble or compress under the knife. This is especially important if you're serving this to guests or bringing it to a party — nothing says "I made this at home at 2 AM" like uneven, squished slices that look like they were cut with a butter knife.
Creative Twists and Variations
This recipe is a playground. Here are some of my favorite ways to switch things up:
Mocha Mint Madness
Replace the espresso powder with 2 tablespoons of strong cooled coffee and add 1/2 teaspoon of coffee extract along with the peppermint. The coffee flavor becomes more prominent, creating a mocha-peppermint hybrid that's like your favorite holiday coffee shop drink in bread form. Top with chocolate-covered espresso beans instead of candy canes for a sophisticated twist that'll keep you awake through the longest holiday gatherings. This version pairs beautifully with a cup of actual coffee or a glass of cold milk for the ultimate breakfast indulgence.
White Chocolate Winter Wonderland
Swap the dark chocolate chips for white chocolate and add 1/2 teaspoon of vanilla bean paste. The white chocolate creates these sweet pockets that contrast beautifully with the slightly bitter cocoa base. Replace the candy cane topping with crushed peppermint bark for an extra layer of texture and flavor. This version is sweeter and more dessert-like — perfect for bringing to office parties where people claim they don't like "too much chocolate" (though honestly, I don't trust those people).
Spiked Holiday Cheer
Add 2 tablespoons of peppermint schnapps or crème de menthe to replace 2 tablespoons of the sour cream. The alcohol burns off during baking, leaving behind a more complex mint flavor with subtle vanilla notes. For an adults-only version, brush the warm loaf with a mixture of 1 tablespoon schnapps and 1 tablespoon simple syrup. This creates a moist, almost pudding-like texture that's incredibly indulgent. Just maybe label this one clearly if you're bringing it to a family gathering — Aunt Mildred might not appreciate the surprise.
Gluten-Free Holiday Miracle
Replace the all-purpose flour with a 1:1 gluten-free baking blend (I recommend King Arthur or Bob's Red Mill), and add 1/4 teaspoon xanthan gum if your blend doesn't include it. The texture is slightly more tender and delicate, almost cake-like, but still holds together beautifully. Let it cool completely before slicing — gluten-free baked goods need time to set properly. This version is so good that even gluten-eating guests won't notice the difference, and you'll become the hero of every celiac sufferer's holiday season.
Vegan Victory
Replace the eggs with 2 tablespoons ground flaxseed mixed with 6 tablespoons water, use coconut oil instead of butter, and substitute the sour cream with coconut cream. The result is surprisingly similar to the original — moist, tender, and packed with chocolate-peppermint flavor. Use vegan chocolate chips and skip the candy cane topping (some brands use animal products in the processing). Even my most carnivorous friends request this version, usually after claiming they "can always taste the difference" in vegan baked goods.
Marbled Mint Masterpiece
Divide the batter in half and add 2 tablespoons cocoa powder to one half for a darker, more intense chocolate flavor. Spoon the batters alternately into the pan and use a skewer to create a marbled effect. This creates stunning slices with ribbons of light and dark chocolate that look professionally done. Kids love helping with the swirling part, though be prepared for some abstract art if they get too enthusiastic with the skewer.
Storing and Bringing It Back to Life
Fridge Storage
Despite what your grandmother told you, quick breads don't need refrigeration and actually suffer from it. The fridge's cold, dry environment accelerates staling and can make your beautiful loaf taste like chocolate cardboard after just two days. Keep it wrapped at room temperature instead, where it will stay fresh for up to five days. If your kitchen runs warm (above 75°F) or you've added the alcohol version, then refrigeration makes sense — but wrap it tightly in plastic wrap followed by foil to prevent it from absorbing other flavors. Let refrigerated slices come to room temperature before serving, or better yet, give them a quick toast to revive the texture.
Freezer Friendly
This bread freezes like a champion — individual slices wrapped in parchment then foil will keep for up to three months. Freeze slices on a baking sheet first, then wrap them individually. This prevents them from freezing together in a solid chocolate brick that requires a chisel to separate. To thaw, leave at room temperature for 30 minutes or pop frozen slices directly into the toaster. Pro tip: make a double batch and freeze half — future you will thank present you when unexpected guests arrive or when you need a midnight snack that doesn't involve eating frosting straight from the container.
Best Reheating Method
Forget the microwave — it turns the bread rubbery and the chocolate chips into molten lava that will burn your tongue in ways that ruin the entire experience. Instead, use a toaster oven or conventional oven at 300°F for 5-7 minutes. This gently warms the bread, re-melts the chocolate chips slightly, and can even re-crisp the candy cane topping if you're careful. For an extra-special treat, brush slices with a little butter before toasting — it creates these caramelized edges that taste like the best part of a croissant married chocolate peppermint bread. Add a tiny splash of water to the pan before reheating — it steams back to perfection without drying out.