I still remember the first time I tried to make tiramisu at home. I was twenty-three, wildly overconfident, armed with nothing but a dusty box of ladyfingers and a vague memory of watching someone whisk egg whites on television. What emerged from my refrigerator three hours later looked like a collapsed sandcastle and tasted like regret sprinkled with instant coffee. Fast forward a decade, a few culinary school classes, and countless dessert experiments, and I can finally say—with zero humility—that this Heavenly Tiramisu Cheesecake is the dessert I was chasing all along.
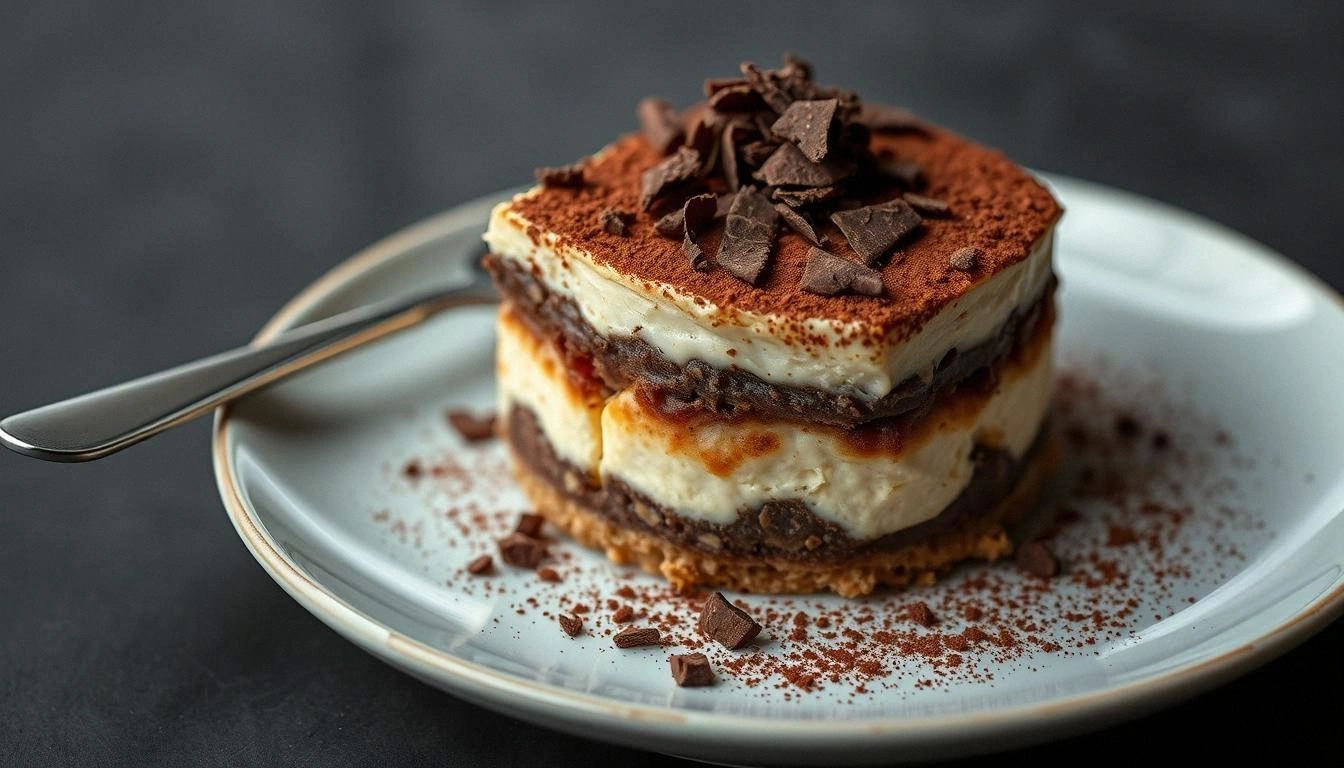
Picture this: a buttery, espresso-soaked ladyfinger crust that shatters delicately under your fork, giving way to a cloud-like mascarpone cheesecake filling that tastes like Italy decided to hug your taste buds. The top is dusted with a whisper of cocoa so fine it drifts across the surface like morning mist over Venice. One bite and you're transported to a candlelit table in Florence, even if you're actually standing in your kitchen wearing mismatched socks and stealing bites straight from the fridge at midnight. I dare you to taste this and not go back for seconds.
Most recipes get this completely wrong. They either lean too hard on the cheesecake angle—ending up dense and cloying—or they stay too loyal to traditional tiramisu and miss that lush, creamy decadence we crave from a proper New York-style slice. This version walks the tightrope between the two desserts, balancing the airy elegance of tiramisu with the rich satisfaction of cheesecake. The secret weapon? A whisper of espresso reduction folded right into the batter, so the coffee flavor blooms slowly on your tongue instead of punching you in the face.
Okay, ready for the game-changer? We're going to bake this beauty in a water bath, but with a twist: slip a thin sheet of foil loosely over the top for the first half of baking. It locks in moisture so the surface stays soufflé-light while the interior sets to that signature velvety texture. Stay with me here—this is worth it. Let me walk you through every single step—by the end, you'll wonder how you ever made it any other way.
What Makes This Version Stand Out
Ultra-Airy Texture: Thanks to whipped heavy cream folded gently into the batter, each forkful melts like gelato in July. Most recipes rely solely on cream cheese density, but we're channeling Italian nonna energy and treating our mascarpone like royalty—light, ethereal, barely set.
Layered Coffee Punch: We hit coffee three ways—espresso in the batter, espresso brushed on the crust, and a whisper of espresso powder in the cocoa dusting. The result is a gentle crescendo of coffee notes rather than a bitter jolt.
No Raw Eggs Drama: Traditional tiramisu can feel sketchy if you're serving kids, pregnant friends, or anyone with an immune system that side-eyes salmonella. By baking the custard-style filling, we sidestep the worry without sacrificing silkiness.
Make-Ahead Magic: This cheesecake actually improves after a 24-hour nap in the fridge. Flavors mingle, textures settle, and you get to be the host who casually pulls dessert from the cooler like a low-key superhero.
Show-Stopping Visuals: Those neat ladyfinger cookies ringing the sides look intimidating, but they're just standing at attention waiting for their photo op. Your guests will think you spent hours at pastry school; you and I will know it took ten minutes of mindful stacking.
Balanced Sweetness: Ever bite into dessert and feel like you just chewed a sugar cube? Me too. Here, cocoa bitterness and espresso's earthy edge tame the sweetness, so the final impression is elegant, not cloying.
Crowd Gasps Guaranteed: I've served this at birthdays, potlucks, and one random Tuesday when my neighbor needed emotional support. The reaction is always the same—eyes widen, forks hover mid-air, someone whispers "Oh my god" like they're in church.
Alright, let's break down exactly what goes into this masterpiece...
Inside the Ingredient List
The Flavor Base
Mascarpone cheese is the silk purse of Italian dairy—luscious, subtly tangy, and richer than most reality TV stars. Skip the grocery store brand that's been languishing next to the ricotta; head to the specialty cheese section and look for one with a pale ivory color and a fat content north of 40%. If you absolutely can't find it, swap in two parts cream cheese whisked with one part heavy cream, but promise me you'll hunt down the real stuff next time—it's the soul of this dessert.
Espresso is more than caffeinated water here; it's aromatic glue binding coffee-soaked memories to every bite. Pull two shots from your machine, or dissolve 2 teaspoons of instant espresso powder in 2 ounces of just-boiled water. Please, for the love of all that is edible, avoid pre-ground canned coffee. The flavor compounds that make this dessert sing oxidize within minutes of grinding.
The Texture Crew
Heavy cream gets whipped to soft peaks and folded in like culinary fairy wings. Cold cream whips faster, so pop your bowl and whisk in the freezer for ten minutes before starting. You're looking for the consistency of thick yogurt—when the whisk leaves faint trails that slowly melt back into themselves, you're golden.
Ladyfingers are the edible scaffolding of our dessert. Buy them crisp (often labeled "savoiardi") rather than soft sponge cake fingers; they need to hold their shape when soaked with espresso. If your grocery only stocks the soft kind, dry them out on a baking sheet in a 200°F oven for 20 minutes, cool, then proceed.
The Unexpected Star
A single tablespoon of dark rum or marsala wine amplifies coffee notes and adds grown-up complexity. Alcohol-averse? Substitute with ½ teaspoon vanilla plus ½ teaspoon molasses for depth. The alcohol bakes off, but if you're serving kids, stick with the vanilla route and nobody will know the difference.
The Final Flourish
Cocoa powder seems straightforward, but reach for Dutch-processed rather than natural. Dutch-processed cocoa is darker, milder, and dissolves into a velvety dust that doesn't taste like bitter chocolate chalk. Sift it through a fine-mesh strainer right before serving for that snow-kissed Italian café aesthetic.
Everything's prepped? Good. Let's get into the real action...
The Method — Step by Step
- Start by preheating your oven to 325°F and positioning a rack in the center. Tear off a long sheet of heavy-duty foil and wrap the outside of a 9-inch springform pan, crimping it halfway up the sides. This waterproof armor prevents the water bath from sneaking in and turning your crust into soggy cardboard. Trust me, I once skipped this step and served cheesecake soup—delicious, but not the vibe we're after tonight.
- Combine 20 crisp ladyfingers and 3 tablespoons melted unsalted butter in a food processor. Pulse until you have fine crumbs that look like golden sand from a Tuscan beach. Press the mixture firmly into the bottom of the pan, using the flat bottom of a glass to tamp it down evenly. Slide the pan into the oven for 8 minutes; you want it to smell faintly of toasted shortbread and feel dry to the touch.
- While the crust cools, whisk 16 ounces mascarpone, 8 ounces room-temp cream cheese, and ¾ cup sugar in a stand mixer fitted with the paddle attachment. Beat on medium for 2 minutes until the mixture looks like fluffy clouds. Scrape the bowl often; unmixed streaks of cheese will bake into sad lumps. Add 3 large eggs, one at a time, mixing just until the yellow disappears—overbeating whips in air that later collapses, causing surface cracks.
- Now for the espresso shot: whisk 2 shots cooled espresso with 2 tablespoons flour. The flour acts like insurance, binding excess moisture so your cheesecake sets instead of puddling. Reduce speed to low, stream the espresso in, and watch the batter marble into café au lait swirls. Pause to scrape the bowl once more; this is the last chance to banish hidden lumps.
- In a separate chilled bowl, whip 1 cup cold heavy cream to soft peaks. They should flop over like tired sunhats, not stand at attention like meringue. Fold the cream into the batter with a giant rubber spatula, cutting down through the center and sweeping up the sides in a gentle J-motion. Rotate the bowl as you go, aiming to preserve every precious air bubble.
- Arrange 12 split ladyfingers upright around the inside wall of the pan, flat sides facing in. They'll look like domino soldiers standing guard. Pour the batter slowly so it slides between the cookies and sets them in place. Tap the pan gently on a towel-lined counter to pop any rogue bubbles hiding beneath the surface.
- Create a water bath by pouring boiling water halfway up the foil line. Cover the cheesecake loosely with a sheet of foil tent (don't let it touch the surface) for the first 25 minutes. This gentle steam prevents the top from browning too quickly and keeps the texture custardy. Bake 45–50 minutes total, until the edges look set but the center jiggles like Jell-O when you nudge the pan.
- Turn off the oven, crack the door with a wooden spoon, and let the cheesecake linger inside for 1 hour. This slow cooldown prevents the dreaded sinkhole in the middle. Remove from the water bath, peel off the outer foil, and cool completely on a rack. Refrigerate at least 6 hours, preferably overnight, before releasing the springform sides.
- Just before serving, dust the top generously with Dutch-processed cocoa through a fine sieve. Hold the sieve high—about 12 inches—to let the cocoa drift down like espresso-scented snow. Slice with a hot knife (dip in hot water, wipe dry) for café-worthy clean cuts. The first piece is always messy; call it "rustic charm" and keep going.
That's it—you did it. But hold on, I've got a few more tricks that'll take this to another level...
Insider Tricks for Flawless Results
The Temperature Rule Nobody Follows
Every ingredient except the heavy cream should sit at room temperature for at least 45 minutes before mixing. Cold cream cheese refuses to blend smoothly, leaving microscopic flecks that bake into gritty curds. Test by pressing a finger into the mascarpone; it should yield like soft butter. If you've ever struggled with lumpy cheesecake, you're not alone—and I've got the fix.
Why Your Nose Knows Best
When the fragrance of toasted ladyfingers mingles with espresso and drifts from the oven, start checking for doneness. Aroma molecules release when proteins unwind and sugars caramelize—basically your dessert's built-in timer. If your kitchen smells like a Roman café, the edges are probably set and the center's ready for its signature jiggle.
The 5-Minute Rest That Changes Everything
After slicing, let each plated wedge sit for five minutes before serving. This micro-breather allows the filling to relax, the flavors to open like a flower, and the chill to soften just enough for the texture to turn spoon-soft. A friend tried skipping this step once—let's just say it didn't end well; the cheesecake tasted tight and fridge-cold instead of cloud-light.
Flip for a Flat Top
If you covet that mirror-flat surface for Instagram glory, invert the cooled cheesecake onto a parchment round, peel off the base, then flip it back onto your serving plate. The bottom becomes the top—smooth as glass. Brush with a thin layer of melted white chocolate to seal, chill 10 minutes, then dust with cocoa. Your followers will think you hired a pastry assassin.
Creative Twists and Variations
This recipe is a playground. Here are some of my favorite ways to switch things up:
Salted Caramel Tiramisu Cheesecake
Swirl ½ cup room-temp caramel sauce into the batter just before baking, drawing figure eights with a skewer. Finish with a whisper of flaky sea salt on top. Salty-sweet meets coffee-bitter, and suddenly grown-ups have a legitimate reason to lick their plates in public.
Orange-Zest Neapolitan
Add 2 teaspoons finely grated orange zest and 1 tablespoon Grand Marnier to the batter. Replace half the cocoa dusting with shaved dark chocolate curls. It tastes like Sicily in springtime—sunshine captured in dessert form.
Mini Mason-Jar Cheesecakes
Press crust into 8 half-pint jars, divide batter among them, and bake in a water bath for 20 minutes. They're portable, portion-controlled, and adorable enough to make you look like Pinterest royalty. Perfect for picnics or bribing your kid's teacher.
White Chocolate Raspberry Ripple
Melt 4 ounces white chocolate, cool slightly, then fold into the batter along with ⅓ cup raspberry purée swirls. The tart berries slice through the richness like a zingy pop song on a mellow playlist.
Kahlúa Mocha Madness
Replace the rum with Kahlúa and add 2 tablespoons cocoa powder to the batter. Top with chocolate-covered espresso beans for crunch. Serve after dinner and watch your guests transform into night-owled conversationalists.
Storing and Bringing It Back to Life
Fridge Storage
Wrap the cheesecake (or individual slices) tightly in plastic wrap, then slip into an airtight container. It keeps for up to 5 days, though the flavor peaks around day 2 when espresso and mascarpone have finished their slow dance. Store away from strong odors—cheesecake is basically a sponge wearing a tuxedo.
Freezer Friendly
Freeze slices on a parchment-lined tray until solid, then wrap each in plastic plus foil. They'll hibernate happily for 2 months. Thaw overnight in the fridge, then let sit at room temp 20 minutes before serving. Texture stays dreamy because the water bath set the custard so gently to begin with.
Best Reheating Method
Okay, reheating cheesecake sounds weird—until you've tried a 10-second microwave kiss on a slice straight from the freezer. It takes the chill off just enough to heighten the creamy factor without melting the structure. Add a tiny splash of water before reheating—it steams back to perfection and keeps the surface from drying.