I was in the middle of a weekday rush, the clock ticking louder than my stomach, when a friend dared me to create something that could satisfy a craving for comfort, cheese, and that unmistakable garlic punch—all without turning the kitchen into a disaster zone. I grabbed the nearest chicken breast, a handful of tortillas, and a mountain of cheese, and what happened next was nothing short of culinary alchemy. The sizzling butter hit the pan, releasing a fragrant wave that made the whole apartment feel like a five‑star bistro, while the garlic danced like tiny fireworks, each pop promising a flavor explosion.
Imagine the scene: the golden crust of the chicken forming a crisp armor, the cheese melting into a silky river that clings to every bite, and the tortilla wrapping it all up like a warm, buttery hug. You can hear the faint crackle of the pan, smell the sweet‑savory perfume of garlic and herbs, feel the heat radiating from the skillet, and already taste that first bite—a perfect balance of creamy, garlicky, and slightly smoky. It’s the kind of dish that makes you close your eyes, lean back, and think, “I could live off this forever.”
Most recipes I’ve tried either leave the chicken dry, the cheese clumpy, or the wrap soggy. This version? It’s a game‑changer. I’ve cracked the code on the coating, the timing, and the cheese blend so that each bite is a textural symphony—crispy on the outside, juicy inside, with cheese that stretches like a lazy cat in the sun. The secret? A splash of milk in the batter and a double‑layer of cheese that creates that melt‑in‑your‑mouth magic without turning the tortilla into a soggy mess.
And there’s a little twist you won’t see coming: a pinch of smoked paprika that adds a whisper of depth, turning ordinary garlic chicken into something that feels both familiar and adventurous. I dare you to taste this and not go back for seconds. Let me walk you through every single step — by the end, you’ll wonder how you ever made it any other way.
What Makes This Version Stand Out
- Flavor Explosion: The combination of fresh garlic, smoked paprika, and three cheeses creates a layered taste that builds with every bite, making the palate sing.
- Texture Harmony: A light, crunchy coating on the chicken meets the silky melt of mozzarella, cheddar, and Parmesan, while the tortilla stays pleasantly soft.
- Simplicity: All ingredients are pantry‑friendly, and the steps use one pan, one bowl, and a skillet—no fancy equipment required.
- Unique Cheese Blend: Using both mozzarella for stretch and cheddar for sharpness, plus a dash of Parmesan for umami, gives a depth most wraps miss.
- Crowd‑Pleaser: Whether it’s a quick lunch or a family dinner, the aroma alone draws everyone to the kitchen, and the first bite seals the deal.
- Ingredient Quality: Fresh garlic, high‑quality chicken breast, and real cheese make a noticeable difference—no shortcuts needed.
- Cooking Method: Pan‑searing followed by a brief oven finish locks in juices and ensures the cheese bubbles to perfection.
- Make‑Ahead Potential: You can prep the chicken and cheese mixture ahead of time; just assemble and bake when you’re ready to eat.
Inside the Ingredient List
The Flavor Base
Garlic is the undisputed hero here. Freshly minced, it releases allicin the moment it meets heat, creating that unmistakable aromatic punch. If you skip it, you’ll lose the heart of the dish, leaving the chicken tasting bland and the wrap lacking personality. A good swap is roasted garlic for a sweeter, milder profile, but be prepared for a subtler aroma.
Smoked paprika adds a whisper of wood‑smoke that elevates the garlic without overwhelming it. It’s the secret that turns a standard chicken wrap into a “wow” experience. If you can’t find smoked, regular sweet paprika plus a pinch of liquid smoke does the trick.
The Texture Crew
Flour and milk create a light batter that adheres to the chicken, forming a crisp crust when seared. The flour provides structure, while the milk introduces a tenderizing dairy element. Skipping the milk will result in a dry, powdery coating that never reaches that golden crunch.
Butter in the pan not only prevents sticking but also contributes a buttery flavor that complements the garlic and cheese. Use real butter, not margarine, for that rich mouthfeel. If you’re dairy‑free, a high‑smoke‑point oil works, but you’ll miss the buttery nuance.
The Unexpected Star
Parmesan cheese is the unsung champion, adding a salty, nutty depth that balances the milder mozzarella and sharp cheddar. It also helps the cheese melt evenly without becoming oily. Forgetting it makes the cheese blend one‑dimensional; you’ll notice the difference immediately.
The Final Flourish
Fresh cilantro or parsley sprinkled just before serving adds a bright, herbaceous finish that cuts through the richness. If you’re not a fan of cilantro, a handful of sliced green onions works just as well. Skipping the garnish is okay, but you’ll miss that fresh pop that lifts the whole dish.
Large flour tortillas act as the edible vessel, holding everything together without falling apart. Look for tortillas that are pliable yet sturdy; a tortilla that tears will ruin the eating experience. If you’re gluten‑free, a corn tortilla can be used, but expect a different texture.
Everything's prepped? Good. Let's get into the real action...
The Method — Step by Step
Start by slicing the chicken breasts into thin strips, about a quarter‑inch wide. Place them in a bowl, drizzle with olive oil, and toss with minced garlic, smoked paprika, dried oregano, salt, and pepper. Let the mixture rest for five minutes; this short marination lets the spices penetrate the meat, creating a flavor base that’s deeper than a quick sprinkle.
While the chicken marinates, whisk together flour, a pinch of salt, and black pepper in a shallow dish. In a separate cup, combine milk with a splash of water to loosen the batter—this is where the magic of a tender crust begins. Dip each seasoned chicken strip into the flour, then into the milk mixture, and back into the flour for a double coating. The double dip ensures a crunchy exterior that won’t fall flat.
Kitchen Hack: Freeze the coated chicken strips for 10 minutes before cooking; this firms them up and prevents the coating from sliding off in the pan.Heat a large skillet over medium‑high heat and add butter. Once melted and bubbling, lay the coated chicken strips in a single layer—don’t crowd the pan, or you’ll steam instead of sear. Listen for that satisfying sizzle; it should sound like a tiny fireworks show. Cook for 3‑4 minutes per side, turning once, until the coating turns golden brown and the chicken is cooked through (internal temperature 165°F).
While the chicken cooks, preheat your oven to 375°F (190°C). This step is crucial for finishing the wraps with a perfect melt. In a separate bowl, combine mozzarella, cheddar, and Parmesan, mixing them until evenly distributed. The cheese blend should look like a colorful snowdrift ready to blanket the chicken.
When the chicken strips are golden, transfer them to a paper‑towel‑lined plate to drain excess butter. Then, arrange the cooked strips on a baking sheet, sprinkle the cheese mixture generously over each piece, and pop the sheet into the preheated oven. Bake for 5‑7 minutes, watching closely—once the cheese bubbles and turns a light amber, you’ve reached cheese‑perfection.
Watch Out: Over‑baking can cause the cheese to separate and become oily; pull the tray out the moment the cheese is fully melted and just starting to brown.While the cheese melts, warm the tortillas. Stack them on a plate, cover with a damp paper towel, and microwave for 30 seconds. This steam‑softens the tortillas, making them pliable enough to wrap without tearing. If you prefer a slightly crisp edge, you can briefly toast each tortilla in a dry skillet for 20 seconds per side.
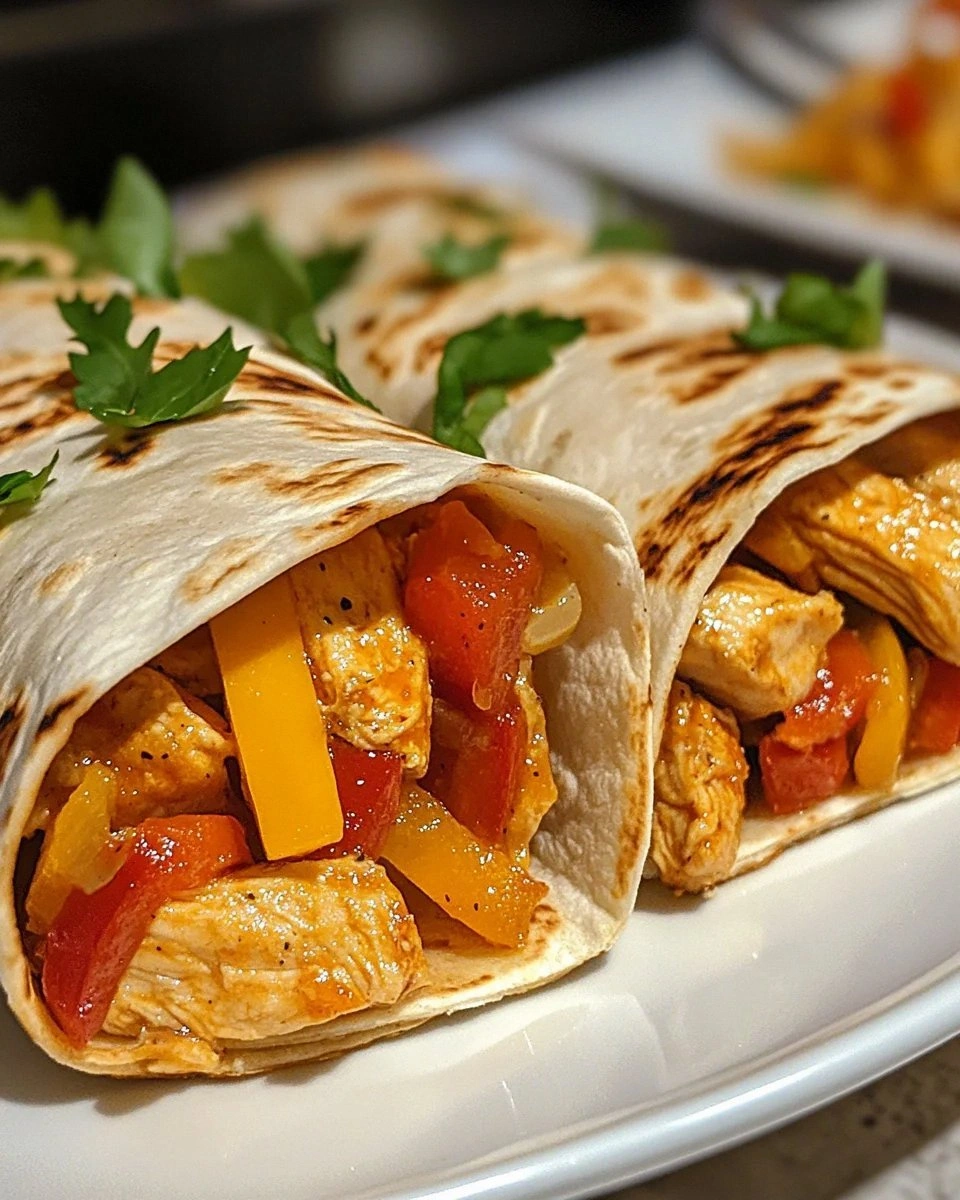
Now the fun part: assemble the wraps. Lay a warm tortilla flat, place 2‑3 cheese‑coated chicken strips down the center, drizzle a spoonful of any leftover pan juices, and sprinkle fresh cilantro or parsley. Fold the sides in, then roll tightly, tucking the ends as you go. The result should look like a neat, golden‑brown parcel, ready to be devoured.
Serve the wraps immediately, with a side of lime wedges or a simple mixed green salad. The contrast of the hot, cheesy interior with the cool, crisp salad is pure culinary poetry. Picture yourself pulling this out of the oven, the whole kitchen smelling incredible, and the first bite delivering a burst of garlicky, cheesy bliss.
That's it — you did it. But hold on, I've got a few more tricks that'll take this to another level...
Insider Tricks for Flawless Results
The Temperature Rule Nobody Follows
Never start with a cold pan. Preheat the skillet for at least two minutes before adding butter. A hot surface creates an immediate sear, locking in juices and forming that coveted golden crust. If you’re impatient and add chicken to a lukewarm pan, you’ll end up with soggy coating and uneven cooking.
Why Your Nose Knows Best
When the garlic hits the butter, you’ll hear a subtle pop and smell a sweet, nutty aroma. That’s your cue that the flavor base is activating. If the smell is faint or the garlic turns brown too quickly, lower the heat—burnt garlic is a one‑way ticket to bitterness.
The 5‑Minute Rest That Changes Everything
After the chicken is cooked and before you coat it in cheese, let it rest on a wire rack for five minutes. This short pause lets the juices redistribute, preventing them from spilling out when you bite into the wrap. A friend once skipped this step and ended up with a soggy tortilla; lesson learned.
Cheese Distribution Mastery
Instead of dumping all the cheese on top, sprinkle it in two layers: half before baking and half after. The first layer melts and binds, while the second adds that fresh, gooey finish right before serving. This technique ensures every bite has that perfect cheese pull.
Wrap Tight, Not Tight‑Wound
When rolling, keep the tortilla snug but avoid over‑pressing. A tight roll holds the filling, but too much pressure squeezes out the juices, leaving the wrap dry. Think of it like a gentle hug—firm enough to stay together, loose enough to let the flavors breathe.
Creative Twists and Variations
This recipe is a playground. Here are some of my favorite ways to switch things up:
Spicy Jalapeño Kick
Add thinly sliced jalapeños to the cheese layer or mix them into the batter. The heat pairs beautifully with the mellow cheese, creating a balanced heat that makes you reach for another bite.
Mediterranean Flair
Swap cheddar for feta, toss in chopped sun‑dried tomatoes, and finish with a drizzle of tzatziki sauce. The tangy feta and creamy yogurt sauce bring a fresh Mediterranean vibe to the classic wrap.
BBQ Lovers’ Dream
Replace smoked paprika with a tablespoon of BBQ sauce in the chicken marinade, and add a handful of shredded coleslaw after baking. The sweet‑smoky flavor and crunchy slaw add texture and depth.
Veggie‑Packed Version
Include sautéed bell peppers, onions, and mushrooms in the filling before wrapping. The vegetables add moisture, color, and an extra layer of flavor, making the dish more wholesome.
Breakfast Twist
Swap the chicken for scrambled eggs, add a dash of hot sauce, and use a whole‑grain tortilla. It’s a hearty breakfast that carries the same cheesy, garlicky goodness into the morning.
Storing and Bringing It Back to Life
Fridge Storage
Place the cooled wraps in an airtight container or wrap tightly in foil. They keep well for up to three days. Before reheating, add a tiny splash of water (about a teaspoon) to the wrap—this creates steam that revives the crust without making it soggy.
Freezer Friendly
Wrap each individual portion in parchment paper, then a layer of freezer‑safe zip‑lock bag. Freeze for up to two months. To reheat, thaw overnight in the fridge, then bake at 350°F for 10‑12 minutes, adding a drizzle of water to keep the tortilla moist.
Best Reheating Method
A quick skillet reheat works wonders: medium heat, a few minutes per side, and a lid on top to trap steam. This restores the crispness of the chicken coating while melting the cheese back to its glorious stretch.