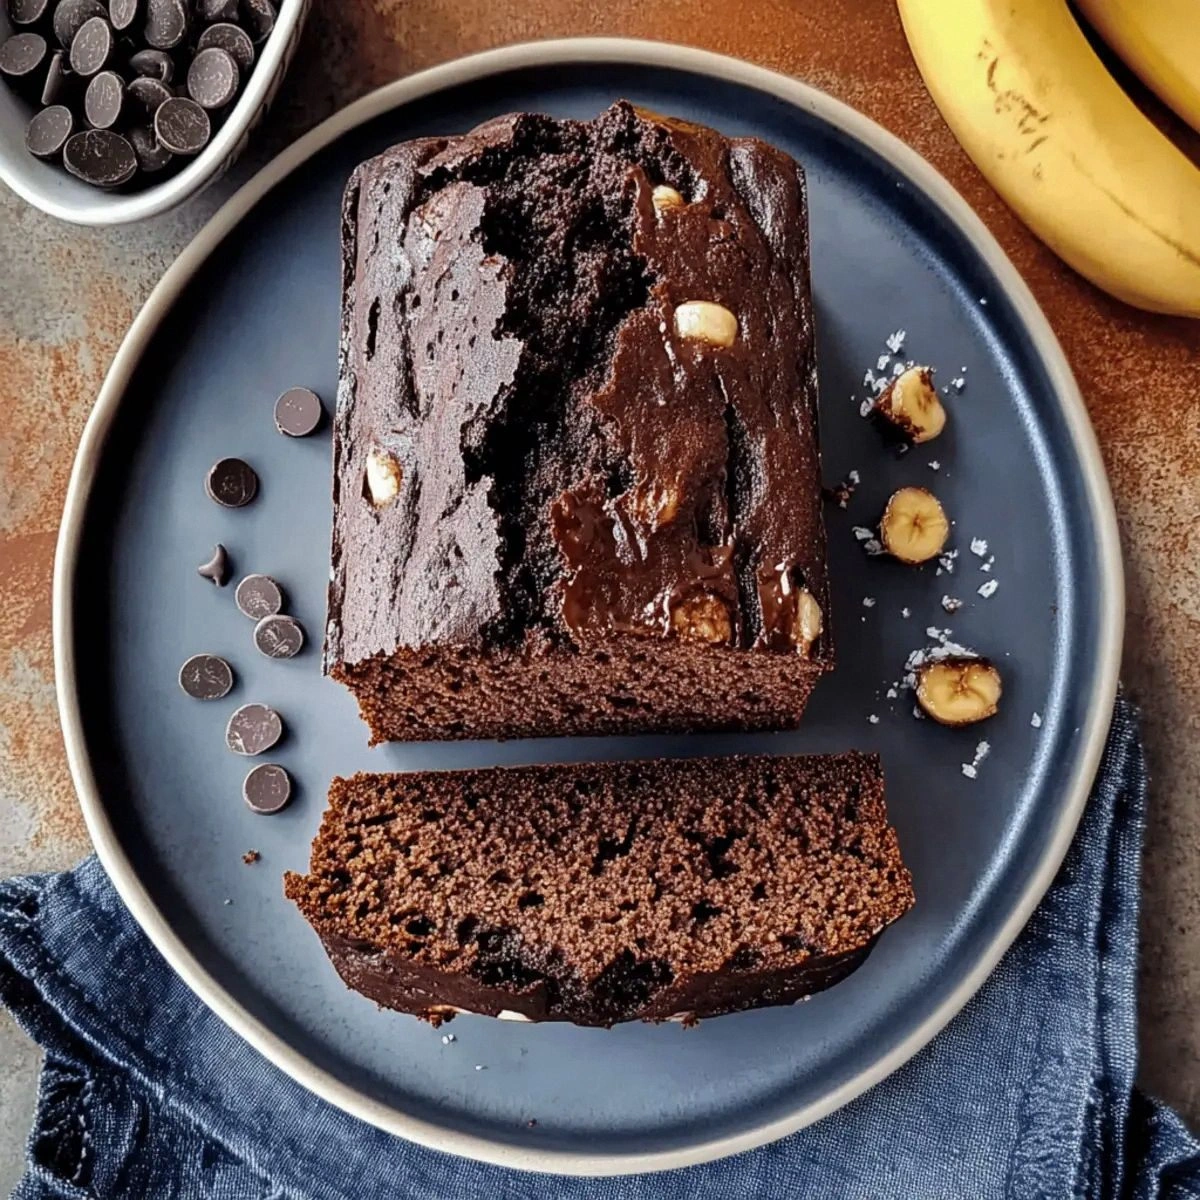
Ever had that moment when you open the pantry, stare at a half‑ripe banana, a bar of dark chocolate, and an espresso tin, and think, “What on earth could possibly bring these together without turning into a disaster?” I’ve been there, standing over a stovetop that was more smoke than heat, a batter that looked like a muddy swamp, and a craving that was louder than my alarm clock. That chaotic morning turned into the birth of the most decadent, coffee‑kissed banana bread you’ll ever taste, and trust me, it’s a game‑changer. I dare you to taste this and not go back for seconds.
The kitchen was a symphony of sounds: the whirr of the blender, the gentle crack of eggs, the faint hiss as the espresso powder hit the warm oil. The air was thick with the sweet perfume of bananas mingling with the deep, earthy aroma of cocoa and coffee – a scent that made my stomach do a little dance. When the batter finally hit the pan, it sang a buttery, chocolatey lullaby that promised something truly indulgent. Most recipes get this completely wrong, ending up dry or flat, but this one hits every note perfectly, like a well‑tuned piano.
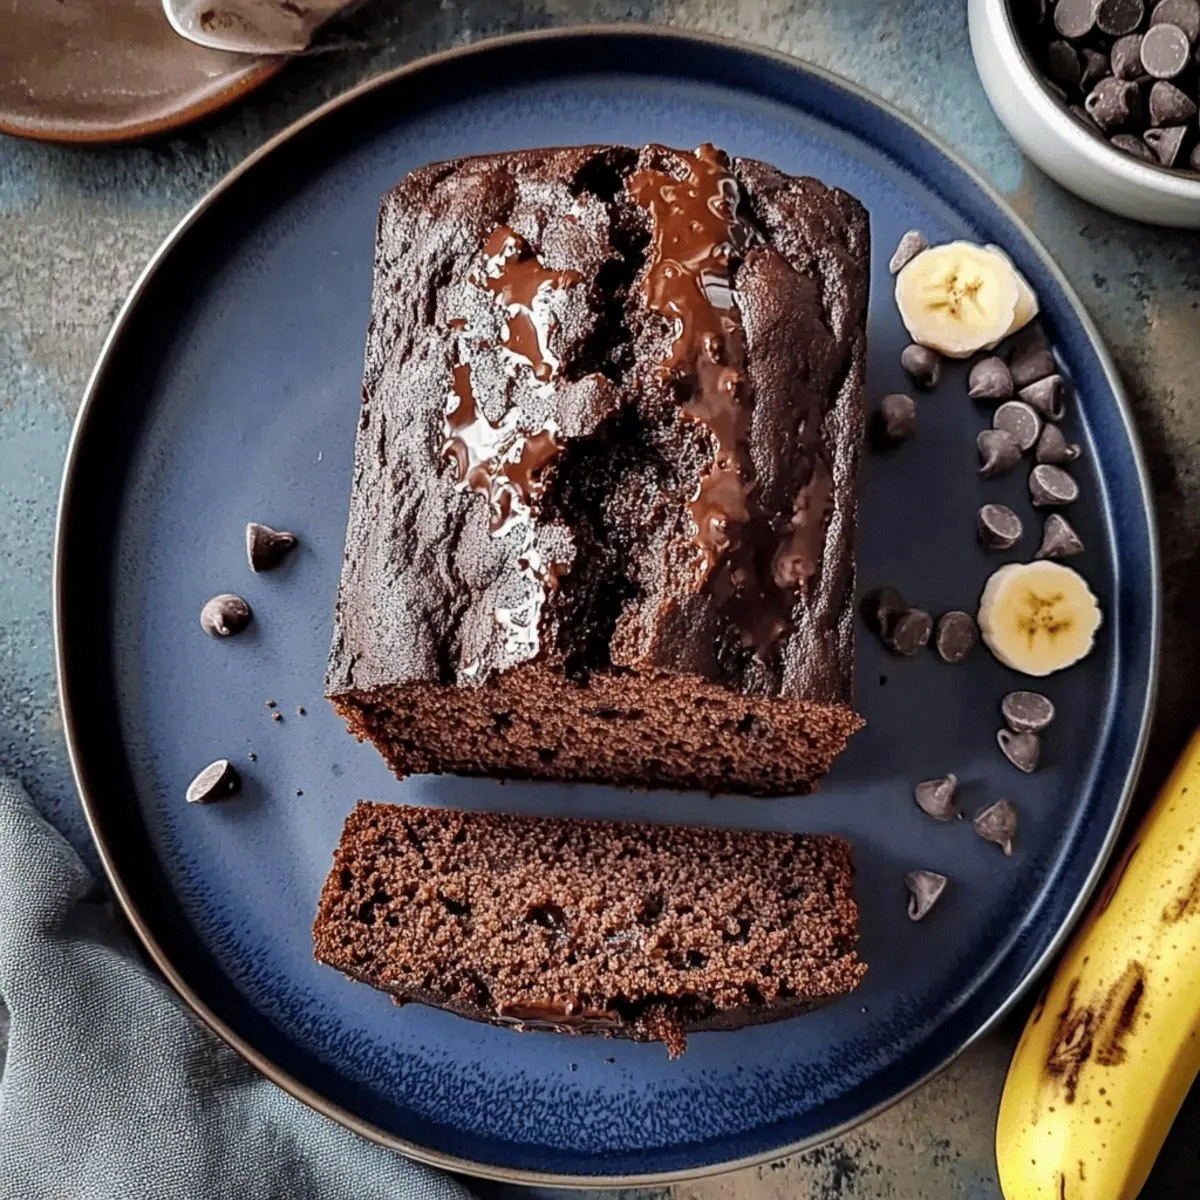
What makes this version stand out isn’t just the ingredients; it’s the method, the little tricks I’ve learned after countless burnt edges and soggy middles. I’ll be honest — I ate half the batch before anyone else got to try it, and that’s because the crumb is so moist it practically melts on your tongue. The secret? A splash of olive oil for richness, a dollop of sour cream for tenderness, and a finishing brûlée banana topping that crackles like caramelized sugar under a torch. Picture yourself pulling this out of the oven, the whole kitchen smelling like a boutique café, and the top gleaming with a caramelized banana crown.
Let me walk you through every single step — by the end, you’ll wonder how you ever made banana bread any other way. Okay, ready for the game‑changer? This next part? Pure magic. Stay with me here — this is worth it.
What Makes This Version Stand Out
- Moisture: The combination of olive oil and sour cream creates a crumb that stays soft for days, unlike traditional butter‑only breads that dry out.
- Flavor Depth: Espresso powder amplifies the chocolate, giving the loaf a sophisticated coffee‑kiss that’s more than just sweet.
- Texture Contrast: Dark chocolate chips melt into pockets of gooey bliss, while the brûléed banana topping adds a crisp, caramelized crunch.
- Simplicity: No fancy equipment needed – just a mixing bowl, a loaf pan, and a trusty kitchen timer.
- Crowd Reaction: This loaf has been called “the best version you’ll ever make at home” by friends who claim they’ve never tasted anything comparable.
- Ingredient Quality: Using high‑quality cocoa and fresh espresso powder makes a world of difference in the final taste.
- Cooking Method: Baking at a moderate temperature ensures an even rise without a dry exterior.
- Make‑Ahead Potential: It freezes beautifully, so you can enjoy a slice any time, even on a lazy Sunday morning.
Inside the Ingredient List
The Flavor Base
All Purpose Flour (1.5 cups): This is the structural backbone, providing the necessary gluten network. If you skip it or use too much, the loaf will either crumble or become dense. For a lighter crumb, sift the flour with the cocoa powder before measuring.
Cocoa Powder (0.5 cups): Gives the bread its rich, chocolatey heart. Choose a Dutch‑process cocoa for a smoother, less acidic flavor. Substituting with unsweetened chocolate will make the batter thicker and require a bit more liquid.
Espresso Powder (2 teaspoons): The espresso awakens the chocolate, creating a deep, almost bittersweet undertone. If you don’t have espresso powder, grind fresh espresso beans into a fine powder – just be careful not to over‑dose.
Brown Sugar (0.5 cups) & Granulated Sugar (0.25 cups): The duo balances moisture and sweetness. Brown sugar adds a hint of molasses, while granulated sugar contributes crispness. Using only one type will change the texture – expect a drier crumb with just granulated.
The Texture Crew
Olive Oil (0.33 cups): This oil keeps the loaf moist without the heaviness of butter. Its subtle fruitiness complements the banana and chocolate. If you’re allergic, swap with melted coconut oil – the flavor will shift slightly toward tropical.
Sour Cream (0.5 cups): The acidity breaks down gluten, resulting in a tender crumb. It also adds a slight tang that balances the sweetness. For a dairy‑free version, use coconut yogurt with the same consistency.
Eggs (2 large): Eggs bind everything together and add lift. Over‑beating can incorporate too much air, leading to a cake‑like texture; gentle folding is key. If you’re vegan, replace each egg with a “flax egg” (1 tbsp ground flax + 3 tbsp water).
The Unexpected Star
Dark Chocolate Chips (0.5 cups): These melt into molten pockets that surprise the palate. Opt for chips with at least 70% cacao for a less sweet, more intense flavor. If you’re allergic to chocolate, chopped toasted nuts make a great substitute.
Bananas (2 medium ripe): The natural sweetness and moisture from bananas are essential. Over‑ripe bananas give a stronger flavor, but if they’re too mushy, the batter can become watery. Mash them just until smooth – no large lumps.
The Final Flourish
Vanilla Extract (1 teaspoon): A classic enhancer that rounds out the flavors. Real vanilla bean paste would elevate the aroma even further, but pure extract works just fine.
Sliced Banana (1 large) & Granulated Sugar (1 tablespoon): This topping is brûléed just before serving, creating a caramelized crust that cracks delightfully under a fork. The sugar caramelizes, forming a glossy, slightly bitter edge that balances the sweet interior.
If you’ve ever struggled with a soggy top, you’re not alone — and I’ve got the fix: use a kitchen torch or broiler for just 30 seconds, watching the sugar melt and turn amber. This tiny step transforms the loaf from ordinary to show‑stopping.
Everything's prepped? Good. Let's get into the real action...
The Method — Step by Step
Preheat your oven to 350°F (175°C). While the oven warms, grease a 9‑×‑5‑inch loaf pan with a thin layer of olive oil, then line it with parchment for easy removal. The heat should be steady; an uneven oven can cause the top to brown too quickly while the center stays raw. That sizzle when it hits the pan? Absolute perfection.
In a large bowl, whisk together the flour, cocoa powder, baking soda, and kosher salt. This dry blend should be uniform in color, with no streaks of cocoa. Sifting at this stage ensures a lighter crumb and prevents clumps that could turn the loaf gummy.
In a separate medium bowl, combine the olive oil, brown sugar, and granulated sugar. Beat until the mixture becomes glossy and the sugars start to dissolve, about 2 minutes. This is where the magic of moisture begins; the oil emulsifies the sugars, creating a silky base.
Add the eggs, one at a time, whisking after each addition. Then stir in the vanilla extract and sour cream, mixing just until incorporated. Over‑mixing here will develop gluten and make the crumb tough; you want a smooth, slightly thick batter.
Fold the mashed bananas into the wet mixture, using a rubber spatula to create ribbons of banana throughout. The bananas should be fully integrated but still visible as small swirls – this gives you pockets of banana flavor in every bite.
Now combine the wet and dry components. Make a well in the center of the dry mix and pour the wet batter in slowly, folding gently. Stop mixing as soon as the flour disappears; a few streaks are okay. The batter will be thick but still pourable.
Stir in the espresso powder and dark chocolate chips, ensuring they’re evenly distributed. The espresso will dissolve into the batter, releasing its aroma. If you notice any clumps of espresso, sprinkle a tiny splash of hot water and stir – it will dissolve without making the batter watery.
Pour the batter into the prepared loaf pan, smoothing the top with a spatula. Arrange the sliced banana on the surface, then sprinkle the tablespoon of granulated sugar evenly. This will create the brûlée layer later.
Bake for 30‑35 minutes, or until a toothpick inserted into the center comes out with just a few moist crumbs. Around the 25‑minute mark, rotate the pan 180° to ensure even browning. The edges should start pulling away from the pan, a visual cue that the crumb is set.
When the loaf is done, turn on the broiler for 1‑2 minutes or use a kitchen torch to caramelize the top banana slices. Watch closely – you want a deep amber hue, not a burnt black. The sugar will crackle, forming a glossy, caramelized crown.
Allow the bread to cool in the pan for 10 minutes, then transfer it to a wire rack. Cooling lets the crumb set fully, preventing it from becoming gummy. Once cool, slice with a serrated knife for clean cuts.
That's it — you did it. But hold on, I've got a few more tricks that'll take this to another level...
Insider Tricks for Flawless Results
The Temperature Rule Nobody Follows
Always let your ingredients sit at room temperature before mixing. Cold eggs or sour cream can cause the batter to seize, leading to a tough crumb. I once tried skipping this step and ended up with a loaf that felt like a dense brownie. A quick 15‑minute sit‑out makes the batter smoother and the rise more uniform.
Why Your Nose Knows Best
When the loaf is about 20 minutes into baking, open the oven door just a crack and inhale. If you smell a deep, toasty chocolate‑coffee scent, you’re on track. If the aroma is faint or overly sweet, the oven might be too low – crank it up by 10°F and finish the bake. Trust your nose; it’s a better thermometer than any gadget.
The 5‑Minute Rest That Changes Everything
After removing the bread from the oven, let it rest in the pan for exactly five minutes before unmolding. This short pause lets the steam finish cooking the interior gently, resulting in a tender, not gummy, crumb. Skipping this step often leads to a crumb that collapses when sliced.
Don’t Over‑Mix the Flour
Over‑mixing is the silent killer of banana breads. Once the flour is added, stop stirring as soon as you no longer see dry spots. The gluten network should be just enough to hold the loaf together, not so developed that it becomes chewy. A friend tried beating for a full minute and ended up with a bread that tasted like rubber.
Caramelizing the Top Without a Torch
If you don’t own a kitchen torch, use the broiler on high for 30‑45 seconds. Keep a close eye; the sugar can go from glossy amber to bitter black in seconds. Position the rack so the top is about 6 inches from the heating element for even caramelization.
Creative Twists and Variations
This recipe is a playground. Here are some of my favorite ways to switch things up:
Nutty Crunch
Swap half of the chocolate chips for toasted pecans or walnuts. The nuts add a buttery crunch that contrasts with the soft crumb, making each bite a textural adventure.
Spiced Holiday
Add a teaspoon of ground cinnamon and a pinch of nutmeg to the dry mix. The warm spices turn the loaf into a festive treat perfect for winter brunches.
Double‑Espresso
Boost the coffee punch by adding an extra teaspoon of espresso powder and a drizzle of espresso‑infused simple syrup on top after baking. This version is a barista’s dream.
Fruit‑Burst
Fold in ¼ cup of dried cranberries or cherries along with the chocolate chips. The tartness of the dried fruit balances the sweet banana and chocolate, creating a bright flavor profile.
Vegan Velvet
Replace the eggs with flax eggs (1 tbsp ground flax + 3 tbsp water each) and swap the olive oil for melted coconut oil. Use coconut yogurt instead of sour cream. The result is a plant‑based loaf that still boasts that luxurious moisture.
Storing and Bringing It Back to Life
Fridge Storage
Wrap the cooled loaf tightly in plastic wrap or store it in an airtight container. It will stay fresh for up to 5 days in the refrigerator. For an extra moisture boost, place a slice of fresh banana on top before sealing.
Freezer Friendly
Slice the bread first, then wrap each slice individually in parchment and place them in a freezer bag. The loaf freezes beautifully for up to 3 months. When you’re ready, let a slice thaw at room temperature, then give it a quick 10‑second zap in the microwave.
Best Reheating Method
Preheat your oven to 300°F (150°C), place a slice on a baking sheet, and add a tiny splash of water (about a teaspoon) to the slice’s surface. Cover loosely with foil and heat for 8‑10 minutes. The steam revives the crumb, making it taste as fresh as the day it was baked.