I was in the middle of a chaotic Saturday night, the kind where the dishwasher is humming, the kids are demanding snacks, and my roommate just announced she’s bringing over a box of mint chocolate chip ice cream. I stared at the empty dessert plate and thought, “If only there was something that could tame this sugar tsunami and still feel like a guilty‑pleasure cheat.” Then, in a moment of sheer desperation (and a dash of culinary bravado), I tossed together a handful of Oreo crumbs, a splash of peppermint extract, and a pot of melted chocolate. The result? A bite‑sized explosion that made the ice cream look like a side dish. I dare you to taste this and not go back for seconds.
Imagine the scene: the kitchen filled with the warm, buttery scent of crushed cookies, the faint cool whisper of mint dancing through the air, and the glossy sheen of chocolate coating every curve like a midnight lake. You hear the soft pop of chocolate hitting the pan, the gentle thud of a spoon against the bowl, and the occasional sigh of satisfaction from the oven timer. Your fingers feel the silky smoothness of the ganache as you roll each truffle, and your tongue is greeted with a snap of crisp cookie followed by a melt‑in‑your‑mouth chocolate‑mint duet. That’s the sensory roller coaster we’re about to ride.
Most recipes for chocolate‑mint truffles either drown the mint in a swamp of chocolate or forget the crunchy Oreo heart entirely. This version stands out because it balances the minty zing with the earthy crunch of real Oreo cookies, all while staying surprisingly simple—no fancy tempering, no expensive equipment, just a bowl, a spatula, and a willingness to get a little messy. I’ll be honest — I ate half the batch before anyone else got to try it, and that’s a testament to how addictive these little gems are.
One thing you’ll notice right away is the secret weapon I’m about to reveal: a splash of heavy cream that turns the chocolate coating into a glossy, velvety armor that snaps cleanly when you bite, while still keeping the interior soft and gooey. Okay, ready for the game‑changer? Let me walk you through every single step — by the end, you’ll wonder how you ever made it any other way.
What Makes This Version Stand Out
- Taste: The mint isn’t overpowering; it’s a cool breeze that lifts the deep cocoa notes, creating a balanced flavor profile that feels luxurious yet familiar.
- Texture: A crisp, buttery Oreo crumb core meets a silky ganache exterior, delivering a satisfying contrast that makes each bite unforgettable.
- Simplicity: No tempering, no sous‑vide, just melt, mix, roll, and chill—perfect for a weeknight treat or an impressive party platter.
- Uniqueness: The addition of heavy cream in the coating gives a glossy finish that looks restaurant‑level without the hassle.
- Crowd Reaction: These truffles disappear faster than you can say “minty chocolate,” turning any gathering into an instant hit.
- Ingredient Quality: Using premium semisweet chocolate and real Oreo cookies ensures every component shines.
- Method: A quick chill step locks in shape, while a gentle roll in cocoa powder adds a subtle bitterness that balances the sweetness.
- Make‑Ahead Potential: Store them for up to a week and they’ll stay fresh, making them perfect for prep‑ahead parties.
Inside the Ingredient List
The Flavor Base
The heart of these truffles is a blend of cream cheese and butter. The cream cheese provides a tangy undertone that cuts through the richness of the chocolate, while the butter adds a buttery silkiness that makes the mixture easy to roll. If you skip the butter, you’ll end up with a crumbly texture that refuses to hold together, turning your truffle dreams into a crumb‑fest. For a dairy‑free twist, try a plant‑based cream cheese and coconut oil, but expect a slightly different mouthfeel.
The Texture Crew
Crushed Oreo cookies are the star crunch. They bring a caramelized cookie flavor and a light, airy structure that keeps the truffle from feeling dense. When selecting Oreos, go for the classic chocolate‑and‑cream version; double‑stuf or flavored varieties can overwhelm the mint and throw off the balance. A quick tip: place the cookies in a zip‑top bag and crush with a rolling pin for uniform crumbs.
The Unexpected Star
Peppermint extract is the secret whisper of cool that makes these truffles unforgettable. A little goes a long way—overdo it and you’ll taste a chemical after‑taste that no one wants. If you’re skeptical about artificial extracts, opt for a few drops of high‑quality peppermint oil or even fresh mint leaves finely minced. The mint not only flavors the ganache but also pairs beautifully with the dark chocolate’s bitterness.
The Final Flourish
The coating is a simple mixture of melted semisweet chocolate, heavy cream, and a pinch of cocoa powder for dusting. The heavy cream is the game‑changer: it creates a glossy sheen and a snap that feels like biting into a professionally tempered chocolate shell. If you’re watching calories, you can replace half the cream with coconut milk, but you’ll lose some of that luxurious snap. Finally, a dusting of cocoa powder adds a subtle bitterness that balances the sweet mint, creating a harmonious finish.
Everything's prepped? Good. Let’s get into the real action…
The Method — Step by Step
Start by crushing 24 Oreo cookies (about 2 cups) into fine crumbs. I like to do this in a zip‑top bag with a rolling pin—quick, quiet, and it keeps the crumbs from scattering across the kitchen. Once crushed, spread the crumbs on a baking sheet and pop them into the freezer for five minutes; this firms them up and makes the next step smoother. Pro tip: If you don’t have a freezer, just chill the bowl for a couple of minutes.
While the crumbs chill, combine 8 oz of softened cream cheese, 1/2 cup melted unsalted butter, and 1 tsp peppermint extract in a large mixing bowl. Beat with a hand mixer on medium speed until the mixture is silky and homogenous—this should take about two minutes. The scent of peppermint will fill the room, and you’ll know you’re on the right track. Watch Out: Over‑mixing can incorporate too much air, making the truffle mixture too light and prone to falling apart later.
Remove the chilled Oreo crumbs from the freezer and fold them into the cream cheese mixture. Use a spatula to press the crumbs into the mixture, ensuring every crumb is coated. The mixture should feel thick, almost dough‑like, and should hold together when pressed between your fingers. If it feels too dry, add a tablespoon of milk; if too wet, sprinkle in a little extra crushed Oreo.
Shape the mixture into uniform 1‑inch balls. This is the fun part—roll each ball between your palms, feeling the cool mint and buttery crumb blend. Place the balls on a parchment‑lined tray and refrigerate for at least 30 minutes; this firming step is crucial for a clean chocolate coating later.
While the truffles chill, prepare the chocolate coating. In a saucepan over low heat, combine 2 cups semisweet chocolate chips and 1/4 cup heavy cream. Stir constantly; the mixture should become a glossy, smooth ganache that emits a faint, sweet aroma. Once fully melted, remove from heat and let it cool slightly—this is the moment of truth where the coating will be thick enough to coat but not so hot that it melts the truffles.
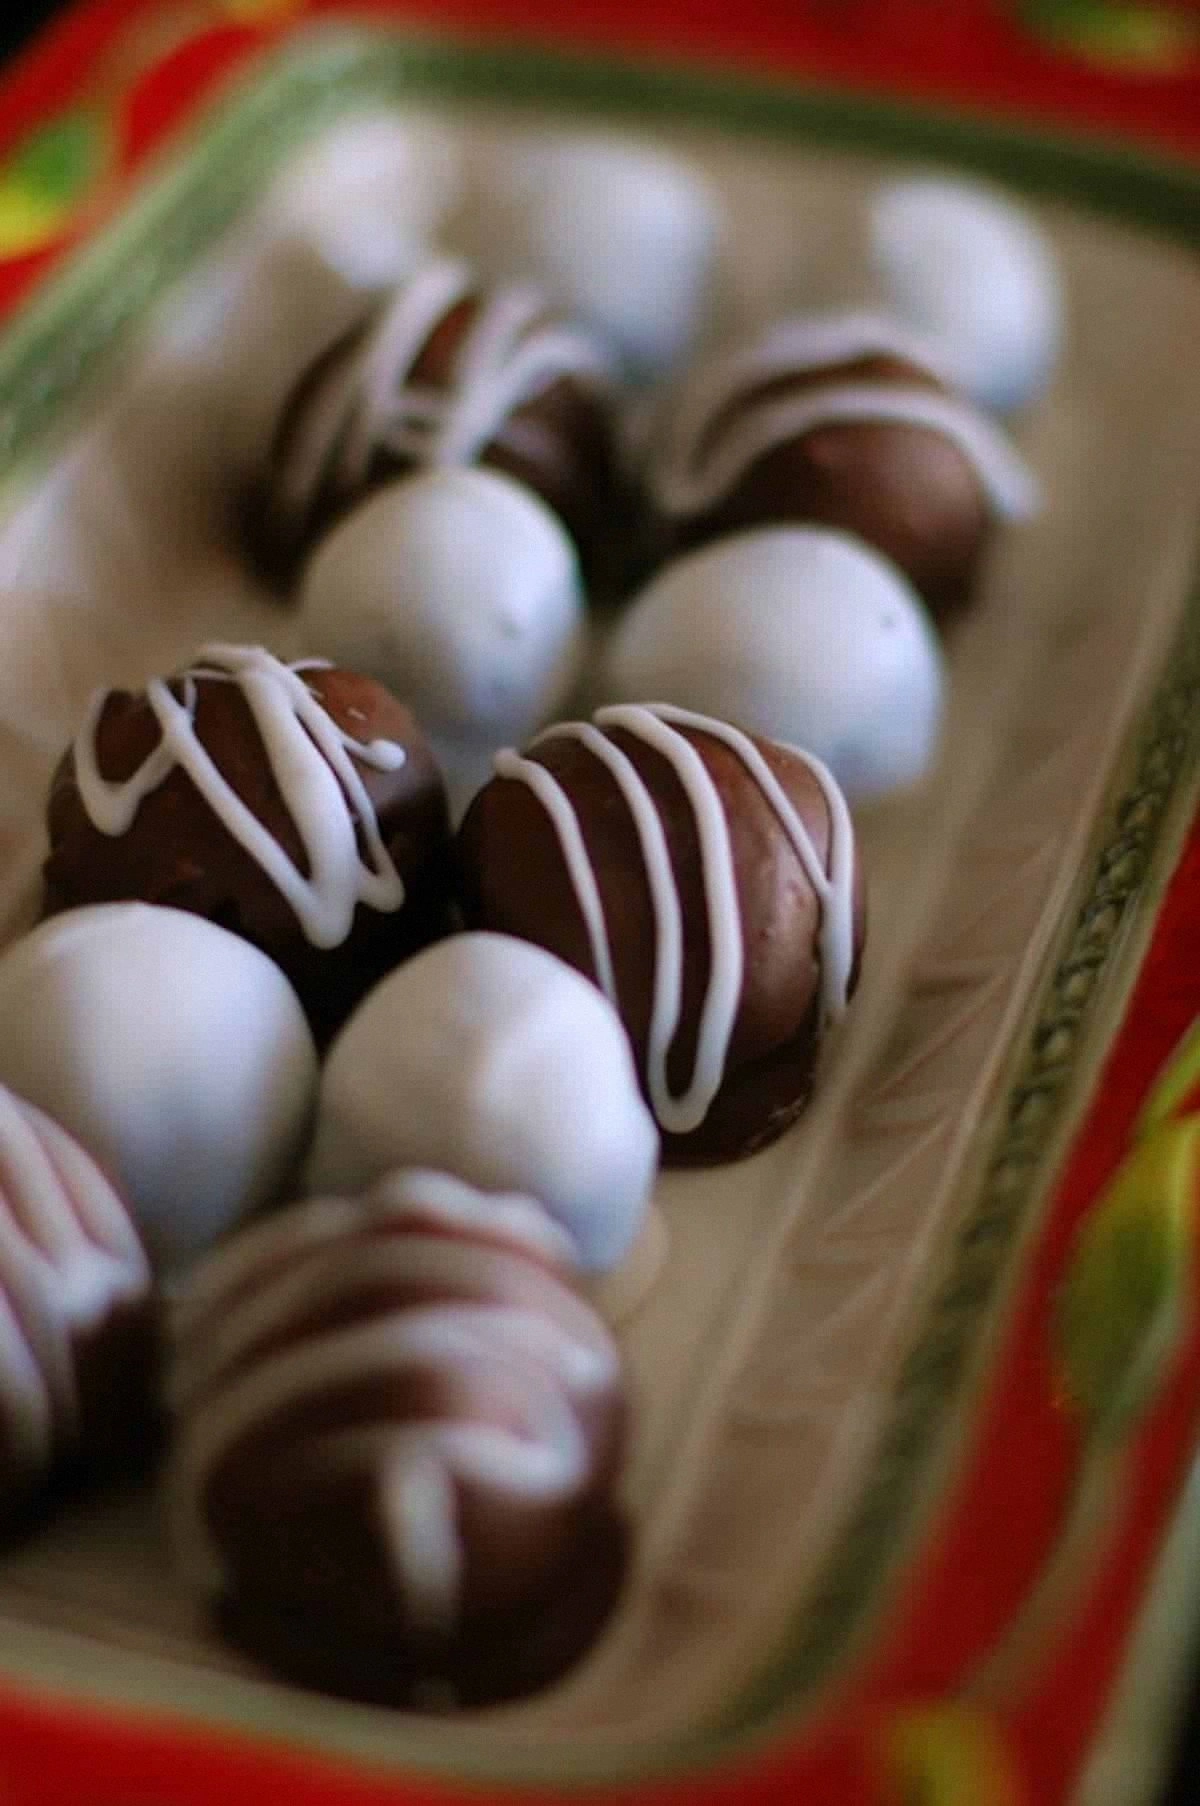
One by one, dip each chilled truffle into the ganache, using a fork to lift it out and letting excess chocolate drip back into the bowl. Tap the fork gently against the side of the bowl to remove drips, then place the coated truffle back onto the parchment. The chocolate should set within a minute, forming a thin, glossy shell.
While the coating is still soft, dust each truffle with a light coating of cocoa powder. This adds a subtle bitterness that balances the sweet mint and gives the truffle an elegant matte finish. If you want a pop of color, a pinch of green food coloring mixed into the cocoa works beautifully.
Allow the truffles to set completely at room temperature for 15 minutes, then transfer the tray to the refrigerator for an additional 20 minutes. This final chill locks in the texture, ensuring the interior stays creamy while the exterior stays firm.
Serve the truffles on a decorative platter, garnish with a few fresh mint leaves for visual flair, and watch your guests swoon. Picture yourself pulling this out of the fridge, the whole kitchen smelling incredible, and the first bite delivering that perfect snap‑and‑melt sensation. That's it — you did it. But hold on, I've got a few more tricks that'll take this to another level...
Insider Tricks for Flawless Results
The Temperature Rule Nobody Follows
Chocolate is fickle; it loves a precise temperature range. Keep your ganache between 90°F and 115°F; any hotter and you risk melting the truffle cores, any cooler and the coating will become grainy. A candy thermometer is a cheap investment that pays off in glossy perfection. I once tried to skip this step, and the coating turned into a dull, chalky mess that no amount of cocoa dust could hide.
Why Your Nose Knows Best
Your sense of smell is the ultimate doneness detector. When the chocolate ganache starts to emit a faint roasted aroma, that’s your cue that the butterfat is fully incorporated and the coating will set with a snap. If the scent is still raw or buttery, keep stirring a few seconds longer. Trust your nose; it’s more reliable than any timer.
The 5‑Minute Rest That Changes Everything
After shaping the truffle balls, let them rest uncovered for five minutes before chilling. This brief air‑dry period allows the surface to form a thin film, which helps the chocolate adhere more uniformly. Skipping this step leads to a “slippery” surface where the coating slides off like a bad haircut.
The Double‑Dip Technique
For an ultra‑smooth finish, dip each truffle twice: first for a thin base layer, let it set for 30 seconds, then dip again for a thicker, more robust shell. This method creates a professional‑grade sheen that even the most discerning chocolate lovers will notice. I tried this on a whim once, and the truffles looked so glossy that my friends thought I’d bought them from a boutique patisserie.
The Secret of the Chill
Never skip the initial refrigeration of the truffle cores. A firm interior prevents the chocolate from sliding off during the dip, and it also speeds up the setting time, letting you finish a batch in under an hour. If you’re in a hurry, a quick 10‑minute blast in the freezer works, but be careful—too cold and the chocolate may crack as it contracts.
Creative Twists and Variations
This recipe is a playground. Here are some of my favorite ways to switch things up:
White Chocolate Peppermint
Swap the semisweet chocolate for white chocolate and increase the peppermint extract to 1½ tsp for a brighter, sweeter profile. The contrast between the white coating and dark Oreo core creates a stunning visual and flavor surprise that kids adore.
Espresso Crunch
Add 1 tsp finely ground espresso to the crushed Oreos before mixing. The coffee notes deepen the chocolate flavor, turning the truffles into an elegant after‑dinner bite that pairs beautifully with a glass of port.
Nutty Delight
Fold in ¼ cup toasted chopped hazelnuts or almonds into the Oreo‑cream cheese mixture. The nutty crunch adds another texture layer and makes the truffles feel more substantial, perfect for a brunch buffet.
Spicy Mint
Introduce a pinch of cayenne pepper or a dash of chili powder to the chocolate ganache. The subtle heat amplifies the mint, creating a tantalizing sweet‑heat combo that will wow adventurous eaters.
Vegan Version
Replace cream cheese with a vegan cream cheese alternative, butter with coconut oil, and use dairy‑free chocolate chips. The texture remains indulgent, and the mint still shines through, proving that you don’t need dairy to create decadence.
Storing and Bringing It Back to Life
Fridge Storage
Place the truffles in an airtight container lined with parchment paper. They’ll stay fresh for up to 7 days, retaining their creamy interior and glossy coating. If condensation forms, gently pat the tops with a paper towel before serving.
Freezer Friendly
For longer storage, arrange the truffles on a baking sheet, freeze for 2 hours, then transfer to a zip‑top freezer bag. They’ll keep for up to 3 months. When you’re ready to enjoy, let them thaw in the fridge for 30 minutes, then add a tiny splash of heavy cream and give a quick stir to revive the sheen.
Best Reheating Method
If the coating has dulled, microwave the truffles for 5‑10 seconds, then drizzle a teaspoon of melted chocolate over each and let it set. The added chocolate restores the glossy finish and adds a fresh burst of flavor.