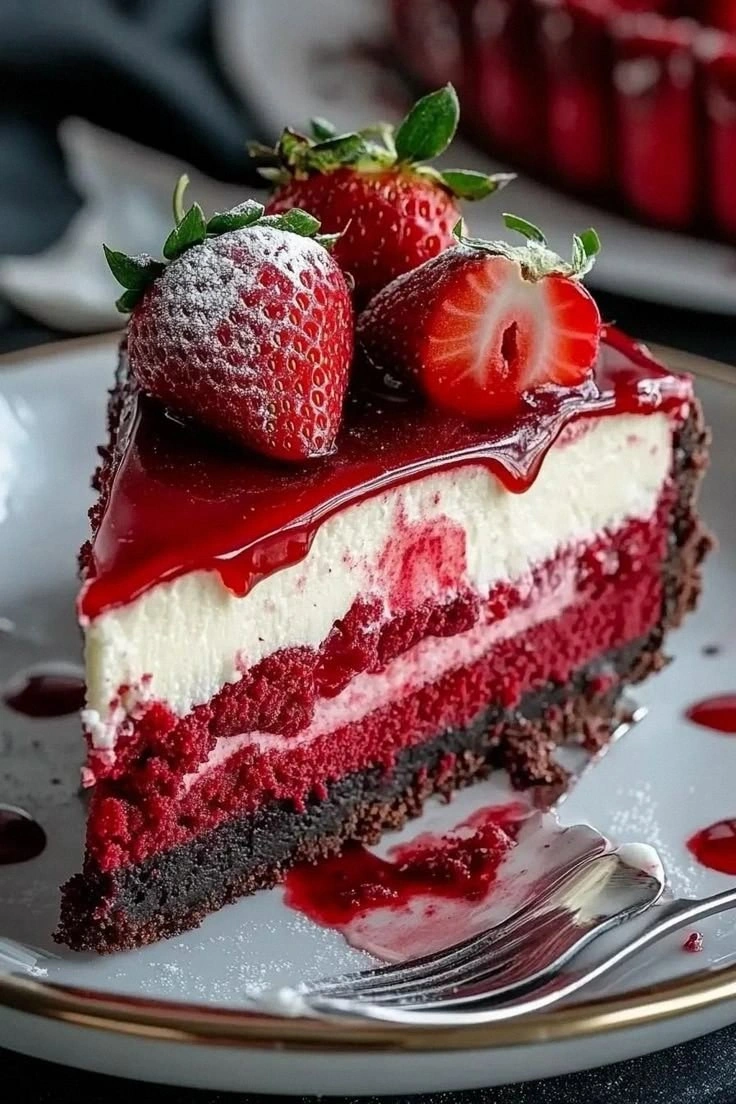
I was standing in my kitchen, staring at a ruined batch of red velvet cake that had turned into a soggy, pinkish slab, when the phone rang. My friend, a self‑proclaimed dessert queen, dared me to beat her signature strawberry cheesecake in a single afternoon. I laughed, grabbed my apron, and declared, “I’m going to create a red velvet strawberry cheesecake that will make even the most stubborn skeptics weep.” The kitchen lights flickered, the timer buzzed, and the aroma of butter, vanilla, and fresh strawberries began to mingle in the air.
Picture the scene: a pot of cream cheese melting over a gentle heat, the hiss of fresh strawberries sizzling into a glossy puree, and the sweet scent of graham crackers baking into a buttery crust. My senses were assaulted by the deep crimson of the food coloring, the subtle tang of lemon juice, and the comforting crackle of a parchment‑lined pan. Every sound—from the gentle clink of a spoon to the rhythmic beat of the mixer—felt like a drumbeat in a culinary symphony. I could almost taste the velvety finish that would slide off the spoon like a ribbon, the strawberries bursting with juice, and the subtle zing of citrus lifting the richness.
What sets this version apart from the endless list of red velvet cheesecakes floating on Pinterest is not just the recipe itself, but the way each component is treated with reverence. I’ve distilled the classic into a streamlined process that preserves texture, flavor, and color, while eliminating the common pitfalls that turn a dream dessert into a disappointment. From a crust that’s crisp on the outside and chewy on the inside, to a filling that balances creaminess with a hint of tartness, every bite is an invitation to indulge without guilt.
And there’s a twist you won’t expect: a touch of espresso powder in the filling that deepens the chocolate undertones without making it taste like a coffee shop. It’s a secret that elevates the red velvet experience to a whole new level, making the cheesecake not just a dessert, but a conversation starter. I dare you to taste this and not go back for seconds—because once you’ve had one, the rest will feel like a compromise.
Let me walk you through every single step—by the end, you’ll wonder how you ever made it any other way. The journey from pantry to plate is about precision, timing, and a few little hacks that will make the process feel more like a dance than a chore.
What Makes This Version Stand Out
- Texture: The crust is baked to a golden‑brown crispness that contrasts with the silky, airy filling. The result is a delightful bite that starts with a crunch and ends in a melt‑in‑your‑mouth finish.
- Flavor: The addition of espresso powder subtly amplifies the chocolate undertones, while lemon juice provides a bright counterpoint that keeps the cheesecake from feeling heavy.
- Color: Natural red food coloring derived from beet juice ensures a vibrant hue that doesn’t fade, even after refrigeration.
- Ease: The recipe requires no advanced techniques—mixing, baking, and chilling are all straightforward, making it perfect for both novices and seasoned bakers.
- Make‑ahead: Once baked, the cheesecake can be stored in the refrigerator for up to a week, allowing you to serve it fresh on a rainy Sunday or a last‑minute dinner party.
- Crowd‑pleaser: The combination of red velvet and strawberries is a crowd‑pleasing duo that feels festive yet comforting, ideal for birthdays, anniversaries, or any celebratory gathering.
- Ingredient Quality: Using high‑quality cream cheese and fresh strawberries makes a noticeable difference in both taste and texture, proving that a little investment pays off.
- Versatility: The base can be adapted into mini cheesecakes, cheesecake bars, or even a layered parfait, offering endless serving possibilities.
Alright, let’s break down exactly what goes into this masterpiece…
Inside the Ingredient List
The Flavor Base
Cream cheese is the heart of any cheesecake. It delivers the rich, tangy foundation that balances the sweetness of the strawberries and the chocolate undertones. Use a brand with a fat content of 33% to ensure a smooth, creamy texture. If you’re prone to lumps, let the cream cheese sit at room temperature for at least 30 minutes before mixing.
Sour cream adds a silky, slightly acidic layer that lightens the overall mouthfeel. It also helps to stabilize the filling, preventing cracks during baking. When measuring, choose a full‑fat version; low‑fat sour cream tends to separate and can cause a grainy texture.
Powdered sugar, or confectioners’ sugar, is the sweetener of choice because it dissolves quickly, eliminating the gritty feel of granulated sugar. It also contributes to the smoothness of the batter. If you prefer a less sweet cheesecake, reduce the amount by a quarter cup and compensate with a splash of vanilla for depth.
The Texture Crew
Eggs are the glue that binds everything together. They provide structure while keeping the cheesecake tender. Use fresh, free‑range eggs for the best flavor. If you’re concerned about cholesterol, you can replace one egg with an equal amount of unsweetened applesauce.
Red food coloring derived from beet juice or natural dyes ensures a vibrant hue that remains stable after baking and refrigeration. Too much can make the cheesecake taste metallic; too little will give it a pale pink that looks less dramatic. Aim for 2 tablespoons for a rich, even color.
Graham cracker crumbs form the base. They add a subtle sweet crunch and a buttery undertone that complements the creamy filling. For a gluten‑free option, use certified gluten‑free crackers or a blend of almond flour and coconut flour.
The Unexpected Star
Espresso powder is the secret ingredient that deepens the chocolate flavor without making the cheesecake taste like coffee. It’s a subtle nuance that most recipes overlook. Add 1 teaspoon to the batter and you’ll notice a richer, more complex profile.
Fresh strawberries are the star of the show. They provide natural sweetness, bright color, and a juicy burst that cuts through the richness of the cream cheese. Use ripe, firm strawberries for the best flavor; if you’re out of season, frozen strawberries can work—just thaw and drain well to avoid excess water.
The Final Flourish
Whipped cream is optional but highly recommended for topping. It adds a light, airy finish that balances the density of the cheesecake. Beat until soft peaks form and fold in a tablespoon of powdered sugar for added sweetness.
Lemon juice is used in both the filling and the glaze. It brightens the flavor profile and helps to prevent the cheesecake from becoming too sweet. A teaspoon in the batter and an additional tablespoon in the glaze are sufficient.
Powdered sugar for the glaze adds a glossy finish and a hint of sweetness that complements the strawberries. It also helps to set the glaze so it doesn’t run when you slice the cheesecake.
Everything’s prepped? Good. Let’s get into the real action…
The Method — Step by Step
- Preheat the oven to 325°F (160°C). Line a 9‑inch springform pan with parchment paper, leaving an overhang on the sides for easy removal. This step ensures the crust cooks evenly and doesn’t stick. The parchment also creates a slight barrier that prevents the crust from becoming overly dry.
- In a medium bowl, combine graham cracker crumbs, melted butter, and 2 tablespoons of sugar. Stir until the mixture resembles wet sand. Press the crumb mixture firmly into the bottom of the prepared pan, then tap the pan gently on the counter to level the crust. This compacts the crumbs and creates a stable base for the cheesecake.
- Bake the crust for 10 minutes, then remove from the oven and let it cool while you prepare the filling. The crust should be golden and aromatic, with a slight crunch that will contrast beautifully with the filling. If you prefer a softer crust, reduce the baking time by a minute.
- In a large mixing bowl, beat the softened cream cheese on medium speed until smooth and creamy. Scrape the sides frequently to ensure no lumps remain. A smooth base is essential for a silky filling that won’t crack.
- Add powdered sugar, sour cream, vanilla extract, lemon juice, and espresso powder to the cream cheese. Beat until well combined and fluffy. The mixture should be light and airy, with no visible lumps.
- Fold in the fresh strawberry puree gently, ensuring an even distribution of color and flavor. The puree should be smooth, not chunky. If you prefer a more pronounced strawberry flavor, reserve a few whole strawberries for topping later.
- Pour the batter over the cooled crust, smoothing the top with a spatula. Tap the pan lightly to release any air pockets. This step is critical to avoid cracks during baking.
- Bake the cheesecake in the preheated oven for 45 minutes, or until the edges are set and the center still has a slight wobble. A perfectly baked cheesecake should have a glossy finish and a faint crackle when you tap the top. If the edges brown too quickly, cover them loosely with foil.
- Remove the cheesecake from the oven and let it cool in the pan for 15 minutes. Then, run a knife around the edges to loosen it before placing it on a wire rack to cool completely. This prevents the cheesecake from cracking as it cools.
- Once cooled, refrigerate the cheesecake for at least 4 hours, preferably overnight. Chilling allows the flavors to meld and the texture to set. When you’re ready to serve, run a knife around the edge again to ensure a clean release.
- Prepare the strawberry glaze by whisking powdered sugar and lemon juice together until smooth. Drizzle the glaze over the chilled cheesecake, letting it pool slightly for a glossy finish. Finish with sliced strawberries on top for a burst of color and freshness.
That's it — you did it. But hold on, I've got a few more tricks that'll take this to another level…
Insider Tricks for Flawless Results
The Temperature Rule Nobody Follows
Many bakers bake cheesecake at 350°F, which can cause the center to overcook and crack. The secret is to bake at a lower temperature—325°F—and rely on the gentle heat to set the filling slowly. This prevents the edges from cooking faster than the center, keeping the texture smooth.
Why Your Nose Knows Best
If you notice a sour or metallic scent while mixing the batter, the cream cheese might be too cold or overmixed. Let the cream cheese sit at room temperature for at least 30 minutes before mixing, and keep the mixer speed low to avoid incorporating too much air.
The 5-Minute Rest That Changes Everything
After baking, let the cheesecake rest in the oven with the door slightly ajar for 5 minutes. This gradual cooling prevents the surface from cracking and allows the interior to set more evenly.
Using a Water Bath for Perfection
Wrapping the springform pan in foil and placing it in a larger pan filled with a few inches of hot water creates a water bath. This technique keeps the heat even, preventing the edges from overbaking while the center remains tender.
Choosing the Right Strawberries
Opt for organic or locally sourced strawberries when possible. They tend to have a higher sugar content and a brighter flavor. If you’re using frozen strawberries, thaw them at room temperature and press out excess moisture to avoid a watery filling.
Storing the Crust Separately
If you’re planning to serve the cheesecake on a different day, keep the crust separate until just before serving. A dry crust will stay crisp, while a moist crust can become soggy when left in the fridge with the filling.
Creative Twists and Variations
This recipe is a playground. Here are some of my favorite ways to switch things up:
Chocolate‑Red Velvet Cheesecake
Replace half of the cream cheese with mascarpone for a lighter texture and add 1/4 cup of melted dark chocolate to the batter. The result is a decadent chocolate‑red velvet cheesecake that satisfies both chocolate and red velvet lovers.
Berry Medley Cheesecake
Swap the strawberries for a mix of blueberries, raspberries, and blackberries. Keep the same ratio of puree to batter for a colorful, fruity twist that still keeps the classic red velvet base.
Almond Crust Variation
Use almond flour and coconut oil to create a gluten‑free crust that pairs wonderfully with the strawberry filling. The nutty flavor adds an extra layer of complexity to each bite.
Caramel Swirl Cheesecake
Fold a swirl of homemade caramel sauce into the batter before baking. The caramel adds a buttery sweetness that contrasts beautifully with the tangy cream cheese.
Mini Cheesecake Bites
Divide the batter into mini muffin tins and bake for 20 minutes. These bite‑size treats are perfect for parties and can be topped with a single strawberry and a drizzle of glaze.
Vegan Red Velvet Cheesecake
Replace cream cheese with a tofu‑based cream cheese alternative, use coconut milk instead of sour cream, and ensure the crust is vegan‑friendly. This version maintains the same flavor profile while being plant‑based.
Storing and Bringing It Back to Life
Fridge Storage
Store the cheesecake in an airtight container in the refrigerator for up to 5 days. Keep it wrapped in plastic wrap to prevent it from absorbing fridge odors. Before serving, let it sit at room temperature for 20 minutes to soften slightly.
Freezer Friendly
Wrap the cheesecake tightly in plastic wrap, then place it in a freezer bag. It can be stored for up to 2 months. Thaw overnight in the fridge, then bring to room temperature before serving.
Best Reheating Method
To reheat, place the cheesecake on a baking sheet and warm in a 300°F (150°C) oven for 10 minutes. Add a splash of water to the pan to create steam, which keeps the cheesecake moist and prevents it from drying out. Let it cool slightly before slicing.