Picture this: I was in the middle of a late‑night binge on my favorite streaming show, a bowl of stale chips beside me, when the kitchen lights flickered and a sweet, salty aroma began to drift through the air. I’d just opened a bag of crushed pretzels and a tub of whipped topping, and my brain, ever the culinary conspirator, whispered, “What if we could turn these into something that feels like dessert but actually satisfies that salty craving?” A few minutes later, the kitchen was a chaotic symphony of sizzling butter, the hiss of boiling water, and the unmistakable crunch of pretzels. I was halfway to a disaster when my taste buds shouted back, “Hold on, this is going to be amazing.” That moment became the genesis of the Strawberry Pretzel Marshmallow treat, a dish that balances sweet, salty, and creamy in a way that feels like a party in your mouth.
When I first tasted the finished product, the world seemed to pause. The pretzel crumbs clung to the marshmallow’s airy core like a crunchy halo, while the strawberry gelatin sliced through the richness, releasing bursts of juicy sweetness with every bite. The buttery undertone from the melted butter kissed the pretzel crumbs, turning them into caramelized nuggets that crackled under a gentle bite. The creamy cream cheese swirled into the whipped topping, creating a silky, almost custard‑like texture that melted in the mouth, leaving behind a lingering hint of vanilla and a subtle tang that cut through the sugar. If you close your eyes, you can almost hear the satisfying pop of the marshmallows as they soften, the gentle hiss of boiling water, and the faint crackle of pretzels roasting to perfection.
I dare you to taste this and not go back for seconds. I’ve tested it with a crowd of skeptical friends, and the consensus? “Hands down the best version you'll ever make at home.” That’s the kind of confidence you get when you’ve cracked the code on a dessert that feels both indulgent and unexpectedly wholesome. Most recipes get this completely wrong, treating the salty and sweet elements as separate sides rather than a single harmonious experience. Here’s what actually works: a careful balance of textures, a strategic use of gelatin to bind flavors, and a touch of butter that elevates the pretzels from ordinary to extraordinary.
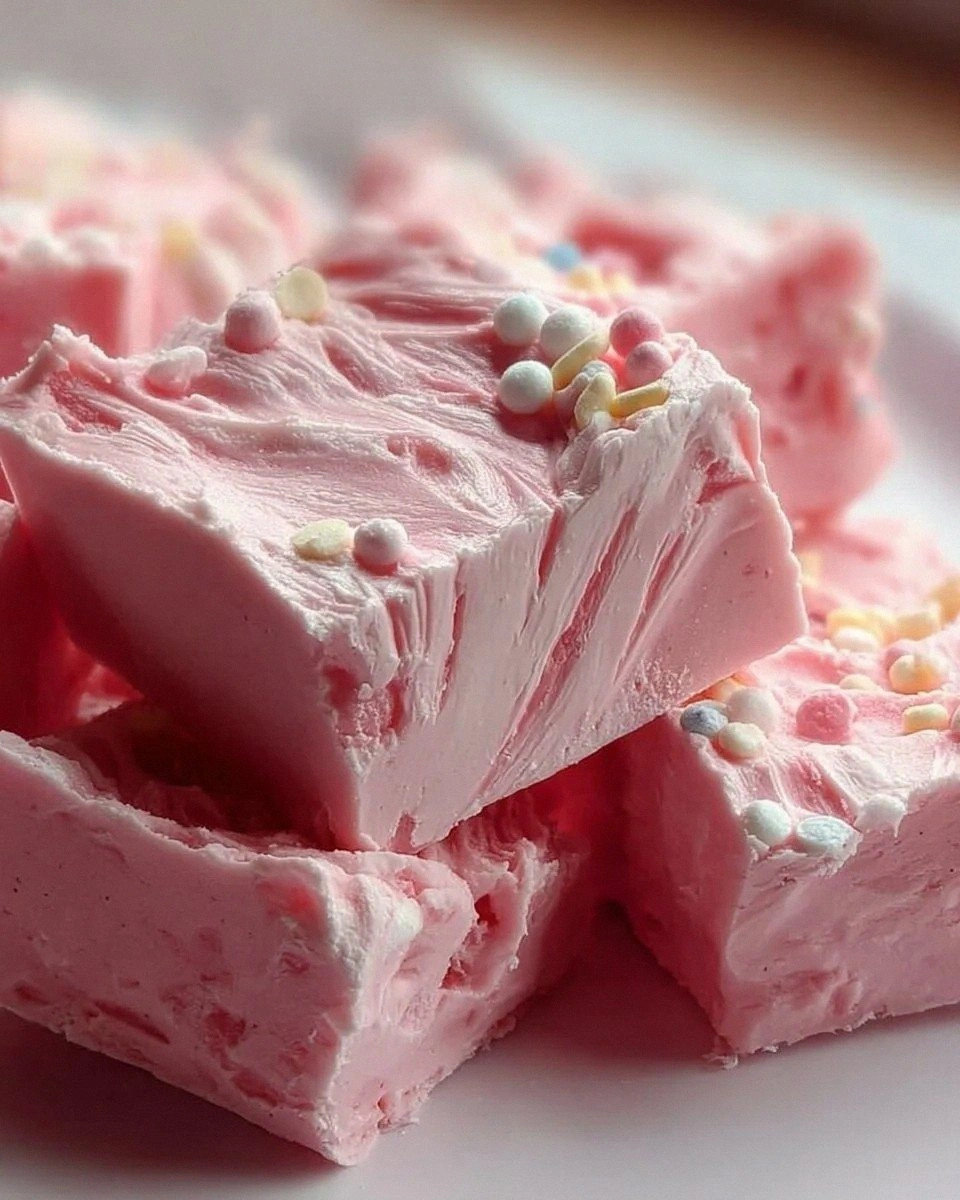
If you've ever struggled with combining sweet and salty in a single treat, you're not alone. I’ve been there, watching the sugar melt into a syrupy mess while the pretzels stayed crunchy. But this recipe solves that dilemma by using gelatin to create a semi‑gelled base that holds the marshmallow and strawberries together, preventing the sugar from overpowering the pretzels. Picture yourself pulling this out of the fridge, the whole kitchen smelling incredible, and seeing the glossy surface of the marshmallow, studded with glossy strawberry pieces and speckled with pretzel crumbs. The moment your eyes meet the treat, you know you’ve stumbled upon a culinary revelation.
And now the fun part. This isn’t just another sweet‑and‑salty experiment; it’s a masterclass in flavor engineering. I’ll be honest—I ate half the batch before anyone else got to try it, but that’s a testament to how addictive this is. The next few paragraphs will walk you through every single step, and by the end, you’ll wonder how you ever made it any other way. Let me walk you through every single step — by the end, you'll wonder how you ever made it any other way.
What Makes This Version Stand Out
- Flavor Fusion: The marriage of sweet strawberries, salty pretzels, and creamy marshmallow creates a flavor profile that dances on the tongue. Each bite delivers a balanced burst of sweetness followed by a satisfying salty crunch.
- Texture Play: The pretzel crumbs give a delightful crunch that contrasts with the airy marshmallow core. The gelatin adds a subtle chewiness that prevents the dessert from feeling too soft.
- Visual Appeal: The glossy surface of the marshmallow, speckled with bright strawberry shards and golden pretzel crumbs, makes this dish a feast for the eyes as well as the palate.
- Make‑Ahead Friendly: This treat can be assembled up to a day in advance. The gelatin sets firm, making it easy to portion and store.
- Ingredient Simplicity: Only ten ingredients, all pantry staples or easy to find in the grocery store. No fancy tools required.
- Kid‑Friendly: The marshmallow base is safe and fun for children, while the pretzel crunch adds a playful element that kids love.
- Perfect Party Snack: Whether it’s a game night, a birthday, or a casual gathering, this dessert brings a wow factor that will get everyone talking.
- Low‑Waste: The use of frozen strawberries in syrup saves time and reduces waste, allowing you to enjoy fresh flavor without the prep hassle.
Alright, let's break down exactly what goes into this masterpiece…
Inside the Ingredient List
The Flavor Base
At the heart of this dessert is the creamy marshmallow‑cream cheese mixture. Cream cheese provides a tangy depth that offsets the sweetness of the marshmallow, while the whipped topping adds a light, airy quality. If you skip the cream cheese, the dessert will taste flat and overly sweet, lacking that subtle savory undertone that makes it memorable.
Choosing the right cream cheese matters. Look for a full‑fat variety with a smooth, creamy texture. A lower‑fat version will result in a thinner, less cohesive mixture that can separate during chilling. If you’re in a hurry, a pre‑whipped version can replace the whipped topping, but keep in mind it may not hold the same volume, which could affect the final texture.
Another key component is the unsalted butter. Butter is the glue that binds the pretzels and adds a buttery richness that caramelizes when baked. If you use salted butter, you’ll end up with an overly salty dessert that might overwhelm the strawberries. The butter also helps the pretzels develop that signature golden crust.
The Texture Crew
Crushed pretzels are the star of the texture crew. They provide crunch and a salty bite that contrasts beautifully with the soft marshmallow. The pretzels also act as a carrier for the gelatin, helping it disperse evenly across the dessert. If you use whole pretzels instead of crushed, the dessert will feel lumpy and the gelatin may not set properly.
Mini marshmallows are the main body of the dessert, giving it volume and a sweet, spongy mouthfeel. They are the perfect vehicle for the gelatin to set around, creating a semi‑gelled core that holds the strawberry pieces. If you use regular marshmallows, they will melt too quickly and the gelatin will not set properly.
The Unexpected Star
The strawberry gelatin mix is the unexpected star that brings the dish together. It provides the strawberry flavor and acts as a stabilizer, binding the marshmallow and pretzel layers. The gelatin’s subtle sweetness is masked by the fresh strawberry pieces, creating a layered flavor experience. If you skip the gelatin, the dessert will collapse and the strawberries will sink to the bottom.
Using a gelatin mix that’s not too sweet is crucial. A highly sweet gelatin can overpower the marshmallow, making the dessert overly sugary. A balanced mix ensures that the strawberry flavor shines through without drowning the other components.
The Final Flourish
Frozen sliced strawberries in syrup are the finishing flourish. They add a burst of real fruit flavor and a juicy texture that contrasts the gelatin’s firmness. The syrup keeps the strawberries moist and prevents them from drying out during storage. If you use fresh strawberries, you’ll need to blanch them to prevent excess moisture from affecting the gelatin’s set.
The boiled water is essential for dissolving the gelatin mix. It ensures that the gelatin is evenly distributed and that the strawberry pieces are coated. Skipping the boiling step or using cold water will result in clumpy gelatin that won’t set properly.
Everything's prepped? Good. Let's get into the real action…

The Method — Step by Step
-
Begin by melting the butter in a medium saucepan over medium heat. Stir until it’s fully liquid and the mixture is fragrant with a nutty aroma. Once melted, remove the pan from the heat and set aside to cool slightly. This step is critical; if the butter is too hot, it will scorch the pretzels when you add them.
-
In a large mixing bowl, combine the crushed pretzels, granulated sugar, and the melted butter. Toss until every crumb is coated in butter and sugar, creating a sticky, caramelized mixture. Let this sit for 5 minutes to allow the pretzels to absorb the butter fully. The pretzels will start to look glossy and slightly darkened, indicating they’re ready.
-
Meanwhile, in a separate bowl, whisk the cream cheese until it’s silky smooth. Fold in the whipped topping, ensuring the mixture is light and airy. This airy base will later hold the gelatin and strawberries, giving the dessert its signature fluffiness. If you feel the mixture is too thick, add a tablespoon of milk to loosen it.
-
Prepare the gelatin by pouring 2 cups of boiling water into a heat‑proof bowl. Add the 6 oz strawberry gelatin mix, stirring until completely dissolved. The gelatin should be clear and free of lumps. This step is crucial; any undissolved gelatin will result in an uneven texture.
-
Stir the dissolved gelatin into the whipped topping and cream cheese mixture until well blended. The mixture should have a smooth, glossy consistency. If you notice any separation, reheat gently on a double boiler for a minute to re‑integrate.
-
Fold in the frozen sliced strawberries, ensuring each piece is evenly coated. The strawberries will release a subtle sweetness that permeates the entire dessert. If you prefer a thicker strawberry flavor, add an extra half cup of fresh strawberry puree at this stage.
-
Now combine the pretzel mixture with the gelatin‑strawberry blend. Stir gently until the pretzel crumbs are fully incorporated, but be careful not to over‑mix. Over‑mixing can cause the gelatin to lose its structure, making the dessert runny.
-
Pour the entire mixture into a lined 8x8 inch baking dish, smoothing the top with a spatula. Press the mixture down firmly, ensuring an even surface. Let it chill in the refrigerator for at least 4 hours, or overnight, until it sets firmly. The gelatin will firm up, giving the dessert a delightful bite.
-
Once set, cut the dessert into bite‑size squares using a sharp knife. For a cleaner cut, warm the knife in hot water and wipe dry before slicing. Serve immediately, or store in an airtight container in the fridge for up to 3 days. The dessert will keep its texture and flavor, thanks to the gelatin’s stabilizing effect.
That's it — you did it. But hold on, I've got a few more tricks that'll take this to another level…
Insider Tricks for Flawless Results
The Temperature Rule Nobody Follows
Temperature is everything when working with gelatin. Keep the gelatin at a warm, but not boiling, temperature when you mix it into the whipped topping. If it’s too hot, the gelatin will lose its setting ability; if it’s too cold, it won’t dissolve fully. A good rule of thumb is to let the gelatin cool to about 70°F before adding it to the cream cheese mixture.
Why Your Nose Knows Best
The aroma of the melted butter and caramelized pretzels is a sign that the flavor base is developing correctly. If the butter starts to smell burnt, pull the pan off the heat immediately. A burnt smell will ruin the delicate balance of sweet and salty.
The 5‑Minute Rest That Changes Everything
After you fold in the gelatin, let the mixture rest for 5 minutes before adding the strawberries. This brief pause allows the gelatin to settle and prevents the strawberries from releasing too much liquid, which could compromise the set.
Pre‑Chill Your Mixing Bowl
Chilling your mixing bowl for 10 minutes before combining the gelatin and whipped topping ensures the mixture stays cool and doesn’t start to set prematurely. A cold bowl also helps maintain the airy texture of the whipped topping.
Pressing Technique
When you pour the mixture into the baking dish, press it down firmly with a spatula or the back of a spoon. This compacts the layers, eliminating air pockets that could cause the dessert to crack or become uneven.
Storing Secrets
When storing the dessert, place a sheet of parchment paper on top of the chilled surface before covering it with plastic wrap. This prevents the surface from sticking to the wrap, which can cause the pretzel crumbs to become soggy.
Creative Twists and Variations
This recipe is a playground. Here are some of my favorite ways to switch things up:
Chocolate Pretzel Marshmallow
Swap the strawberry gelatin for a chocolate gelatin mix and use dark chocolate chips instead of strawberries. The result is a rich, bittersweet dessert that pairs wonderfully with a splash of espresso.
Minty Fresh Strawberry
Incorporate a teaspoon of peppermint extract into the gelatin mixture and top the finished dessert with crushed mint leaves. The mint adds a refreshing contrast to the sweet and salty layers.
Caramelized Banana Pretzel
Replace the strawberries with caramelized banana slices and use a caramel gelatin mix. The sweet banana and salty pretzels create a tropical twist that feels like a beach day in a bite.
Sea Salt & Honey Variation
Drizzle honey over the pretzel crumbs before mixing and sprinkle a pinch of flaky sea salt on top after setting. This gives the dessert a gourmet, caramelized finish that’s perfect for an upscale gathering.
Vegan Version
Use a dairy‑free whipped topping and a plant‑based cream cheese substitute. Replace the gelatin with agar‑agar, following the package instructions for a vegan set that mimics the traditional texture.
Mini Dessert Cups
Instead of a single sheet, pour the mixture into silicone muffin cups and chill for 3 hours. The mini cups make it easy to serve individual portions at parties or as a fun snack for kids.
Storing and Bringing It Back to Life
Fridge Storage
Store the dessert in an airtight container in the refrigerator for up to 3 days. The gelatin keeps the texture firm, while the pretzel crumbs retain their crunch. Keep the container on the middle shelf to avoid temperature fluctuations.
Freezer Friendly
For longer storage, wrap the dessert tightly in plastic wrap and place it in a freezer bag. Freeze for up to 2 weeks. When ready to serve, thaw in the refrigerator overnight to maintain the perfect texture.
Best Reheating Method
To revive the dessert’s freshness, place the chilled squares on a microwave‑safe plate and heat on medium for 10-15 seconds. Add a tiny splash of water before reheating; it steams back to perfection, restoring the airy marshmallow feel.