I was halfway through a late‑night binge of maple‑infused pancakes when the kitchen erupted in a smoky alarm. My bacon had gone from crisp to charred in a blink, and the maple syrup had turned into a caramelized glaze that stuck to the pan like a stubborn coat of oil. I stared at the mess, and a spark of culinary rebellion ignited. That night, I decided that maple, bacon, caramel, and apple could coexist in a single, glorious dish—if I could just get the ratios and timing right.
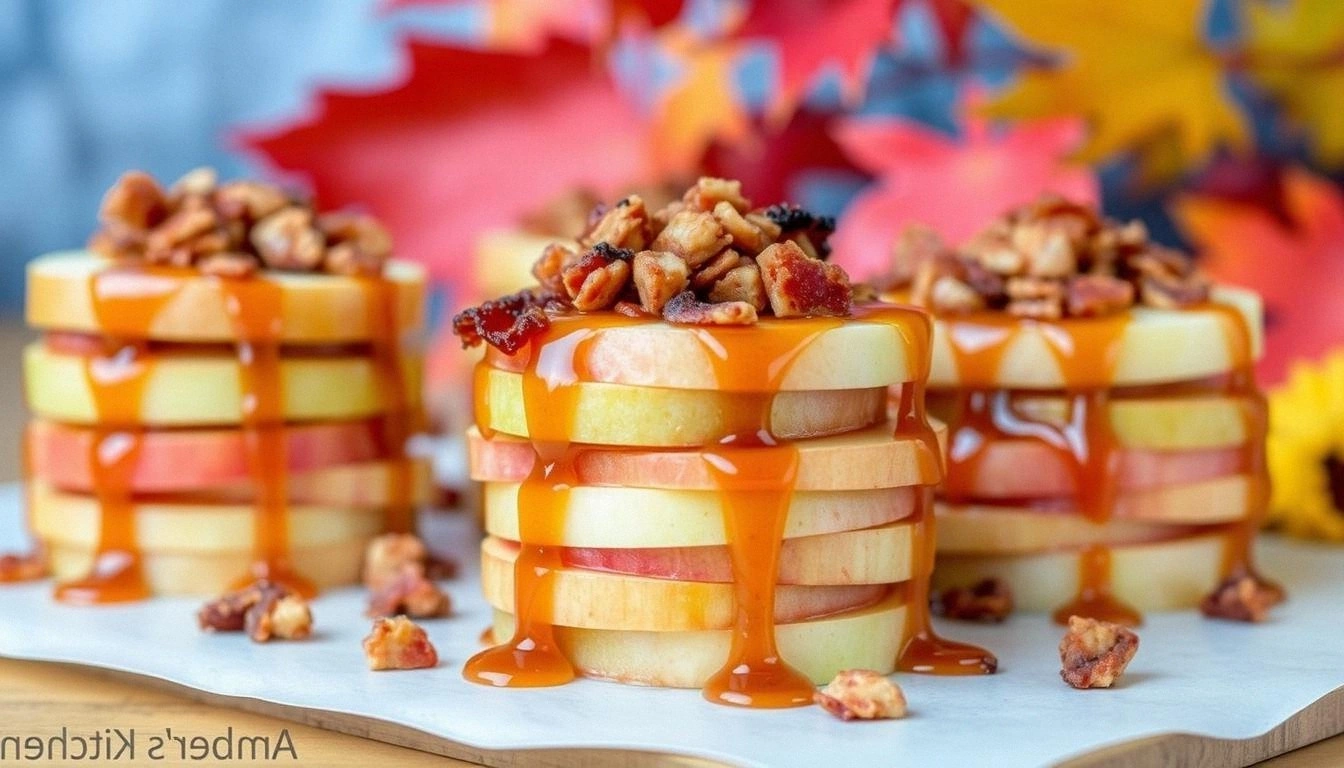
Picture this: a crisp apple slice, glistening with a glossy maple‑caramel drizzle, topped with a buttery, slightly salty bacon crumble that crackles when you bite. The scent of fresh apples mingles with the sweet, smoky aroma of maple and bacon, while the caramel sauce offers a silky, almost buttery sweetness that coats the tongue like velvet. The texture is a symphony—crunchy bacon, tender apple flesh, and a glossy glaze that glides. It’s a dish that feels indulgent yet surprisingly balanced, and it’s the kind of comfort food that makes you want to share the recipe with everyone you know.
What makes this version stand out is not just the combination of flavors but the precise way each component is treated. I’ve dialed in the perfect amount of maple syrup to caramelize without burning, chosen bacon that crisps to a golden edge, and sliced apples just enough to hold their shape when sautéed. The result is a dish that feels both luxurious and approachable, a true crowd‑pleaser that will have people asking for seconds—yes, I dare you to taste this and not go back for seconds. It’s hands down the best version you’ll ever make at home, and I’m about to walk you through every single step so you can replicate it without a hitch.
Now, before you dive into the ingredients, let me tease you with one of the tricks that sets this recipe apart: a splash of lemon juice before caramelizing the apples. It’s a subtle, almost invisible tweak that brightens the entire dish, cutting through the richness of the maple and bacon. And trust me, the first bite will feel like a burst of sunshine on a winter day. Stay with me here—this is worth it.
What Makes This Version Stand Out
- Flavor Balance: The maple syrup is sweet but never cloying, the bacon brings savory depth, and the lemon juice cuts through the richness, creating a harmonious palate.
- Texture Contrast: Crisp bacon, tender apples, and a silky caramel glaze offer a satisfying mix of crunch, bite, and smoothness.
- Visual Appeal: The glossy glaze coats the apple slices like a lacquer, while the bacon bits scatter like golden confetti, making the dish Instagram‑ready.
- Ingredient Quality: Using fresh, locally sourced apples and high‑grade maple syrup elevates the dish from ordinary to extraordinary.
- Make‑Ahead Potential: The caramel sauce can be pre‑made and stored, and the bacon can be cooked in advance, saving you time on busy mornings.
- Versatility: This dish works as a breakfast, brunch, or dessert, and it pairs beautifully with a cup of coffee or a glass of cold brew.
Alright, let's break down exactly what goes into this masterpiece. And before we do, here’s a quick hack that will save you from a common pitfall.
Inside the Ingredient List
The Flavor Base
The foundation of this dish is the sweet‑savory harmony between maple syrup and caramel. Maple syrup provides a natural sweetness that complements the apple’s tartness, while the caramel adds a buttery depth that lingers on the palate. Skipping either would leave the dish feeling incomplete; you’d miss the silky, glossy coat that makes each bite memorable. If you’re on a sugar‑conscious diet, you can replace maple syrup with a natural sweetener like agave, but be prepared for a slightly different flavor profile.
The Texture Crew
Crispy bacon is the star of the texture crew, offering a salty crunch that breaks the soft, juicy apples. The bacon’s fat renders out during cooking, creating a natural, buttery base that coats the apples and caramel. If you omit bacon, the dish loses its savory backbone and feels a bit flat. For a vegetarian version, try using smoked tempeh or crispy tofu; the key is a crispy, salty element that balances the sweetness.
The Unexpected Star
Lemon juice is the unexpected star that brightens the dish. A tablespoon of fresh lemon juice before caramelizing the apples cuts through the richness and adds a subtle tartness that lifts the entire flavor profile. If you’re allergic to citrus, a splash of apple cider vinegar can serve as a suitable substitute, though it will alter the subtlety of the finish. This small addition is what transforms the dish from sweet to sophisticated.
The Final Flourish
A pinch of sea salt is the final flourish that brings all the components together. Salt doesn’t just taste salty; it enhances sweetness and balances flavors, making the caramel glaze more complex. Skipping the salt can result in a flat, one‑dimensional dish that feels underwhelming. For a low‑sodium version, use a salt alternative like potassium chloride, but keep in mind it might add a slightly metallic aftertaste.
Everything's prepped? Good. Let's get into the real action.
The Method — Step by Step
- First, preheat your oven to 375°F (190°C) and line a baking sheet with parchment paper. In a small bowl, combine the maple syrup, brown sugar, and a splash of lemon juice; whisk until the sugar dissolves. This mixture will form the caramel glaze that coats the apples. While the glaze simmers, set the bacon slices on a cold pan to ensure even cooking.
- Place the bacon in the cold pan and turn the heat to medium. Let the bacon render slowly, flipping it every 2 minutes. The goal is to get a deep, golden brown without burning. Once crisp, transfer the bacon to a paper towel to drain excess fat, then crumble it into bite‑sized pieces.
- Wash, core, and slice the apples into thin rounds about 1/4 inch thick. The thinness ensures quick caramelization and a tender interior. Toss the apple slices in a small bowl with the remaining lemon juice, letting them soak for 2 minutes to reduce acidity.
- Heat a large skillet over medium heat and add the apple slices, cooking them for 3–4 minutes on each side until they develop a light golden crust. The apples should still hold their shape but feel slightly soft to the touch. This caramelized exterior will hold the glaze beautifully.
- Pour the maple‑brown sugar glaze over the cooked apples, ensuring each slice is fully coated. Reduce the heat to low and let the glaze simmer for 2 minutes, stirring gently so the sugar doesn’t crystallize. The glaze should thicken and become glossy, like a velvety ribbon.
- Arrange the glazed apples on the prepared baking sheet, leaving a small gap between each slice. Sprinkle the crumbled bacon evenly over the top, allowing the bacon fat to mingle with the caramel glaze for an extra burst of flavor. The bacon will add a delightful crunch and a savory counterpoint.
- Bake in the preheated oven for 10–12 minutes, or until the edges of the apples are crisp and the bacon has browned to a golden hue. Keep an eye on the dish; the glaze can go from perfectly glossy to burnt in a minute if left unattended.
- Remove from the oven and let the dish rest for 5 minutes. This resting period allows the caramel to set slightly, creating a glossy finish that’s easier to serve. Serve warm, optionally with a scoop of vanilla ice cream or a dollop of whipped cream for an indulgent touch.
That’s it—you did it. But hold on, I’ve got a few more tricks that will elevate this dish from great to unforgettable.
Insider Tricks for Flawless Results
The Temperature Rule Nobody Follows
Many people bake at a high temperature, thinking it will speed up the process. However, a moderate heat of 375°F allows the caramel glaze to set properly without burning the bacon. If you push the heat too high, the glaze can scorch, and the bacon can become overly crisp, losing its savory depth. Keep the oven at a steady temperature and use a thermometer if you’re unsure.
Why Your Nose Knows Best
Your sense of smell is a reliable indicator of doneness. When the apples are ready, the aroma will shift from sweet to slightly caramelized, with a faint smoky hint from the bacon. If the smell leans too much towards burnt, pull the dish out immediately. Trust your nose; it’s the best judge of flavor.
The 5‑Minute Rest That Changes Everything
Letting the dish rest after baking is often overlooked but essential. This short pause allows the caramel to thicken into a glossy glaze that’s easier to spread and less likely to run off the apples. It also lets the bacon fat redistribute, creating a more even flavor profile across each slice.
Use Fresh Apples for Best Texture
Choosing the right apple variety is crucial. Crisp apples like Honeycrisp or Granny Smith hold their shape best when caramelized. Avoid overly soft varieties like Fuji, which can become mushy and lose their structure. If you’re in the off‑season, use a frozen apple blend but thaw and drain thoroughly before cooking.
Serve Immediately for Peak Flavor
This dish is best served hot, while the bacon is still crunchy and the glaze is glossy. If you let it sit too long, the bacon will soften, and the glaze may thicken into a syrupy mess. For a quick fix, reheat in a microwave for 20–30 seconds, but be careful not to overcook.
Creative Twists and Variations
This recipe is a playground. Here are some of my favorite ways to switch things up:
Spiced Apple Caramel Stack
Add a pinch of cinnamon and nutmeg to the glaze for a warm, spiced profile. The spices complement the maple sweetness and add a comforting depth that feels like a cozy fall dessert.
Sweet & Salty Crunch
Replace the bacon with toasted almond slivers. The nuts add a crunchy texture and a nutty flavor that pairs wonderfully with the caramelized apples.
Vegan Maple Delight
Use plant‑based bacon substitutes and coconut‑milk caramel sauce. The result is a cruelty‑free version that still delivers the same sweet‑savory experience.
Caramel Apple Tarts
Fold the caramelized apples into a pre‑baked tart shell, top with a drizzle of maple glaze, and bake until golden. This transforms the dish into a sophisticated, bite‑size dessert.
Apple Bacon Breakfast Bowl
Serve the caramelized apples and bacon over a bed of oatmeal, drizzle with maple syrup, and top with a scoop of yogurt. It’s a hearty, protein‑rich breakfast that keeps you satisfied all morning.
Maple Bacon Apple Sliders
Layer caramelized apples and bacon between mini brioche buns, spread a thin layer of maple butter, and grill until the buns are toasted. These sliders are perfect for a brunch party or a game‑day snack.
Storing and Bringing It Back to Life
Fridge Storage
Store the caramelized apples and bacon in an airtight container in the refrigerator for up to 3 days. The glaze will thicken slightly, so let the dish sit at room temperature for 10 minutes before serving to restore its glossy finish.
Freezer Friendly
For longer storage, wrap the apples and bacon individually in parchment paper and place them in a freezer bag. They will keep for up to 2 months. When ready to serve, thaw overnight in the fridge and reheat in a skillet over low heat.
Best Reheating Method
Reheat the dish in a preheated oven at 350°F for 8–10 minutes, or until the glaze is bubbling. Add a splash of water to the skillet before reheating if you notice the caramel drying out; this steams it back to perfection.