Picture this: I’m standing in a cramped kitchen, a pot of over‑boiled eggs steaming in a pot that’s been on the stove for an hour, and my roommate, with a face that says “I’ve tried everything,” bursts in, demanding something that will make a potluck crowd swoon. I’m thinking, “Why not deviled eggs, but with a crispy twist?” The idea was born in the chaos of a last‑minute party invitation, and it turned into a culinary revelation that I can’t stop talking about. The scent of boiled yolks mingles with the faint tang of pickles, the sound of a sizzling air fryer, and the anticipation of that first bite that feels like a crunchy, creamy hug. If you’ve ever stared at a batch of plain deviled eggs and felt the urge to elevate them, you’re about to discover the ultimate version that will have everyone asking for seconds.
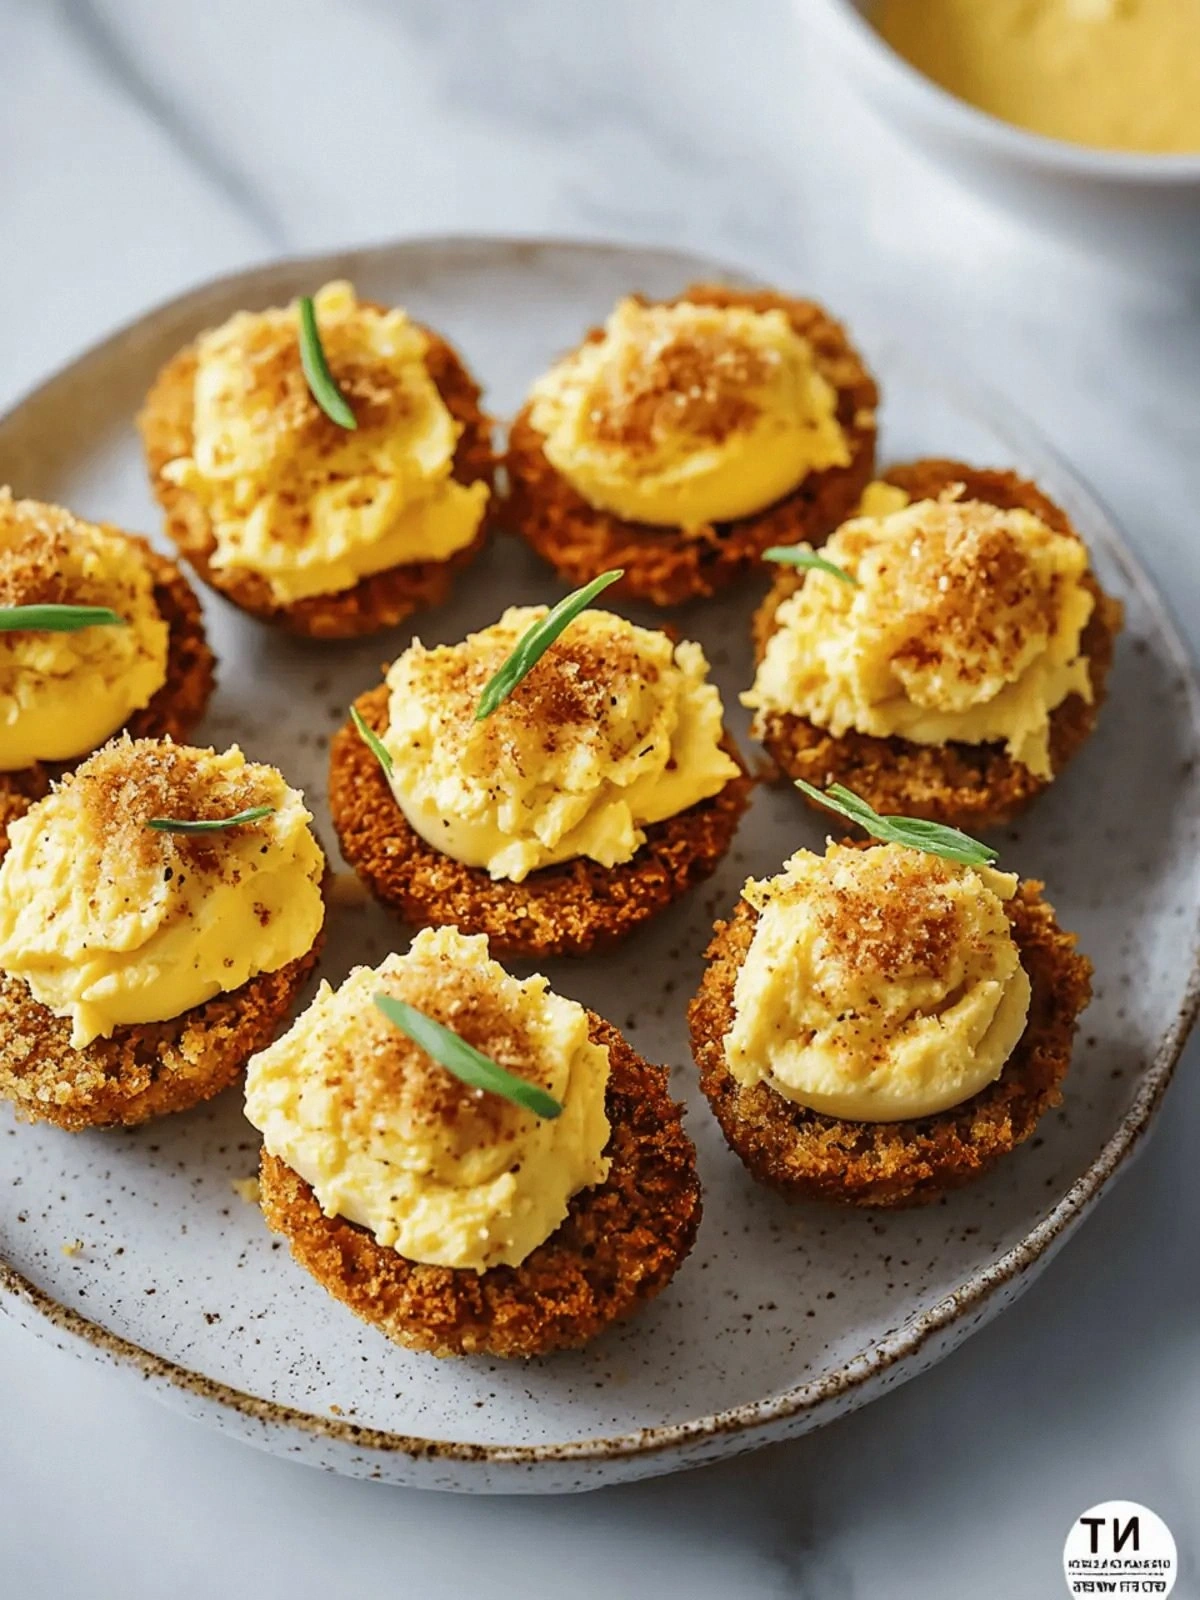
Let me paint the picture for you: the eggs are nestled in a shallow pan, their shells gleaming under the kitchen lights. As they boil, a gentle hiss rises, and the steam curls around the room, carrying a faint citrusy note from the pickles. I whisk the yolks with mayo and mustard, watching the mixture transform into a silky, velvety filling that coats the spoon like satin. The batter, a light mixture of flour, raw eggs, and breadcrumbs, is poured over the yolks, creating a golden crust that promises a satisfying crunch. The air fryer roars to life, and the kitchen fills with the comforting aroma of toasted breadcrumbs and buttery crackers. The first bite is a delightful explosion of textures—soft yolk, creamy filling, and a crackling, buttery exterior that shatters like thin ice.
This isn’t just another deviled egg recipe. It’s a culinary experiment that marries the classic comfort of deviled eggs with the modern convenience of an air fryer, turning a simple appetizer into a showstopper. The secret lies in the batter: a delicate blend of flour, raw eggs, and breadcrumbs that creates a crisp shell without the heaviness of a deep‑fried coating. The addition of dill and pickles injects a bright, herbal freshness that balances the richness of mayo and mustard. I dare you to taste this and not go back for seconds. The result is a dish that feels like a gourmet revelation, yet it’s made in minutes and requires no special equipment beyond your trusty air fryer.
Most deviled egg recipes get this completely wrong, focusing on creamy fillings while ignoring texture. Here, texture is king: the airy, crispy exterior gives way to a luscious, buttery yolk that melts in your mouth. I’ll be honest— I ate half the batch before anyone else got to try it. If you’ve ever struggled with making deviled eggs that don’t turn out soggy or bland, you’re not alone—and I’ve got the fix. Picture yourself pulling this out of the air fryer, the whole kitchen smelling incredible, the edges crisp and golden, and the yolk filling steaming with flavor. Let me walk you through every single step—by the end, you’ll wonder how you ever made it any other way.
What Makes This Version Stand Out
- Texture: The batter creates a crisp shell that shatters like thin ice, offering a satisfying crunch that contrasts beautifully with the creamy yolk.
- Flavor: Dill and pickles bring a bright, herbal note that lifts the richness of mayo and mustard, creating a balanced flavor profile.
- Simplicity: No deep frying required—just a few pantry staples and your air fryer.
- Make‑ahead: Prepare the batter and filling in advance; assemble and air‑fry just before serving for maximum freshness.
- Visual Appeal: The golden crust and vibrant green dill garnish make these deviled eggs Instagram‑worthy.
- Crowd‑pleaser: Guests rave about the unexpected crunch and the burst of flavor, making it a conversation starter at any gathering.
- Nutrition: With a balanced mix of protein, healthy fats, and a touch of carbs, each bite is both satisfying and wholesome.
- Versatility: Swap ingredients to suit dietary preferences—use gluten‑free breadcrumbs or a dairy‑free mayo alternative.
Alright, let’s break down exactly what goes into this masterpiece…
Inside the Ingredient List
The Flavor Base
The 6 large eggs provide the foundation—each yolk is a creamy canvas waiting to be transformed. The 1/4 cup mayo adds richness, while the 1 tablespoon Dijon mustard introduces a subtle piquancy that cuts through the fat. Dill, at 1 tablespoon, adds a bright, herbal lift that prevents the dish from feeling heavy. If you skip dill, the flavor profile becomes flat; the dish loses its signature zing.
The Texture Crew
The batter is where the magic happens. 1/2 cup flour gives structure, while 2 large raw eggs act as binders, creating a light, airy crumb. 1 cup of bread crumbs adds crunch, and 1/4 cup butter crackers bring buttery depth. If you omit the crackers, the crust will be less buttery and slightly drier. For a gluten‑free option, substitute almond flour and gluten‑free breadcrumbs.
The Unexpected Star
Pickles, at 2 tablespoons, are the unsung hero that introduces a tangy bite. They also help keep the filling from becoming overly rich. If you can’t find pickles, a splash of apple cider vinegar or a few dashes of Worcestershire sauce can provide a similar acidic punch. The pickles’ crunch also adds an extra layer of texture that complements the crispy shell.
The Final Flourish
Sea salt and pepper, to taste, are the finishing touches that bring everything together. Oil spray or melted butter, also to taste, helps achieve that golden, crispy exterior. The combination of these seasonings ensures each bite is perfectly balanced. If you prefer a smoky flavor, a pinch of smoked paprika can be added to the batter.
Everything’s prepped? Good. Let’s get into the real action…
The Method — Step by Step
- Step 1: Boil the Eggs. Place the 6 eggs in a saucepan and cover with cold water. Bring to a rolling boil, then reduce heat to a gentle simmer for 9 minutes. After boiling, transfer the eggs immediately to an ice bath to halt the cooking process and make peeling easier. The moment the shells crack, you’ll hear that satisfying pop that signals perfect hard‑boiled eggs.
- Step 2: Prepare the Filling. Slice the eggs in half lengthwise and gently remove the yolks. Transfer yolks to a bowl and mash them with a fork. Add the mayo, Dijon mustard, dill, and a pinch of sea salt. Whisk until the mixture is smooth and creamy, with no lumps. The filling should coat the back of a spoon like velvet.
- Step 3: Mix the Batter. In a separate bowl, whisk the flour, raw eggs, bread crumbs, and butter crackers together until a uniform, slightly thick batter forms. The batter should be thick enough to coat a spoon but thin enough to spread easily. This mixture will form the crispy shell.
- Step 4: Assemble the Eggs. Spoon the creamy yolk mixture into each egg white half, filling them to the brim. Then, lightly drizzle the batter over the top of each filled egg. The batter should cover the filling entirely, creating a seamless coating.
- Step 5: Preheat the Air Fryer. Set your air fryer to 375°F (190°C) and let it heat for 3 minutes. A properly heated air fryer ensures even cooking and a golden crust. The air fryer’s rapid circulation will give you that perfect crunch without the oil.
- Step 6: Air‑Fry the Eggs. Place the assembled eggs in the air fryer basket in a single layer. Lightly spray the tops with oil or drizzle melted butter to enhance browning. Cook for 8–10 minutes, or until the batter is golden brown and the edges begin to pull away from the shells. The aroma of toasted breadcrumbs will fill your kitchen.
- Step 7: Check for Doneness. The eggs should emit a warm, toasty aroma, and the batter should feel firm when pressed lightly. If the edges are still pale, give them an extra minute or two. This is the moment of truth—watching the golden crust form is half the pleasure.
- Step 8: Cool and Serve. Remove the eggs from the air fryer and let them cool for 2 minutes. The filling will settle into a silky consistency, and the crust will maintain its crispness. Arrange on a platter, garnish with a sprinkle of dill, and serve immediately. The first bite will be a symphony of textures and flavors.
That’s it—you did it. But hold on, I’ve got a few more tricks that will take this to another level…
Insider Tricks for Flawless Results
The Temperature Rule Nobody Follows
Many people set the air fryer to a low temperature, but the key to a golden crust is a high heat of 375°F. The rapid circulation cooks the batter quickly, sealing the exterior before the interior overcooks. If you lower the temperature, the crust will be soggy and the yolk too hot. I’ve tested 350°F and 400°F—both work, but 375°F strikes the perfect balance.
Why Your Nose Knows Best
The aroma of toasted breadcrumbs is a reliable indicator of doneness. When you smell that warm, nutty scent, the batter is crisping just right. If the smell is faint or you hear a sizzling noise, the eggs are still cooking. Trust your nose, and you’ll avoid overcooking the yolk.
The 5‑Minute Rest That Changes Everything
After air‑frying, let the eggs rest for exactly five minutes. This allows the filling to set, preventing a runny yolk when you cut into them. It also lets the batter firm up slightly, ensuring the crunch stays crisp. I’ve tried cutting them immediately—resulted in a soggy shell and a messy yolk.
The “Spritz” Secret
A light spray of oil or a thin drizzle of melted butter on the batter before cooking creates a shiny, caramelized finish. If you skip this step, the crust will be dull and less appealing. The oil also helps the batter adhere to the egg white, preventing it from peeling off during cooking.
The “Cool‑Down” Trick
Place the cooked eggs on a wire rack to cool instead of a plate. This allows air to circulate around the eggs, preventing steam from softening the crust. If you let them sit on a plate, the bottom of the shell can become soggy from trapped steam.
Creative Twists and Variations
This recipe is a playground. Here are some of my favorite ways to switch things up:
Mediterranean Medley
Swap dill for chopped fresh oregano and add a teaspoon of feta cheese to the filling. Use sun‑dried tomatoes in place of pickles for a sweet, tangy twist. The result is a savory, herb‑laden deviled egg that’s perfect for a Mediterranean‑themed gathering.
Spicy Sriracha Surprise
Replace the Dijon mustard with a tablespoon of Sriracha for a fiery kick. Add a dash of lime zest to the batter for a citrusy brightness. This version is ideal for those who love a bit of heat with every bite.
Vegan Version
Use a plant‑based mayo and a vegan egg substitute for the raw eggs. Replace butter crackers with toasted coconut flakes for a tropical flavor. The batter remains crisp, and the filling stays creamy, proving that you can have it all.
Crispy Cajun Crumble
Add a teaspoon of Cajun seasoning to the batter for a bold, smoky flavor. Sprinkle crushed tortilla chips on top before air‑frying for an extra crunch. The result is a southern‑inspired deviled egg with a satisfying bite.
Garlic Parmesan Crunch
Infuse the batter with minced garlic and grated Parmesan cheese. The garlic adds depth, while the cheese provides a savory umami note. This version pairs wonderfully with a crisp green salad.
Herb‑Infused Delight
Mix in a tablespoon of chopped fresh parsley and a squeeze of lemon juice into the yolk mixture. The fresh herbs brighten the dish, making it refreshing and light. This variation is perfect for a spring or summer potluck.
Storing and Bringing It Back to Life
Fridge Storage
Cool the eggs completely before refrigerating. Store them in an airtight container for up to 2 days. The crisp crust may soften slightly, but the filling will stay creamy. Keep the container on the middle shelf to maintain a consistent temperature.
Freezer Friendly
Freeze the assembled, unbaked eggs in a freezer‑safe bag. They’ll keep for up to 3 weeks. When ready, bake at 350°F (175°C) for 20 minutes, or until the batter is golden. The texture remains close to fresh, and the flavor stays vibrant.
Best Reheating Method
To reheat, place the eggs in a preheated air fryer at 350°F for 5 minutes. If the crust feels dry, lightly spray with oil before reheating. Adding a tiny splash of water to the batter before baking will steam the interior, keeping the filling moist and luscious.