I’ve spent a lot of time in kitchens that feel like laboratories, mixing, measuring, and testing. One night, a friend dared me to create a “dairy‑free pizza chicken bake” that could win a crowd at a potluck. The moment I sliced the first chicken breast, the air filled with a promise of savory, melty goodness—without the heavy weight of dairy. The smell of tomato sauce dancing with Italian herbs made my taste buds do a little happy dance. I was determined to turn that simple dare into a dish that would make everyone ask for seconds.
Picture this: a golden crust that cracks like a perfectly baked cookie, a bubbling layer of cheese that pulls apart like a silk ribbon, and a chicken center that’s juicy enough to make you forget it’s been in the oven for thirty minutes. I’ve learned that the key to that texture is in the balance of sauce and seasoning, and in the timing of the bake. The first bite should hit you with a burst of tomato tang, followed by a subtle heat from the pepperoni, and then a lingering note of basil that lingers on the tongue. That’s the flavor profile I aimed for, and I’ve got the secrets to keep it consistent every time. If you’re ready to step into my kitchen, let’s walk through each step together—by the end, you’ll wonder how you ever made it any other way.
I’ve spent countless hours experimenting with dairy‑free cheeses, and the result is a melt that’s as smooth as melted chocolate but with a savory kick. The sauce isn’t just a base; it’s the foundation that holds the flavors together, like a velvet curtain that frames the stars of the dish. The chicken, when seasoned correctly, becomes a flavor sponge that soaks up the sauce, turning every bite into a savory, slightly sweet experience. The pepperoni and vegetables add crunch and color, making the dish as visually appealing as it is delicious. This recipe is a testament to the fact that dairy isn’t the only path to a creamy, cheesy experience—just a matter of technique and quality ingredients. The moment you pull this out of the oven, the whole kitchen will smell like a pizza parlor, and you’ll be ready for the first bite.
I dare you to taste this and not go back for seconds. That’s the promise I make to anyone who tries it. Most recipes get this completely wrong by over‑baking the chicken or using the wrong cheese blend. Here’s what actually works: a quick sear to lock in juices, a generous layer of sauce to keep everything moist, and a cheese that melts without separating. Picture the sizzle as the chicken hits the pan—absolute perfection. And when the oven timer dings, the aroma will have already started to make your mouth water. Let’s get into the details so you can replicate this magic at home.
What Makes This Version Stand Out
- Flavor Depth: The combination of tomato sauce, Italian seasoning, and a hint of garlic powder creates a flavor profile that feels like a classic pizza without the dairy. The sauce coats the chicken like velvet, giving each bite a burst of umami.
- Texture Harmony: The chicken is seared to develop a caramelized crust, then baked with sauce to keep it moist. The cheese melts into a silky layer that doesn’t separate, and the veggies add a satisfying crunch.
- Ingredient Simplicity: You only need a handful of pantry staples and a few fresh items. No special equipment—just a sheet pan and a reliable oven.
- Make‑Ahead Friendly: Assemble the dish the night before and bake it in the morning. The flavors meld beautifully, making it perfect for busy weeknights.
- Kid‑Friendly: The dish is mild enough for picky eaters but still packed with flavor for adults. The cheese melt is a big win with the little ones.
- Low Dairy Footprint: Using dairy‑free mozzarella and Parmesan-style topping keeps the dish fully plant‑based without sacrificing the cheesy experience.
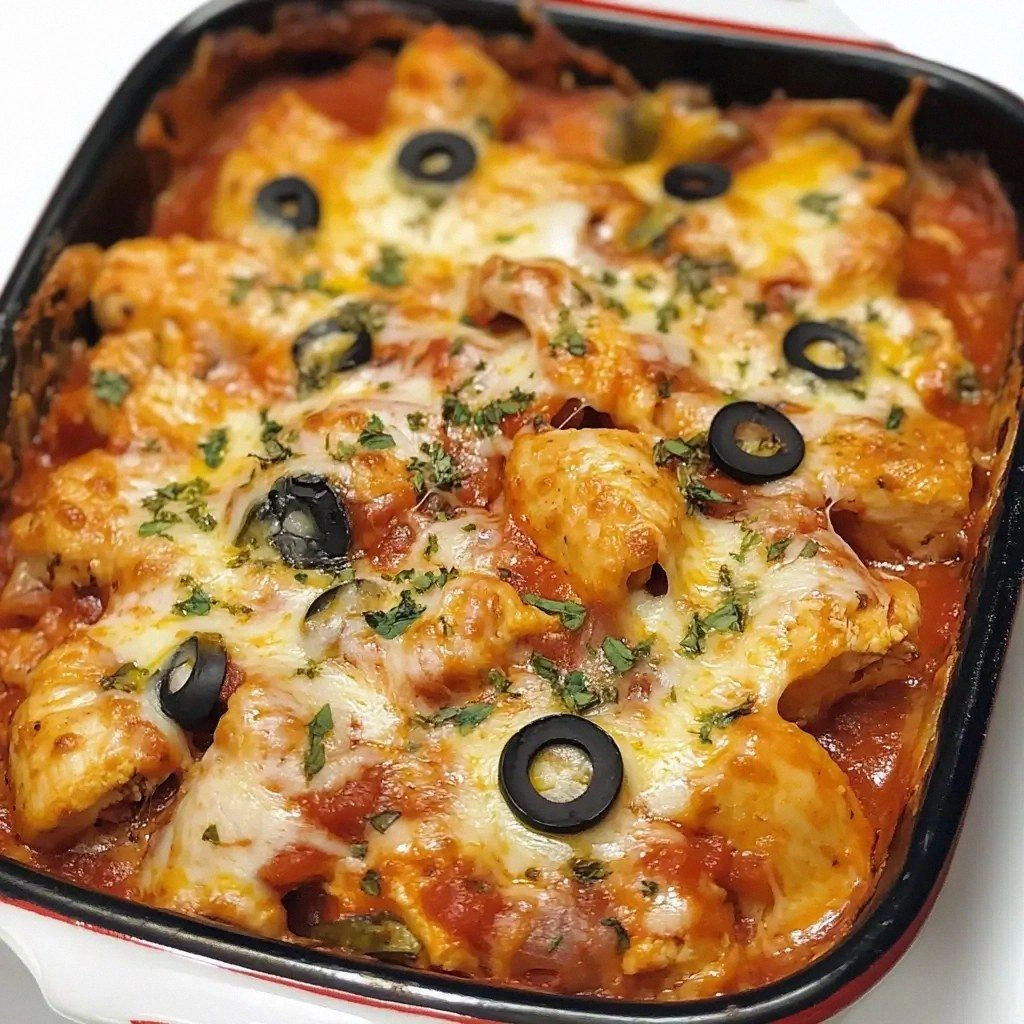
- Visual Appeal: The vibrant colors of pepperoni, bell peppers, mushrooms, and olives make the dish Instagram‑ready. The golden cheese crust is a visual cue of perfection.
- Versatile Toppings: Swap out pepperoni for vegan sausage or add pineapple for a Hawaiian twist. The base recipe adapts to any flavor profile you desire.
Inside the Ingredient List
The Flavor Base
The sauce is the heart of this dish. A good quality pizza or marinara sauce, free from dairy and low in sugar, provides the sweet, tangy backdrop that ties everything together. If you prefer a spicier kick, add a splash of red wine or a pinch of cayenne during the simmer. Skipping the sauce would leave the chicken dry and the dish flat; the sauce’s moisture keeps the chicken tender.
Choosing a sauce with real tomatoes and no artificial additives ensures that each bite is pure, unadulterated flavor. A low‑sodium option keeps the dish balanced without the need for extra salt. For a smoky undertone, consider a sauce that includes a touch of chipotle or smoked paprika. The sauce’s thickness also affects the cheese melt—too thin, and the cheese will separate; too thick, and the dish becomes syrupy.
If you’re in a pinch, a jar of crushed tomatoes with herbs can substitute, but be sure to season it with a bit of sugar to balance acidity. A homemade sauce, simmered for 30 minutes, brings a depth that’s hard to beat. Remember, the sauce is the first layer of flavor; treat it with care. A well‑seasoned sauce sets the tone for the entire bake.
The Texture Crew
The chicken breasts are the star. They should be thick enough to hold the sauce but thin enough to cook through without drying out. Season them with olive oil, Italian seasoning, garlic powder, onion powder, salt, and pepper to create a flavor base that will seep into every crevice. Searing the chicken in a hot pan before baking adds caramelization, which is essential for that “pizza crust” texture on the edges.
The cheese is what gives the dish that signature gooeyness. Dairy‑free mozzarella that melts well is key; brands that contain carrageenan or tapioca starch often perform best. Adding a small amount of dairy‑free Parmesan-style topping introduces a nutty, slightly salty finish that mimics traditional pizza cheese. If you skip the cheese, you’ll lose that satisfying melt and the dish will feel incomplete.
The vegetables—pepperoni, bell peppers, mushrooms, and olives—add crunch and color. Slicing them evenly ensures they cook uniformly and release their flavors. If you prefer a milder dish, reduce the pepperoni or replace it with sliced zucchini. The mushrooms provide earthy undertones that balance the sweet sauce.
The Unexpected Star
Fresh basil or parsley is the final flourish that gives the dish a bright, herbal note. Chop it finely so it distributes evenly across the bake. This herb adds a fresh contrast to the rich sauce and cheese, preventing the dish from feeling too heavy. If you’re not a fan of fresh herbs, you can substitute dried oregano, but the flavor won’t be as vibrant.
Red pepper flakes offer a subtle heat that can be adjusted to taste. They’re optional but recommended for those who enjoy a little spice. A pinch of flakes before baking will infuse the entire dish with a gentle warmth. Skipping them will make the dish more mellow, which might appeal to younger diners.
Everything’s prepped? Good. Let’s get into the real action…
The Method — Step by Step
- Preheat and Prep: Heat your oven to 400°F (200°C). While it’s warming, line a large sheet pan with parchment paper or lightly grease it. This step ensures a non‑stick surface and makes cleanup a breeze. A well‑lined pan also helps the chicken cook evenly. Set the oven rack in the middle position to allow even heat distribution.
- Season the Chicken: Pat the chicken breasts dry with paper towels. In a small bowl, whisk together 1 tablespoon of olive oil, 1 teaspoon of dried Italian seasoning, ½ teaspoon of garlic powder, ½ teaspoon of onion powder, ¼ teaspoon of salt, and ¼ teaspoon of black pepper. Brush both sides of the chicken with the mixture, ensuring an even coat. The oil helps the seasoning adhere and creates a caramelized surface when seared.
- Sear for Flavor: Heat a large skillet over medium‑high heat. Once hot, add the seasoned chicken breasts and sear for 2–3 minutes per side until golden brown. The sear locks in juices and gives the chicken a crispy edge that mimics a pizza crust. Flip only once to maintain a uniform crust. Remove from the skillet and set aside on a plate.
- Layer the Sauce: Spread 1½ cups of pizza sauce evenly over the sheet pan, leaving a small border around the edges. This layer will keep the chicken moist during baking and create a flavorful base for the cheese. Make sure the sauce is spread in a thin, uniform layer to avoid a soggy bottom. A thick sauce can cause the cheese to separate.
- Add the Chicken: Place the seared chicken breasts on top of the sauce. Ensure they’re evenly spaced to allow heat to circulate around each piece. The chicken should be fully covered by the sauce, but not submerged. This arrangement ensures each bite has a consistent flavor profile.
- Top with Cheese: Sprinkle 1½–2 cups of shredded dairy‑free mozzarella over the chicken. The cheese should cover the top of each breast, creating a golden, bubbling layer. For a more authentic pizza flavor, add ¼ cup of dairy‑free Parmesan‑style topping on top of the mozzarella. The Parmesan adds a nutty finish that balances the sweetness of the sauce.
- Add the Toppings: Distribute ½ cup sliced dairy‑free pepperoni, ½ cup sliced bell peppers, ½ cup sliced mushrooms, and ¼ cup sliced black olives evenly over the cheese. These toppings should be spread in a way that every bite contains a mix of flavors. If you’re using fresh basil or parsley, sprinkle it over the top for a bright finish. Red pepper flakes can be added just before baking for a subtle heat.
- Bake to Perfection: Slide the sheet pan into the preheated oven and bake for 25–30 minutes. The cheese should be melted, bubbly, and lightly golden. The chicken should reach the safe internal temperature, and the edges of the sauce should pull away slightly. The aroma will fill the kitchen, making it impossible to resist.
- Rest and Serve: Remove the pan from the oven and let the bake rest for 5 minutes. This resting period allows the juices to redistribute, ensuring every bite is juicy. Slice the chicken into portions, drizzle with a little olive oil if desired, and garnish with fresh basil or parsley. Serve immediately with a side of crusty bread or a simple salad.
That’s it—you did it. But hold on, I’ve got a few more tricks that will take this to another level. The next section will reveal insider tips that even seasoned cooks overlook.
Insider Tricks for Flawless Results
The Temperature Rule Nobody Follows
Many people bake at 350°F, thinking it’s safer. In reality, a higher temperature of 400°F is crucial for a crispy edge and a properly melted cheese. The heat ensures the chicken sears quickly before the sauce has a chance to steam it, preserving that coveted crunch. If you’re using a convection oven, reduce the temperature by 25°F to avoid over‑browning.
Why Your Nose Knows Best
The smell of a pizza bake is a reliable indicator of doneness. When the cheese is bubbling and the sauce has a slight caramelization, the aroma will be unmistakable. If the smell is too sweet, the sauce might be too thick; if it’s too sharp, the chicken may still be undercooked. Trust your nose—it’s a seasoned chef’s secret weapon.
The 5‑Minute Rest That Changes Everything
Resting the bake after removing it from the oven is often overlooked. During this period, the internal temperature rises slightly, ensuring the chicken reaches the perfect 165°F. The rest also allows the cheese to set, making it easier to slice without losing the gooeyness. Skipping the rest can result in a greasy, uneven bite.
Use a Sheet Pan with a Rimming Edge
A sheet pan with a slight rim prevents sauce from spilling over, keeping your oven clean. It also creates a natural border that enhances the presentation. If you don’t have a rimmed pan, line the edges with parchment to mimic the effect. This small tweak improves both aesthetics and cleanup.
Add a Splash of Water Before Reheating
When reheating leftovers, a tiny splash of water on the pan prevents the cheese from drying out. The steam created during reheating restores the melt and keeps the chicken juicy. This trick is especially useful for meal‑prepped portions that have been stored in the fridge.
Creative Twists and Variations
This recipe is a playground. Here are some of my favorite ways to switch things up:
Mediterranean Medley
Swap the pepperoni for sliced sun‑dried tomatoes, add artichoke hearts, and finish with a drizzle of olive oil. The result is a tangy, savory dish that feels like a Mediterranean feast. The sun‑dried tomatoes add a chewy texture, while the artichokes bring a subtle earthiness.
Spicy Tex‑Mex Fusion
Replace the traditional sauce with a smoky chipotle sauce, add sliced jalapeños, and top with corn and black beans. This variation gives the dish a bold, spicy kick that’s perfect for summer gatherings. The corn adds a sweet crunch that contrasts the heat.
Pineapple Paradise
Add chunks of fresh pineapple and a sprinkle of dried oregano for a Hawaiian twist. The pineapple’s natural sweetness balances the savory sauce, creating a harmonious flavor profile. This version is ideal for parties where you want a touch of tropical flair.
Vegan Delight
Use a plant‑based chicken substitute and a vegan mozzarella blend. Add vegan pepperoni slices and a splash of nutritional yeast for a cheesy aroma. This variation is perfect for those who want a fully plant‑based meal without sacrificing taste.
Breakfast Bonanza
Add a handful of spinach and a sprinkle of smoked paprika for a breakfast‑style dish. Serve with a side of avocado toast for a complete morning meal. The spinach adds a nutrient boost, while the paprika provides a subtle smoky flavor.
Herb Garden Explosion
Increase the amount of fresh basil and add chopped dill or cilantro. This variation brings a fresh, herbaceous layer that brightens the dish. It’s especially good with a side of quinoa or a light salad.
Storing and Bringing It Back to Life
Fridge Storage
Cool the bake completely before refrigerating. Store it in an airtight container or wrap tightly with foil. The dish will keep well for up to 4 days. When ready to eat, reheat in a 350°F oven for 10 minutes, or until warmed through.
Freezer Friendly
Pack the cooled bake into a freezer‑safe container or zip‑lock bag. Label with the date and freeze for up to 2 months. Thaw overnight in the fridge before reheating. Freezing preserves the texture better than microwaving.
Best Reheating Method
The oven is the gold standard for reheating. Preheat to 350°F, place the dish in a shallow pan, and cover with foil. Bake for 15 minutes, then remove the foil for the last 5 minutes to crisp the cheese. If you’re short on time, microwave on medium for 2–3 minutes, but be careful not to overcook.