Picture this: I’m standing in my cramped kitchen, the timer on the stove has just beeped, and I’m staring at a batch of chicken that looks more like a flock of wilted birds than a meal. The disaster was simple – I’d tried a “quick orange chicken” from a vague Pinterest post, and the result was a soggy, bland mess that even my cat refused to sniff. I’m not one to give up on a good idea, so I dove into the pantry, pulled out my gluten‑free flour, a bottle of soy sauce, and a fresh orange that smelled like sunshine. The moment the citrus hit the air, I knew I was onto something that would change the game.
The kitchen was a sensory overload: the sharp, bright scent of freshly squeezed orange juice mingled with the earthy aroma of garlic and ginger, while the sizzling sound of oil in the pan was like a promise of crispness. I could taste the promise of sweet, tangy, and savory flavors dancing together even before the first bite. The heat from the stove warmed my hands, and the anticipation made the air feel electric. This isn’t just another recipe; it’s a culinary confession that I’ll be honest — I ate half the batch before anyone else got to try it.
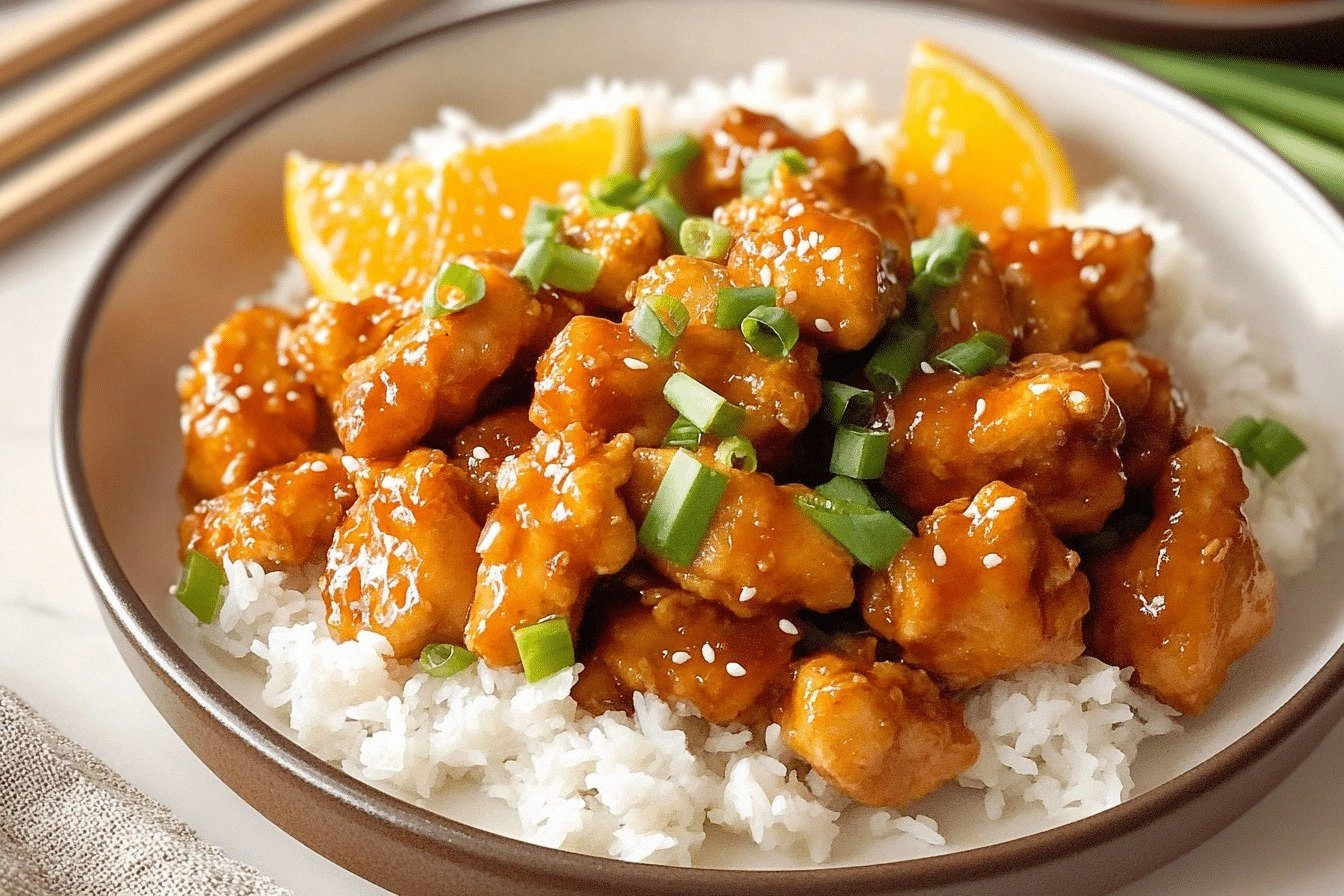
What sets this version apart is that it doesn’t rely on the usual mix of cornstarch and flour. I replaced the standard coating with a gluten‑free blend that gives the chicken a light, airy crunch that shatters like thin ice when you bite into it. The sauce is a glossy, velvety coat that clings to every piece, and the orange zest lifts the entire dish into a bright, almost celebratory mood. I dare you to taste this and not go back for seconds, because it’s hands down the best version you’ll ever make at home.
I’m not just talking about taste; this dish is a full‑sensory experience. The first bite delivers a burst of citrus that tingles your tongue, followed by a subtle umami depth from the soy sauce, and then a sweet finish from honey that lingers like a sweet after‑glow. The contrast between the crispy edges and the tender interior is a dance of textures that makes every mouthful exciting. Picture yourself pulling this out of the pan, the whole kitchen smelling incredible, and then watching your friends’ faces light up when they take a bite. Let me walk you through every single step — by the end, you’ll wonder how you ever made it any other way.
What Makes This Version Stand Out
- Crunch: The gluten‑free flour creates a light, airy coating that crisps without becoming heavy or greasy, unlike the usual thick batter.
- Sauce: A balanced blend of orange juice, zest, honey, and soy sauce yields a glossy, flavorful glaze that coats the chicken like velvet.
- Texture: The chicken remains juicy inside while the exterior turns to golden perfection, delivering that satisfying bite.
- Speed: Prep takes only 15 minutes, and the entire dish is ready in 45 minutes, making it a go‑to for week‑night dinners.
- Gluten‑free: Every ingredient is gluten‑free, allowing people with celiac disease or gluten sensitivity to enjoy the dish without compromise.
- Versatility: The recipe can be easily doubled or halved, and the sauce can be used as a glaze for pork, shrimp, or tofu.
- Make‑ahead: The chicken can be cooked and the sauce can be prepared in advance, making it ideal for busy schedules.
- Presentation: The bright orange glaze gives the dish a vibrant look that looks as good on a plate as it does in your mouth.
Alright, let’s break down exactly what goes into this masterpiece…
Inside the Ingredient List
The Flavor Base
Orange juice is the heart of this dish, providing a natural sweetness and a bright citrus punch that cuts through the savory notes. Freshly squeezed juice is essential; bottled versions often contain added sugars and preservatives that can overpower the delicate balance. If you’re in a pinch, a 1:1 mix of orange juice and water works, but you’ll lose some of the depth.
Orange zest is a game‑changer. The oils in the zest carry the fruit’s aroma directly to the sauce, creating a fragrance that makes the dish feel like a summer celebration. Grate the zest finely to avoid bitter white pith; a microplane works best. If you’re allergic to citrus, a small pinch of lemon zest can substitute, though the flavor profile will shift slightly.
The Texture Crew
Gluten‑free flour is the secret weapon for that crisp coating. Choose a blend that includes rice flour and a small amount of tapioca starch for elasticity. Avoid blends that contain wheat starch or other gluten‑containing ingredients. If you prefer a crunchier bite, double the flour or add a tablespoon of cornstarch to the mix.
Eggs act as the binder that keeps the flour clinging to the chicken. They also add a subtle richness that balances the bright acidity of the orange. Use fresh eggs for the best texture; if you’re vegan, a flax‑egg substitute works, though the coating may be less crispy.
The Unexpected Star
Garlic and ginger are the aromatic backbone of the sauce. Their sharpness complements the sweet orange, creating a complex flavor profile that feels both familiar and adventurous. Mince them finely to release their oils; a coarse chop will result in uneven flavor distribution.
Vegetable oil is used for frying; a high‑smoke‑point oil such as canola or grapeseed keeps the chicken from absorbing too much fat and maintains a clean, crisp exterior. If you’re watching calories, try a light spray of oil to reduce overall fat content.
The Final Flourish
Gluten‑free soy sauce provides depth and umami while keeping the dish gluten‑free. Look for a low‑sodium variety if you’re monitoring sodium intake. The soy sauce’s saltiness balances the natural sweetness of orange and honey.
Honey or maple syrup is the sweetener that ties everything together. Honey gives a floral undertone, whereas maple syrup adds a subtle earthiness. Use equal parts of either, and adjust to taste; more honey will make the glaze thicker and sweeter.
Cornstarch or tapioca starch is the thickening agent that turns the sauce into a glossy coating. It should be added at the end of the cooking process to avoid clumping. If you’re allergic to corn, tapioca starch works perfectly as a substitute.
Everything’s prepped? Good. Let’s get into the real action…
The Method — Step by Step
- Begin by cutting the chicken breasts into bite‑sized pieces, aiming for uniformity so each piece cooks evenly. Pat the chicken dry with paper towels; moisture on the surface will prevent the coating from adhering properly. Toss the chicken in a bowl with the gluten‑free flour, salt, and pepper until each piece is evenly coated. This step is critical; a light coat ensures a crisp exterior without a heavy batter.
- Whisk the eggs in a shallow dish until the yolk and whites are fully blended. Dip each coated chicken piece into the egg, letting excess drip off before placing it back onto the flour. The egg acts as glue, allowing the coating to cling tightly during frying. If you notice any clumping, shake off the excess flour gently.
- Heat 2 tablespoons of vegetable oil in a large skillet over medium‑high heat. A good test is to drop a small piece of chicken; if it sizzles immediately and starts to brown, the oil is ready. Add the chicken in a single layer, avoiding overcrowding, which will lower the temperature and lead to soggy pieces. Cook for 3–4 minutes on each side until golden brown and cooked through.
- While the chicken is frying, combine orange juice, orange zest, soy sauce, honey, minced garlic, and ginger in a small saucepan. Bring the mixture to a gentle simmer over medium heat, stirring constantly. The aromatics release their flavors, creating a fragrant base that will coat the chicken.
- Whisk 1 tablespoon of cornstarch with 2 tablespoons of cold water to create a slurry. This ensures the thickening agent is evenly distributed and prevents clumping. Once the sauce is simmering, slowly pour in the slurry while stirring vigorously. The sauce will thicken into a glossy glaze within 2–3 minutes.
- Reduce the heat to low and add the cooked chicken pieces to the sauce. Toss gently so that every piece is coated with the glossy orange glaze. Let the chicken simmer in the sauce for an additional 2 minutes, allowing the flavors to meld and the coating to set.
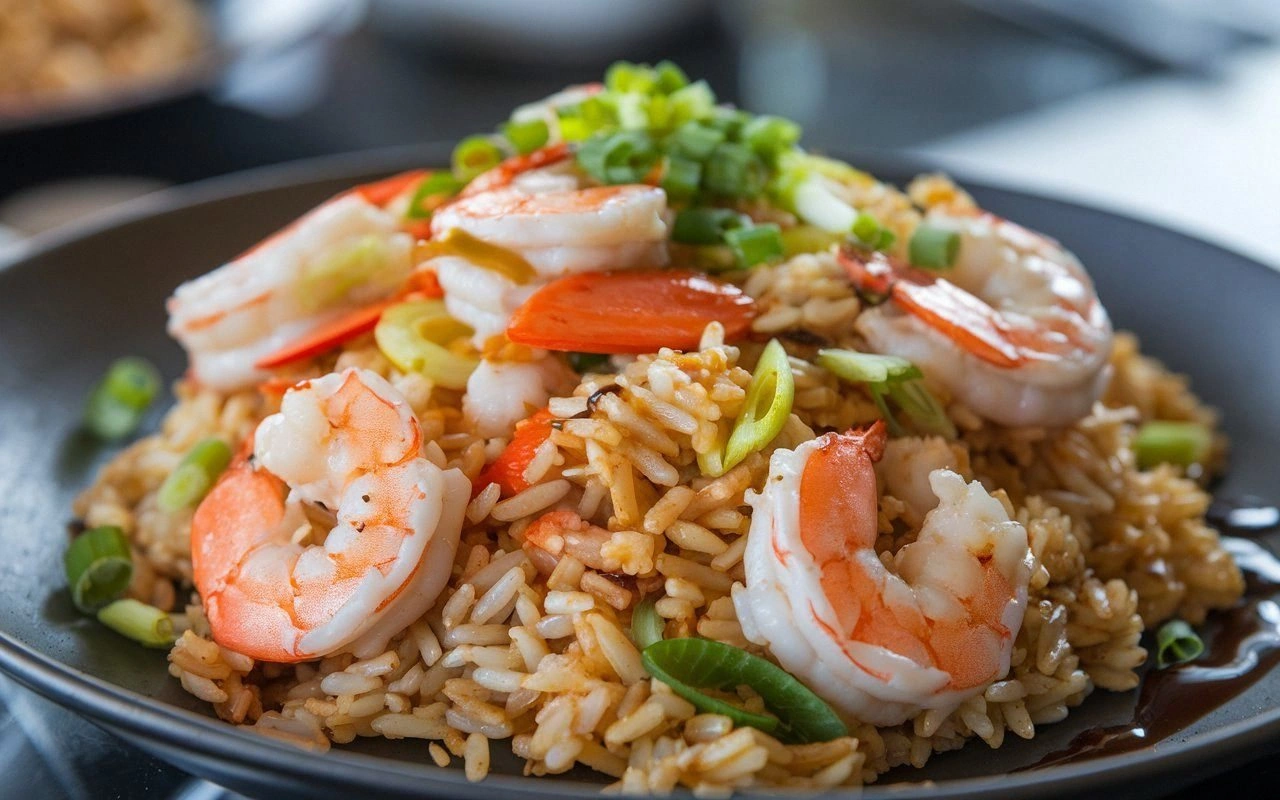
- Serve the chicken over steamed jasmine rice or cauliflower rice for a low‑carb option. Garnish with sliced scallions and a sprinkle of toasted sesame seeds for an added crunch and color contrast. The bright orange glaze should shine like a jewel against the neutral rice.
- If you’re preparing the dish ahead of time, let the chicken cool to room temperature, then store it in an airtight container in the fridge for up to 2 days. When reheating, warm it gently in a skillet over low heat, adding a splash of water to keep the sauce from drying out.
That’s it — you did it. But hold on, I’ve got a few more tricks that will take this to another level. If you’re ready to elevate the dish, keep reading.
Insider Tricks for Flawless Results
The Temperature Rule Nobody Follows
Many cooks fry chicken at the highest heat, thinking it will cook faster. The truth is, medium‑high heat (around 350°F) gives the best balance between a golden exterior and a juicy interior. If the oil is too hot, the coating will burn before the chicken is fully cooked. Use a thermometer to keep the oil between 320–350°F for optimal results.
Why Your Nose Knows Best
Your olfactory senses are a reliable guide. If the sauce smells like a bright citrus garden, you’re on the right track. A burnt or overly sweet aroma signals that the sauce needs to simmer longer or that the honey was added too early. Trust your nose; it will tell you when the flavors have fully blended.
The 5‑Minute Rest That Changes Everything
After cooking, let the chicken rest on a wire rack for 5 minutes. This step allows excess oil to drain and prevents the coating from becoming soggy. It also lets the sauce set into a glossy glaze. Skipping this step often results in a greasy, under‑seasoned dish.
Use a Splash of Citrus Juice When Reheating
When reheating leftovers, add a splash of fresh orange juice or water to the pan. This re‑creates moisture, preventing the sauce from drying out. A quick stir will distribute the liquid evenly, restoring that glossy sheen.
Layer Flavors with Fresh Herbs
Add chopped cilantro or basil at the very end of cooking for a burst of freshness. The herbs contrast the sweet sauce, adding a herbal brightness that makes the dish feel lighter. If you’re not a fan of herbs, a sprinkle of toasted sesame seeds works as a crunchy alternative.
Creative Twists and Variations
This recipe is a playground. Here are some of my favorite ways to switch things up:
Orange‑Ginger Shrimp
Swap the chicken for shrimp, which cooks faster and absorbs the sauce beautifully. The shrimp’s natural sweetness pairs perfectly with the orange glaze, creating a dish that’s both elegant and easy.
Honey‑Sesame Chicken
Add a tablespoon of toasted sesame oil to the sauce for a nutty undertone. Sprinkle sesame seeds on top before serving. The sesame flavor complements the orange, giving the dish a more complex profile.
Spicy Orange Chicken
Incorporate a teaspoon of red pepper flakes or a dash of sriracha into the sauce. The heat balances the sweetness and adds an exciting kick that will keep guests coming back for more.
Cauliflower Rice Bowl
Serve the chicken over cauliflower rice for a low‑carb, keto‑friendly version. The cauliflower’s mild flavor lets the orange glaze shine without competition.
Gluten‑Free Orange Stir‑Fry
Add sliced bell peppers, broccoli, and snap peas to the skillet after the chicken is cooked. Stir‑fry them quickly and toss with the orange sauce for a colorful, nutritious meal that’s perfect for a busy weekday.
Orange Glazed Tofu
For a vegan version, press firm tofu and pan‑fry until golden. Coat with the same orange glaze; the tofu will absorb the sauce and deliver a hearty, plant‑based alternative.
Storing and Bringing It Back to Life
Fridge Storage
Cool the chicken to room temperature, then place it in an airtight container. Store in the refrigerator for up to 2 days. The glaze may thicken slightly; a quick stir will restore its glossy texture.
Freezer Friendly
For longer storage, freeze the chicken in a single layer on a parchment paper sheet. Once solid, transfer to a freezer bag. It will keep for up to 3 months. Reheat in a skillet over medium heat, adding a splash of water to keep the sauce moist.
Best Reheating Method
Reheat the chicken over low heat in a skillet, stirring occasionally. Add a small amount of fresh orange juice or water to help loosen the glaze. This method preserves the sauce’s glossy finish and prevents the coating from drying out.