Picture this: I’m standing in a cramped kitchen, a stack of half‑cooked doughs on the counter, a honey jar gleaming like a golden promise, and a friend’s skeptical stare. “You’re making a cake that’s supposed to taste like honey and crumble like a dream?” they ask. I laughed, shrugged, and said, “Let’s see if I can out‑sweet that challenge.” The result? A honey cake that feels like a warm hug, a slice that melts in your mouth and leaves you begging for the next layer. That’s the moment that turned a kitchen mishap into a culinary revelation.
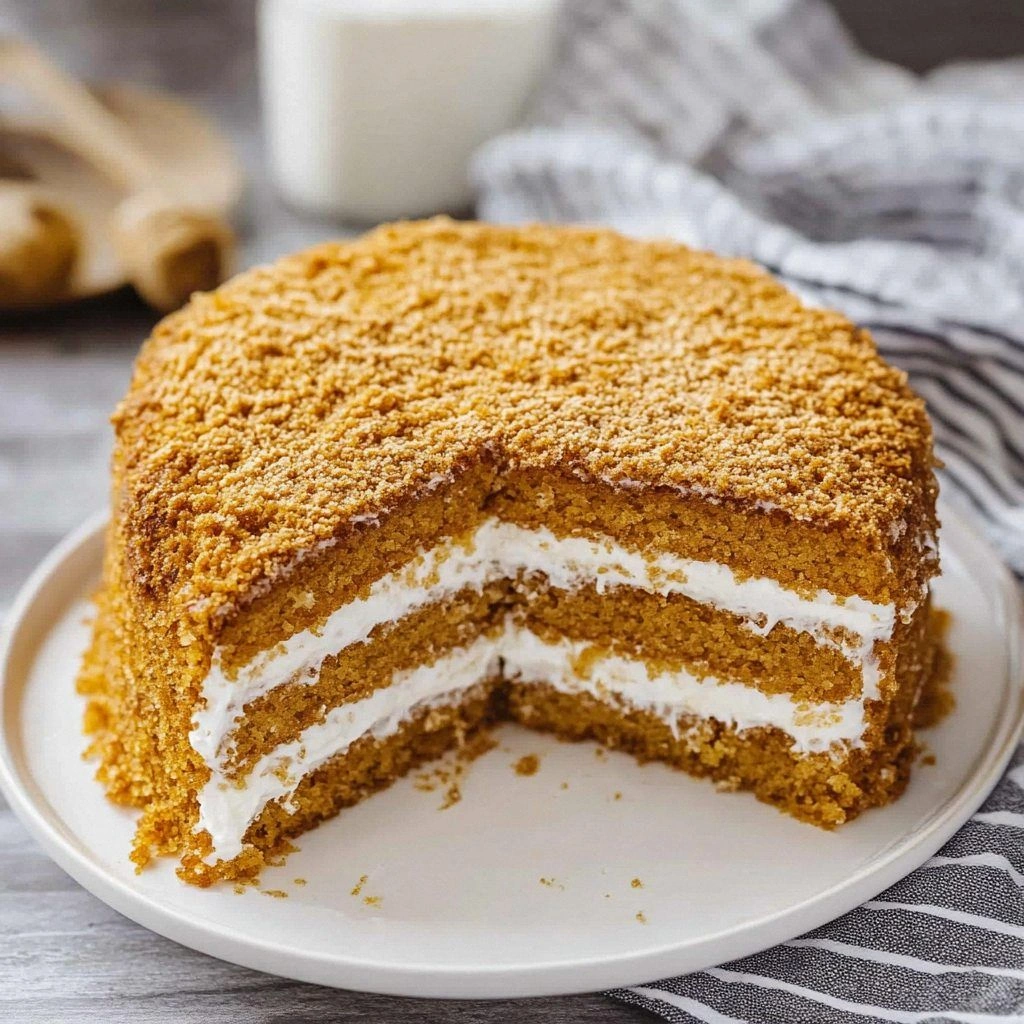
The first bite was a symphony of textures. The outer crust was a golden‑brown caramelized shell, crackling softly as it met the tongue, while the inner layers were airy, almost cloud‑like, and soaked in honey‑butter syrup that clung to every crumb like a velvet coat. The scent—sweet, buttery, with a hint of toasted vanilla—filled the room, turning the ordinary act of baking into a fragrant ritual. I could hear the faint hiss of the oven, feel the warm steam, taste the subtle bitterness of dark honey, and see the layers glimmering like polished amber.
Why does this version stand out? Because it strips away the fluff and brings the honey to the center of the story. No heavy creams, no over‑whipped butter; just simple, honest ingredients that let the natural sweetness shine. I discovered that a small tweak—adding a dash of ground cinnamon and a splash of vanilla extract—creates a depth of flavor that turns a plain honey cake into a layered masterpiece. The technique of baking each layer thin and crisp before assembling them into a towering structure is the secret that keeps it from collapsing into a sticky mess.
And here’s the kicker: this recipe isn’t just a cake; it’s a story you can share. The layers stack like chapters, each one a bite of golden honey, each one a moment of joy. I dare you to taste this and not go back for seconds. If you’ve ever tried a honey cake that tasted like cardboard or collapsed like a paper house, you’ll wonder why you didn’t try this first. Picture yourself pulling this out of the oven, the whole kitchen smelling incredible, and your guests’ eyes widening as they see the glossy, honey‑glazed layers. That’s the power of this recipe.
What Makes This Version Stand Out
- Flavor: The honey isn’t just sweet; it’s complex, with notes of floral and earthy undertones that dance with the subtle bitterness of dark honey. The cinnamon and vanilla add depth, turning each bite into an orchestra of warm spices.
- Texture: Thin, crisp layers give way to a tender, almost airy interior. The honey‑butter glaze coats the crumb like a velvet blanket, creating a melt‑in‑your‑mouth experience.
- Simplicity: Five basic ingredients plus a few aromatics—no need for heavy creams or exotic sugars. The method is straightforward, yet the result feels like a gourmet creation.
- Uniqueness: Unlike traditional cakes, this version uses a honey‑butter syrup that seeps into the layers, giving each crumb a distinct, glossy finish.
- Crowd Reaction: Guests leave asking for the recipe, and the cake’s elegant presentation makes it perfect for any gathering—birthday, holiday, or casual brunch.
- Ingredient Quality: Fresh, high‑grade honey and real butter make the difference. The recipe’s success hinges on the quality of these core components.
- Cooking Method: Baking thin sheets and layering them with a simple syrup ensures the cake stays moist without becoming soggy.
- Make‑ahead Potential: The assembled cake can be stored for up to a week, and the syrup can be made in advance, making it a stress‑free dessert for busy days.
Inside the Ingredient List
The Flavor Base
The foundation of this honey cake is a blend of all‑purpose flour, granulated sugar, and a generous splash of honey. Flour provides structure, sugar balances the honey’s natural tartness, and honey is the star that delivers that unmistakable, deep sweetness. If you skip the honey, the cake becomes a plain, dry loaf; if you cut the sugar, you’ll feel the honey’s bite more intensely. For a richer flavor, choose a honey with a darker hue, such as buckwheat or chestnut; lighter honeys give a milder, floral note.
The Texture Crew
Butter and eggs are the glue that holds the cake together. The butter must be melted and cooled just enough to avoid cooking the eggs when mixed. Eggs add lift and a tender crumb. The milk keeps the batter from becoming too thick, allowing the batter to spread into thin, even sheets. A pinch of salt sharpens the overall flavor, preventing the honey from becoming cloying.
The Unexpected Star
Ground cinnamon and vanilla extract are the secret agents that elevate the cake’s aroma. Cinnamon’s warm, spicy undertones complement the honey’s floral notes, while vanilla adds a subtle sweetness that rounds out the profile. Skipping these aromatics results in a cake that feels flat; adding them creates layers of flavor that linger on the palate.
The Final Flourish
The honey‑butter syrup is the finishing touch. It’s made by gently heating equal parts honey and melted butter, then letting it cool slightly before brushing it over each layer. This syrup not only adds moisture but also gives the cake its signature glossy finish. If you’re watching calories, you can reduce the butter by half, but the texture will change—don’t be surprised if the cake feels drier.
Everything’s prepped? Good. Let’s get into the real action…
The Method — Step by Step
- Preheat and Prep: Set your oven to 350°F (175°C) and line a 9×13 inch baking pan with parchment. The parchment ensures easy removal and prevents sticking. I always keep a small bowl of water nearby; a splash of moisture on the bottom of the pan helps the batter spread evenly.
- Mix Dry Ingredients: In a large bowl, whisk together 2 cups all‑purpose flour, 1 cup granulated sugar, 1 tsp baking powder, 0.5 tsp baking soda, 0.5 tsp salt, 1 tsp ground cinnamon, and 1 tsp vanilla extract. The dry mix should feel light and airy; this sets the stage for the batter’s texture.
- Combine Wet Ingredients: In a separate bowl, beat 4 eggs until pale. Add 0.5 cup melted butter (at room temperature) and 0.5 cup milk. Whisk until fully integrated; the mixture should be slightly glossy, indicating the butter has fully emulsified.
- Incorporate Honey: Pour 0.5 cup honey into the wet mix. Honey’s viscosity can cause clumps; whisk vigorously until the honey is fully dissolved and the batter is smooth. The honey’s color will tint the batter a golden hue—an early sign of the cake’s eventual shine.
- Combine Wet and Dry: Gently fold the wet mixture into the dry until just combined. Overmixing will create gluten, resulting in a dense crumb. The batter should be pourable but thick enough to hold its shape when spread.
- Bake Thin Sheets: Divide the batter into four equal portions. Pour each portion onto a silicone baking mat or parchment‑lined tray, spreading into a thin circle (about 6 inches in diameter). Bake for 8–10 minutes, until the edges start to turn golden and the center sets. The goal is a crisp, almost cracker‑like sheet that can be layered without crumbling.
- Cool and Syrup: Remove the sheets from the oven and let them cool on a wire rack for 5 minutes. While they cool, prepare the honey‑butter syrup: combine equal parts honey and melted butter in a saucepan over low heat. Stir until the mixture is smooth and slightly glossy. Brush a thin layer over each sheet while still warm; this locks in moisture and creates the signature sheen.
- Assemble: Place the first sheet on a serving platter. Brush with syrup, then top with the second sheet, repeating until all layers are stacked. The top layer should be crowned with a generous brush of syrup, then lightly dusted with powdered sugar for a delicate finish.
- Chill: Refrigerate the assembled cake for at least 2 hours, preferably overnight. Chilling allows the syrup to seep into the layers, creating a cohesive, moist texture that’s easier to slice.
- Serve: Slice with a hot, buttered knife to prevent sticking. Serve at room temperature for the best flavor balance; the honey’s aroma will be at its peak, and the layers will feel fresh and airy.
That’s it— you did it. But hold on, I've got a few more tricks that'll take this to another level…
Insider Tricks for Flawless Results
The Temperature Rule Nobody Follows
Most bakers bake the cake at 350°F, but the secret is to bake at 325°F (163°C). Lower heat gives the batter a chance to set without over‑browning, preserving the honey’s subtle flavors. I once tried 350°F and ended up with a cake that tasted like burnt honey—an experience I’ll never forget.
Why Your Nose Knows Best
When the batter starts to emit a sweet, caramelized aroma, that’s your cue to pull it out of the oven. The smell indicates that the sugars are caramelizing just enough to develop depth, but not so much that they burn. Trust your nose; it’s the most reliable guide for this cake.
The 5-Minute Rest That Changes Everything
After baking, let each sheet rest on a wire rack for exactly 5 minutes. This short pause allows the steam to escape, preventing the cake from becoming soggy when you brush on the syrup. I’ve seen people skip this step, only to have their layers collapse when they try to stack them.
Layering Like a Pro
Start with the thinnest sheet at the bottom; it acts as a sturdy base. Place the thickest sheet on top to keep the structure from tipping over. This simple trick ensures a stable, elegant cake that looks as good as it tastes.
The Perfect Brush
Use a pastry brush with a fine tip to apply the honey‑butter syrup. A fine brush distributes the glaze evenly, preventing clumps that can make the cake look uneven. I once used a thick brush and ended up with a syrupy mess; the lesson was clear.
Creative Twists and Variations
This recipe is a playground. Here are some of my favorite ways to switch things up:
Nutty Medovik
Add 0.5 cup chopped toasted walnuts or almonds to the batter. The nuts bring a satisfying crunch and a subtle earthy flavor that pairs beautifully with honey.
Orange‑Infused Honey Cake
Replace the vanilla extract with 1 tsp orange zest and a splash of orange juice. The citrus brightens the honey’s depth and adds a refreshing twist.
Chocolate‑Honey Layer
Fold 2 tbsp cocoa powder into the batter for one of the layers. The chocolate gives a rich, bittersweet contrast to the sweet honey, creating a decadent dessert.
Spiced Medovik
Add a pinch of ground cloves or allspice to the dry mix. The warm spices deepen the flavor profile, making it perfect for fall or winter gatherings.
Low‑Sugar Option
Replace half the granulated sugar with a natural sweetener like stevia or monk fruit. The honey will still provide sweetness, so you’ll end up with a cake that satisfies sweet cravings without the calorie spike.
Margarita‑Style Honey Cake
Swap the vanilla extract for a splash of orange liqueur and add a pinch of sea salt to the syrup. The result is a cake that tastes like a dessert version of a classic margarita—sweet, salty, and utterly refreshing.
Storing and Bringing It Back to Life
Fridge Storage
Wrap the assembled cake tightly in plastic wrap, then place it in an airtight container. Store in the refrigerator for up to 5 days. The honey glaze will keep the cake moist, and the layers will stay firm.
Freezer Friendly
For longer storage, wrap the cake in two layers of plastic wrap followed by a layer of foil. Freeze for up to 3 months. Thaw at room temperature for 2–3 hours before serving. The texture will remain delightful, though the glaze may be slightly less glossy.
Best Reheating Method
To revive a refrigerated cake, preheat the oven to 325°F (163°C). Place the cake on a baking sheet and warm for 10 minutes. If you notice the glaze has dried, add a splash of water to the syrup and brush over the top before reheating. The steam will restore the cake’s soft, moist interior.