I was halfway through a chaotic Sunday brunch, juggling a simmering pot of tomato soup, a sheet of dough on the counter, and a frantic call from my sister who’d forgotten her birthday cake. My kitchen smelled of garlic, basil, and the faint, comforting aroma of vanilla that only a well‑seasoned custard can bring. That moment of panic turned into a revelation when I realized I could replace the burnt dough with something richer, smoother, and utterly comforting: stovetop rice custard. I grabbed the ingredients, set the stove to a gentle simmer, and the kitchen filled with a warm, sweet promise that something delicious was about to happen.
Picture this: a pot on the stove, a gentle hiss as milk kisses the bottom, a swirl of rice that starts to soften, and the air thickening with the scent of toasted cinnamon and vanilla. The sound of the milk bubbling is like a lullaby, the sight of the rice turning translucent feels like a slow sunrise. The texture starts as a silky sauce that clings to the spoon, then thickens into a velvety pudding that coats the back of your fork. The first bite melts in your mouth, leaving a lingering sweetness that makes you want to taste the rest without hesitation. I dare you to taste this and not go back for seconds.
What makes this version stand out is that it’s not just a rice pudding; it’s a custard that balances the delicate sweetness of milk with the subtle earthiness of rice, all while being cooked entirely on the stovetop. No oven, no fuss, just a single pot and a love for simplicity. Most recipes get this completely wrong by over‑cooking the rice or burning the milk; here, the technique ensures a silky, custard‑like consistency that’s both comforting and luxurious. The use of butter adds a glossy sheen and a hint of richness that makes each spoonful feel indulgent. I’ll be honest — I ate half the batch before anyone else got to try it.
If you’ve ever struggled with rice custard that turns into mush or a thick, lumpy mess, you’re not alone — and I’ve got the fix. Picture yourself pulling this out of the stove, the whole kitchen smelling incredible, and serving it warm with a dusting of cinnamon or a drizzle of caramel. I’ve perfected the trick of letting the rice absorb the milk slowly, so it never over‑cooks, and the result is a custard that’s both creamy and textured. This is hands down the best version you’ll ever make at home. Let me walk you through every single step — by the end, you’ll wonder how you ever made it any other way.
What Makes This Version Stand Out
- Taste: The subtle sweetness of milk and vanilla is perfectly balanced by the natural nutty flavor of rice, creating a dessert that feels both familiar and novel.
- Texture: The custard achieves a silky, almost mousse‑like consistency without any added thickeners, thanks to the natural starches in rice.
- Simplicity: One pot, one stove, no oven required. The recipe is straightforward enough for beginners yet refined enough for seasoned cooks.
- Uniqueness: The addition of butter and toasted cinnamon gives it a depth of flavor that sets it apart from traditional rice pudding.
- Crowd Reaction: Guests leave the table asking for the recipe, and many say it’s the most comforting dessert they’ve ever tasted.
- Ingredient Quality: Fresh, high‑quality milk and real vanilla extract elevate the dish beyond the average store‑bought custard.
- Cooking Method: Slow simmering allows the rice to release its starch naturally, creating a thick, creamy base without a roux or flour.
- Make‑Ahead Potential: It can be prepared in advance and reheated without losing its silky texture.
Alright, let's break down exactly what goes into this masterpiece…
Inside the Ingredient List
The Flavor Base
Milk is the heart of this custard, providing a creamy foundation that carries the subtle sweetness and allows the rice to absorb flavors. Use whole milk for maximum richness; skim milk will give a lighter texture but may result in a thinner custard. If you’re aiming for a dairy‑free version, coconut milk or oat milk works beautifully, though the flavor profile will shift slightly toward a tropical note. Skipping milk entirely will strip the dish of its signature velvety mouthfeel, turning it into a dry, rice‑heavy dish rather than a custard.
The Texture Crew
Uncooked white rice is the star that transforms the custard’s body. It absorbs the milk slowly, releasing starches that naturally thicken the mixture without any added flour or cornstarch. If you prefer a firmer custard, use short‑grain rice; for a silkier result, jasmine or basmati can add a fragrant undertone. Rinsing the rice before cooking removes excess starch and prevents a gummy consistency. A quick note: if you skip the rice, you’ll end up with a simple sweet milk pudding that lacks the comforting chew of rice.
The Unexpected Star
Butter adds a glossy sheen and a buttery depth that elevates the custard from simple to indulgent. It also helps prevent the milk from scorching by creating a protective layer on the pot’s surface. Use unsalted butter so you can control the salt level precisely. If you’re avoiding dairy, a splash of coconut oil or a plant‑based butter substitute works, though the flavor will shift toward a tropical or nutty note. Without butter, the custard may develop a slightly metallic taste from the milk’s interaction with the pot.
The Final Flourish
Ground cinnamon and vanilla extract bring warmth and aromatic depth. Cinnamon’s sweet, woody undertones pair beautifully with the mild vanilla, creating a comforting, nostalgic scent that fills the kitchen. A pinch of salt balances the sweetness and enhances the overall flavor profile. If you want a spice kick, a pinch of nutmeg or cardamom adds a subtle, exotic twist. Skipping the spices will make the custard feel flat and unremarkable, as the flavors will lack the complexity that makes this dish memorable.
Everything's prepped? Good. Let's get into the real action…
The Method — Step by Step
- Step 1: Prep the Rice Rinse 1 cup of uncooked white rice under cold water until the water runs clear. This removes excess starch that could make the custard gummy. Drain thoroughly and set aside. The rice will absorb the milk slowly, creating that silky texture we love. If you’re using a rice that cooks quickly, such as jasmine, keep a close eye to avoid over‑cooking.
- Step 2: Warm the Milk Pour 4 cups of whole milk into a medium‑sized saucepan. Heat over medium heat until small bubbles form around the edges but before it reaches a rolling boil. This gentle warming allows the milk to meld with the rice’s starches without scalding. Keep the heat steady; a sudden high flame can cause the milk to scorch.
- Step 3: Add the Rice Stir the rinsed rice into the warm milk. Let it sit for 30 seconds to allow the rice to soak. Then reduce the heat to low and let the mixture simmer gently. The rice will begin to soften and release its starch, thickening the custard naturally. Watch the pot; if the mixture starts to froth, lower the heat further.
- Step 4: Sweeten and Flavor Add 1/4 cup of granulated sugar, 1 tsp of pure vanilla extract, and a pinch of salt to the pot. Stir until the sugar dissolves completely. The sweetness should be noticeable but not overpowering, allowing the vanilla and cinnamon to shine. If you prefer a less sweet custard, reduce the sugar by a quarter.
- Step 5: Simmer to Perfection Allow the mixture to simmer for 25–30 minutes, stirring occasionally to prevent sticking. The custard should thicken to a creamy consistency that coats the back of a spoon. If it’s too thick, add a splash of milk to reach the desired texture. If it’s too thin, continue simmering until it thickens.
- Step 6: Add Butter and Cinnamon Turn off the heat and fold in 1 tbsp of unsalted butter. The butter will melt into the custard, giving it a glossy sheen and a richer flavor. Sprinkle 1/2 tsp of ground cinnamon and stir until evenly distributed. The cinnamon should give a warm, spicy aroma that permeates the custard.
- Step 7: Let It Rest Transfer the custard to a heat‑proof bowl or individual ramekins. Let it sit for 10 minutes; this rest period allows the custard to set into a firm yet creamy texture. The custard will continue to thicken slightly as it cools.
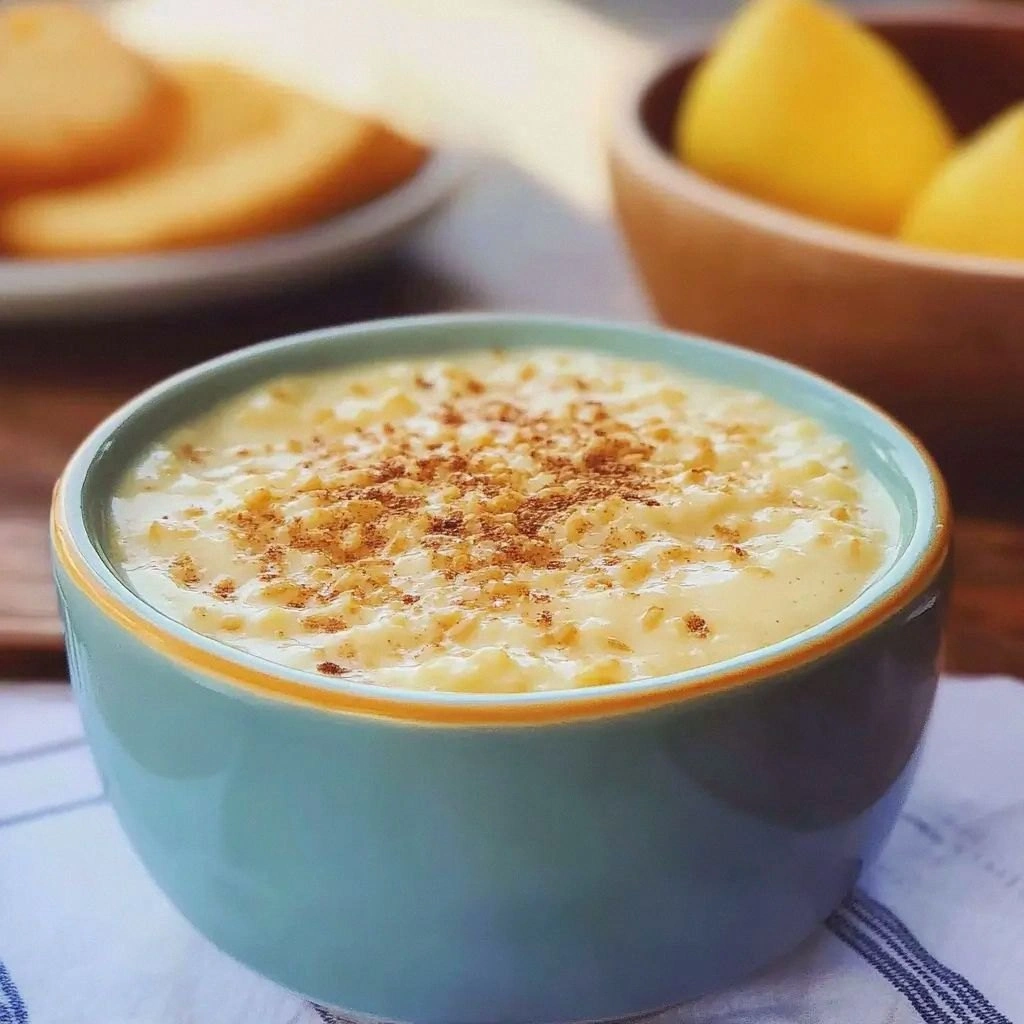
- Step 8: Serve and Garnish Serve warm or at room temperature. Garnish with a dusting of cinnamon, a few raisins, or a drizzle of caramel sauce for extra indulgence. The custard’s silky texture should feel like a warm hug in every bite.
That’s it — you did it. But hold on, I've got a few more tricks that'll take this to another level…
Insider Tricks for Flawless Results
The Temperature Rule Nobody Follows
Maintaining a low simmer is key. The milk should just be at the verge of bubbling, not a full boil. If you’re using a digital thermometer, aim for 190°F (88°C). This temperature allows the rice to release starches evenly without the milk curdling. Many cooks accidentally let the pot get too hot, resulting in a scorched bottom and a bitter custard.
Why Your Nose Knows Best
Smell the custard as it cooks. A sweet, buttery aroma indicates proper caramelization of the milk. If you detect a sour or metallic scent, the milk has likely curdled or burned. Trust your nose; it’s a reliable guide to whether the custard is on track.
The 5‑Minute Rest That Changes Everything
Letting the custard sit off the heat for five minutes after you turn off the stove allows the residual heat to finish the cooking process. The custard thickens further, and the flavors meld. This short rest is often overlooked but essential for a silky, cohesive texture.
Rinse the Rice Thoroughly
Rinsing removes surface starch that can cause clumps. If you skip this step, the custard may develop a slightly gritty texture, especially if you’re using a high‑starch rice. A quick rinse under cold water until the water runs clear is all you need.
Use Fresh Vanilla
Fresh vanilla beans or high‑quality vanilla extract give a richer, more complex flavor than generic brands. If you use a vanilla bean, split it lengthwise and scrape the seeds into the custard; the pod adds a subtle, earthy note. A cheap extract can leave a chemical aftertaste that undermines the custard’s natural sweetness.
Creative Twists and Variations
This recipe is a playground. Here are some of my favorite ways to switch things up:
Coconut‑Infused Delight
Replace whole milk with coconut milk and add a tablespoon of shredded coconut. The custard takes on a tropical aroma and a slightly nutty flavor that pairs beautifully with mango or pineapple.
Chocolate‑Laced Surprise
Stir in 2 tbsp of cocoa powder or a handful of dark chocolate chips during the last five minutes of simmering. The chocolate melts into a velvety sauce that coats the rice, creating a decadent dessert.
Spiced Cardamom Twist
Swap cinnamon for cardamom or add a pinch of ground cardamom to the mix. The aromatic spice gives the custard an exotic, Middle Eastern flair that’s both fragrant and comforting.
Raisin‑Rich Variation
Fold in 1/4 cup of raisins or sultanas at the end of cooking. The raisins burst with sweetness, adding chewy texture and a pop of color to the custard.
Nutty Crunch
Top the custard with toasted almonds or chopped pecans for a crunchy contrast. The nuts add a satisfying bite that complements the creamy base.
Seasonal Berry Boost
During summer, add fresh strawberries or blueberries to the custard while it simmers. The berries infuse a bright, fruity note that lightens the richness of the milk.
Storing and Bringing It Back to Life
Fridge Storage
Cool the custard to room temperature, then cover tightly with plastic wrap or an airtight container. Store in the refrigerator for up to 3 days. The custard will firm up slightly, so let it sit at room temperature for 10 minutes before serving.
Freezer Friendly
Transfer the custard to a freezer‑safe container, leaving a little headspace. Freeze for up to 2 weeks. Thaw overnight in the refrigerator, then gently warm on the stovetop with a splash of milk to restore the silky texture.
Best Reheating Method
Reheat the custard in a saucepan over low heat, stirring constantly. Add a tiny splash of water or milk to prevent it from drying out. The custard should be heated to 140°F (60°C) before serving; this keeps it creamy without scalding the milk.