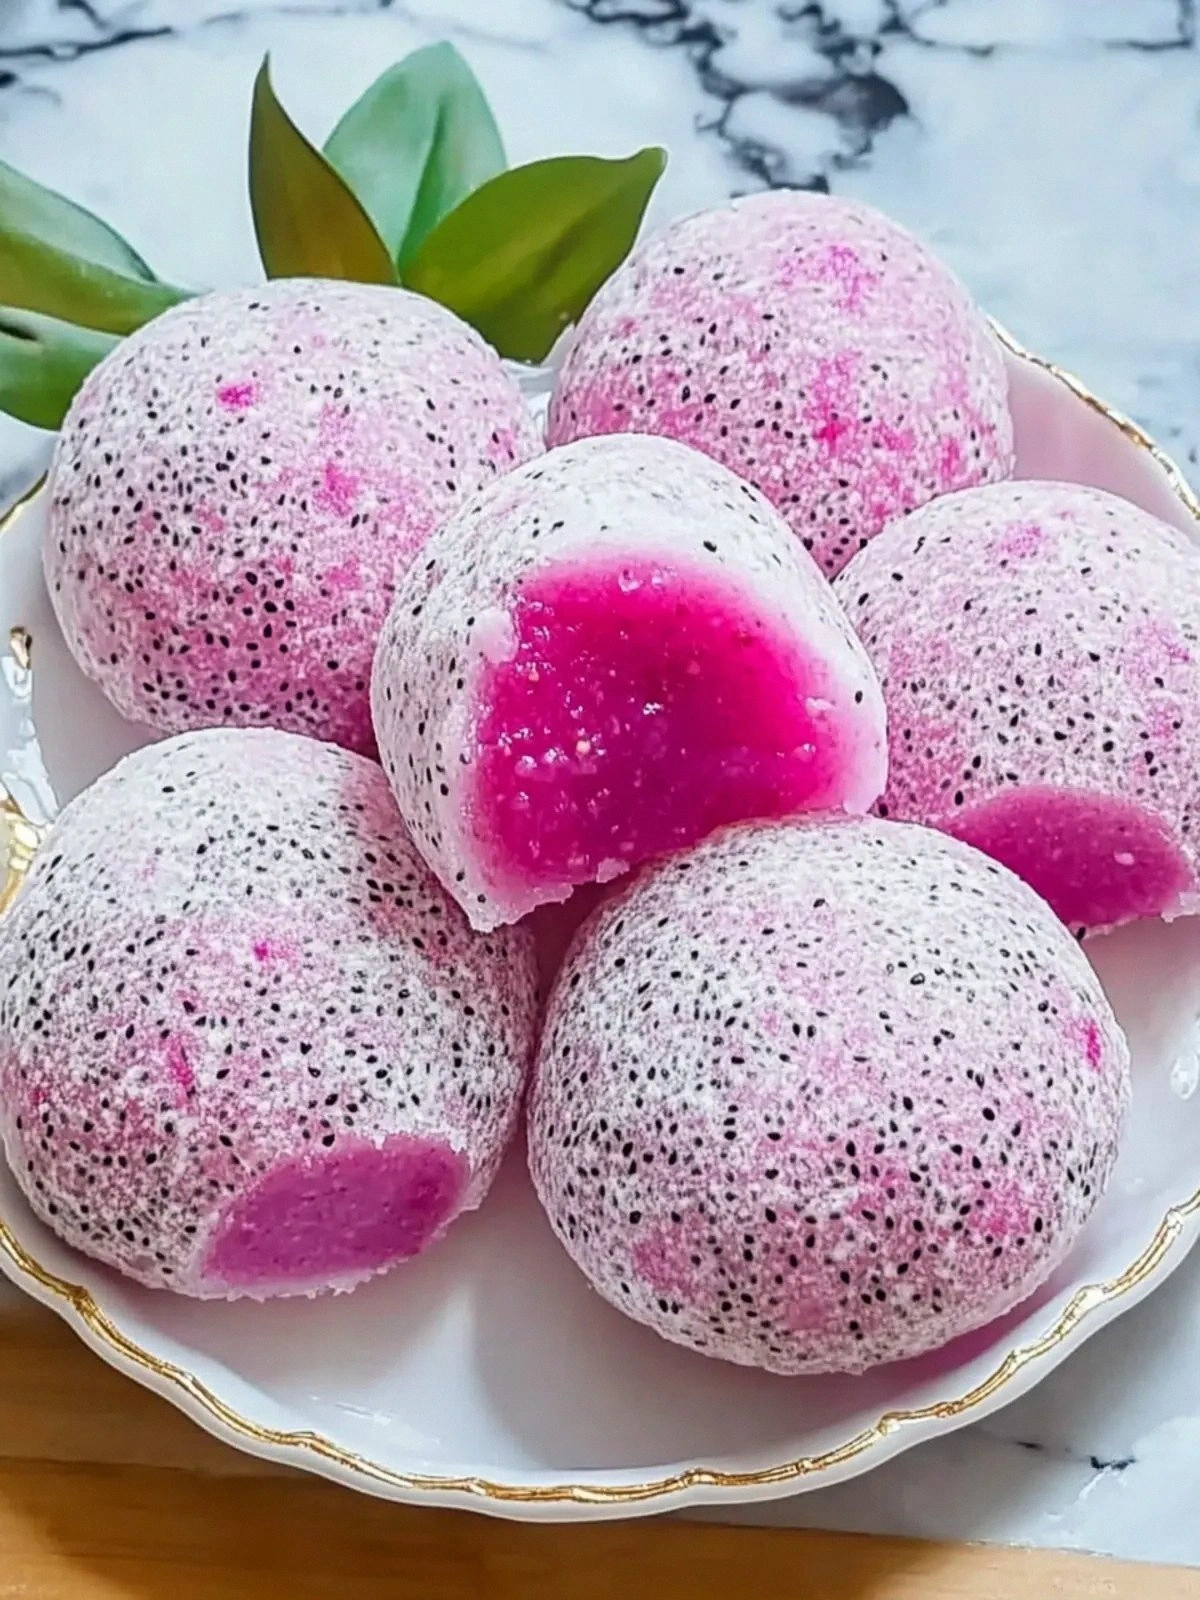
Picture this: I’m standing in my tiny apartment kitchen, a half‑baked batch of plain mochi on the counter, and a friend texts me, “You’ve got to try this, it’s like a tropical party in your mouth.” I laughed, because honestly, the idea of turning a simple sticky rice cake into a dragon fruit‑infused dream seemed as far‑fetched as a unicorn in a bakery. But then I sliced open a bright, ruby‑red dragon fruit, its flesh a gentle pink that glowed like sunrise, and the inspiration hit me—why not marry the chewy, cloud‑like texture of mochi with that juicy, exotic fruit? The result? A dessert that feels like a beach vacation in every bite.
I’ve spent months experimenting with mochi, chasing that perfect balance between pliable chew and airy lightness. The first time I tried this recipe, the dough was a little too sticky, the dragon fruit too watery, and the coconut flakes just flat. I learned that the secret is in the precise ratios and the subtle timing of each step. If you’re like me and love a good kitchen adventure, buckle up; we’re about to dive into a recipe that will make your taste buds do a happy dance.
This isn’t your grandma’s mochi, and it’s definitely not a standard sweet treat. I’ve taken the traditional Japanese staple and given it a tropical makeover—think silky chewy core, a burst of dragon fruit juice that coats each bite like a sweet glaze, and a sprinkle of coconut that adds a gentle crunch. The flavor profile is a harmonious blend of sweet, citrusy, and nutty, all wrapped in a soft, melt‑in‑your‑mouth texture. I dare you to taste this and not go back for seconds.
By the end of this post, you’ll have a step‑by‑step guide that covers everything from ingredient prep to the final plating. We’ll tackle the most common pitfalls, sprinkle in a few kitchen hacks, and even throw in a few variations so you can customize it to your mood. Ready? Let’s walk through each single step, and by the end, you’ll wonder how you ever made it any other way.
What Makes This Version Stand Out
- Texture: The combination of glutinous rice flour and cornstarch creates a uniquely airy chew that doesn’t clump, giving the mochi a cloud‑like feel that melts effortlessly.
- Flavor: Dragon fruit juice isn’t just a color boost—it adds a subtle citrusy sweetness that cuts through the richness of the coconut flakes.
- Simplicity: With only eight ingredients, you can whip up a batch in under 45 minutes, making it perfect for a last‑minute dessert.
- Uniqueness: Most mochi recipes use plain water or simple sugar; we replace those with milk and dragon fruit for a creamy, tropical twist.
- Audience: The bright pink hue and playful texture make it a crowd‑pleaser at parties, especially for those who love Instagram‑ready desserts.
- Ingredient Quality: Fresh dragon fruit and toasted coconut flakes elevate the dish, turning a simple snack into a gourmet treat.
- Cooking Method: Steaming the dough in a silicone mold ensures even heat distribution, preventing the dreaded rubbery center.
- Make‑Ahead Potential: These mochi can be refrigerated for up to three days or frozen for a month, making them a versatile pantry staple.
Alright, let’s break down exactly what goes into this masterpiece…
Inside the Ingredient List
The Flavor Base
Milk is the unsung hero here, providing a subtle richness that balances the bright sweetness of the dragon fruit. It also helps the dough achieve that silky sheen that makes the mochi feel indulgent without being greasy. Skipping milk would leave the dough a bit dry and the flavor flat; you’d miss that creamy undertone that’s essential to this recipe’s character.
The Texture Crew
Glutinous rice flour is the star ingredient that gives mochi its signature chew. It’s called “glutinous” not because it contains gluten, but because it’s sticky when hydrated. Pairing it with cornstarch lightens the dough, preventing it from becoming overly dense. If you’re short on glutinous rice flour, you can substitute 50% with all‑purpose flour, but the chew will be noticeably different.
The Unexpected Star
Dragon fruit juice is the secret sauce that turns ordinary mochi into a tropical delight. The juice infuses the dough with a natural pink hue and a subtle citrus flavor that cuts through the sweetness of the sugar. If you can’t find dragon fruit juice, a splash of passion fruit or a few drops of pink beet juice will do the trick—just be aware the flavor profile will shift slightly.
The Final Flourish
Coconut flakes add a delightful crunch and a hint of tropical sweetness that complements the dragon fruit. Toast them lightly before adding to enhance their flavor and prevent them from becoming soggy during steaming. If you’re vegan or have a coconut allergy, shredded almond or toasted sesame seeds can provide a similar textural contrast.
Everything’s prepped? Good. Let’s get into the real action…
The Method — Step by Step
- In a medium bowl, whisk together the glutinous rice flour and cornstarch until the mixture is smooth. The fine texture of this blend is essential; any lumps will translate into uneven chew. Set aside while you prep the liquid base.
- In a small saucepan, heat the milk over medium heat until it just begins to steam—do not let it boil. Add the granulated sugar, stirring until dissolved. The sugar should dissolve completely; any granules will ruin the silky mouthfeel. Remove from heat and let it cool to lukewarm.
- Slice the dragon fruits in half and scoop out the flesh with a spoon. Transfer the flesh to a blender, add the 10 g of dragon fruit juice, and pulse until completely smooth. This puree will be the color and flavor engine of your mochi.
- Combine the warm milk mixture with the dragon fruit puree, stirring until the mixture is uniform. The mixture should feel like a thick, glossy custard. If it seems too thick, add a tablespoon of water to reach the desired consistency.
- Gently fold the dry flour mixture into the wet mixture until a sticky dough forms. The dough should be tacky but not overly wet. If it feels too dry, drizzle a teaspoon of corn oil and mix again; the oil will help keep the mochi soft.
- Line a silicone mold or a shallow dish with parchment paper and spoon the dough into it, smoothing the surface with a spatula. The thickness should be about 1.5 cm; too thin and it will collapse, too thick and it will steam unevenly.
- Steam the dough over simmering water for 20 minutes. Cover the pot tightly and check after 15 minutes: the surface should look glossy, and a toothpick inserted into the center should come out clean. Once done, remove the mochi from the steamer and let it cool on a rack for 10 minutes before cutting.
- While the mochi is still warm, dust it generously with toasted coconut flakes, pressing lightly so the flakes adhere. The coconut should be slightly toasted to bring out a nutty aroma; if you forget, the texture will still be fine, but the flavor will be less pronounced.
- Slice the mochi into bite‑sized pieces and serve immediately, or store in an airtight container in the refrigerator for up to three days. If you plan to serve later, a quick steam or a splash of warm water will revive the chewiness.
That’s it— you did it. But hold on, I’ve got a few more tricks that will take this to another level. Keep reading for insider tips that will make every bite feel like a spa day for your taste buds.
Insider Tricks for Flawless Results
The Temperature Rule Nobody Follows
The milk should never reach a full boil. A gentle steam is key; a rolling boil will cause the milk to evaporate too quickly, making the dough tough. I’ve seen mochi turn rubbery when the temperature gets too high—trust me, a quick taste test with a toothpick is the best indicator.
Why Your Nose Knows Best
The aroma of toasted coconut is a subtle but powerful cue that the coconut has reached its optimal flavor point. If you notice a raw, green smell, you’ve under‑toasted the flakes; if it’s too burnt, you’ve over‑toasted them. The right balance will give you that nutty perfume that pairs beautifully with the dragon fruit.
The 5‑Minute Rest That Changes Everything
After steaming, let the mochi rest for exactly five minutes before cutting. This pause allows the steam to redistribute, ensuring each slice holds together and the surface is smooth. Skipping this step can result in mochi that crumbles when you try to cut it.
A Friend’s Lesson on Oil
A friend once tried making mochi without corn oil, thinking it was unnecessary. The result was a slightly dry, crumbly texture that didn’t hold together. Adding just a tablespoon of corn oil keeps the dough supple and prevents it from sticking to the mold.
The Secret to a Perfect Bite
If you want each bite to be a burst of flavor, roll the mochi pieces in a mix of coconut flakes and a pinch of sea salt before serving. The salt sharpens the sweetness and the coconut adds a satisfying crunch.
Creative Twists and Variations
This recipe is a playground. Here are some of my favorite ways to switch things up:
Citrus Burst
Swap the dragon fruit puree with a blend of orange and lime juice, adding a splash of vanilla extract. The result is a bright, zesty mochi that’s perfect for summer gatherings.
Matcha Magic
Stir a teaspoon of matcha powder into the dry flour mixture. The green pigment gives the mochi a subtle earthy flavor, and the color contrast is Instagram‑worthy.
Berry Bliss
Incorporate a handful of fresh blueberries into the dough before steaming. The berries burst in the center, creating a juicy surprise that pairs nicely with the coconut.
Nutty Surprise
Add a tablespoon of finely chopped pistachios to the coconut topping. The pistachios add a crunchy texture and a nutty aroma that complements the tropical base.
Spiced Edition
A pinch of cardamom or a dash of ground ginger in the dry mixture gives the mochi a warm, aromatic depth—ideal for a cozy night in.
Vegan Version
Use oat milk instead of dairy milk and replace the corn oil with a neutral‑flavored nut oil. The texture remains the same, and the flavor stays vibrant.
Storing and Bringing It Back to Life
Fridge Storage
Place the mochi in an airtight container and store in the refrigerator for up to three days. The moisture from the container keeps the mochi from drying out, preserving its chewy texture.
Freezer Friendly
Wrap each mochi piece individually in plastic wrap before placing them in a freezer bag. Freeze for up to one month. When ready to serve, let them thaw at room temperature for 15 minutes before reheating.
Best Reheating Method
A quick steam or a splash of warm water will revive the mochi’s chewiness. Place the mochi on a heat‑proof plate, cover with a damp paper towel, and microwave for 15–20 seconds. The result is a warm, soft mochi that tastes just like fresh.