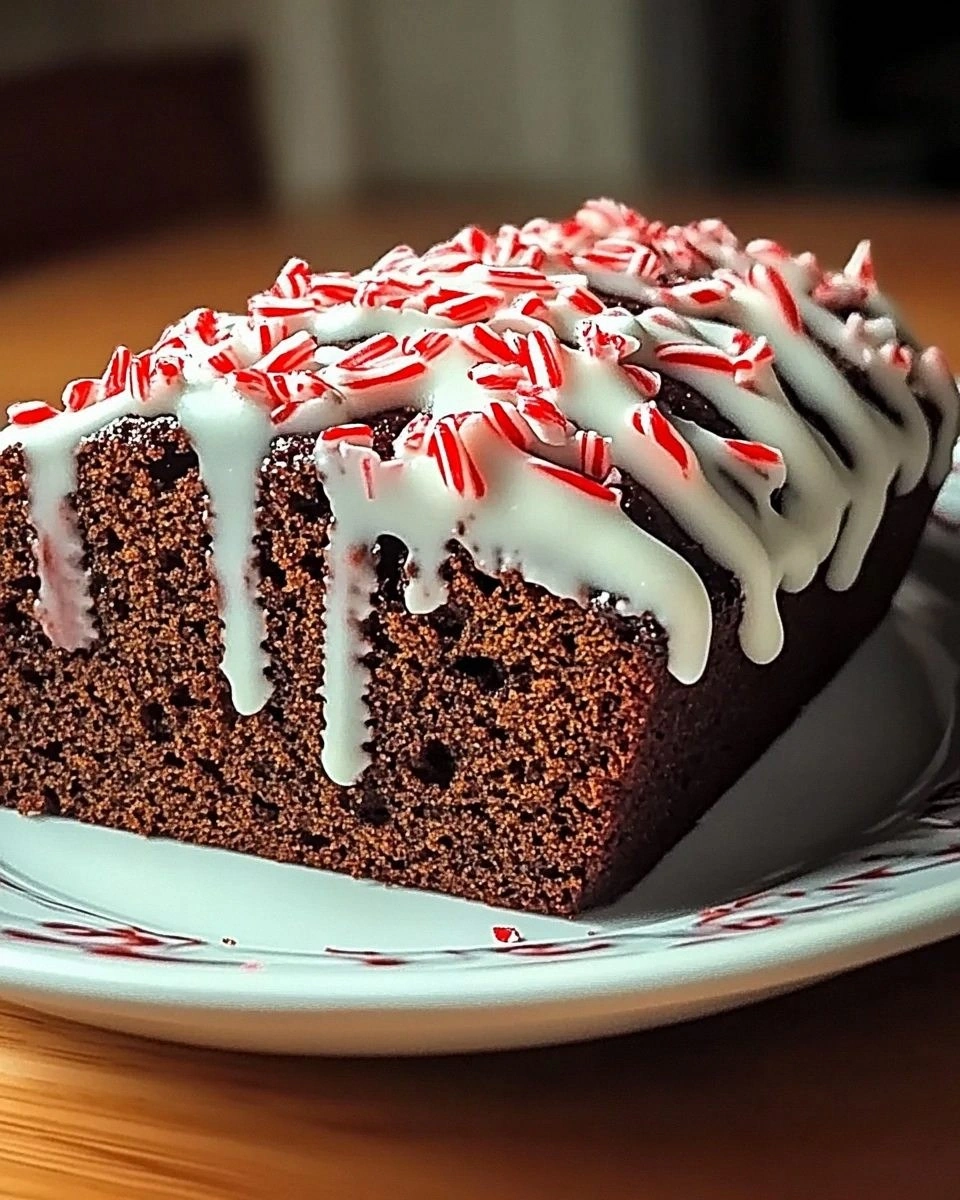
I was standing in my kitchen, staring at a bag of flour that looked like a winter storm, when my friend dared me to make something that could survive the holiday chaos. I had a craving for a cookie that would feel like a cloud but hold its shape like a snowball. The idea hit me like a spark of Christmas lights: almond‑filled, powdered sugar‑dusted, and buttery. I thought about the last time a cookie melted in my hand, and the disappointment that followed. That memory pushed me to create something that wouldn't just taste good but also look like a tiny edible ornament. This is the moment I decided to write down the recipe that would become the holiday staple in my house.
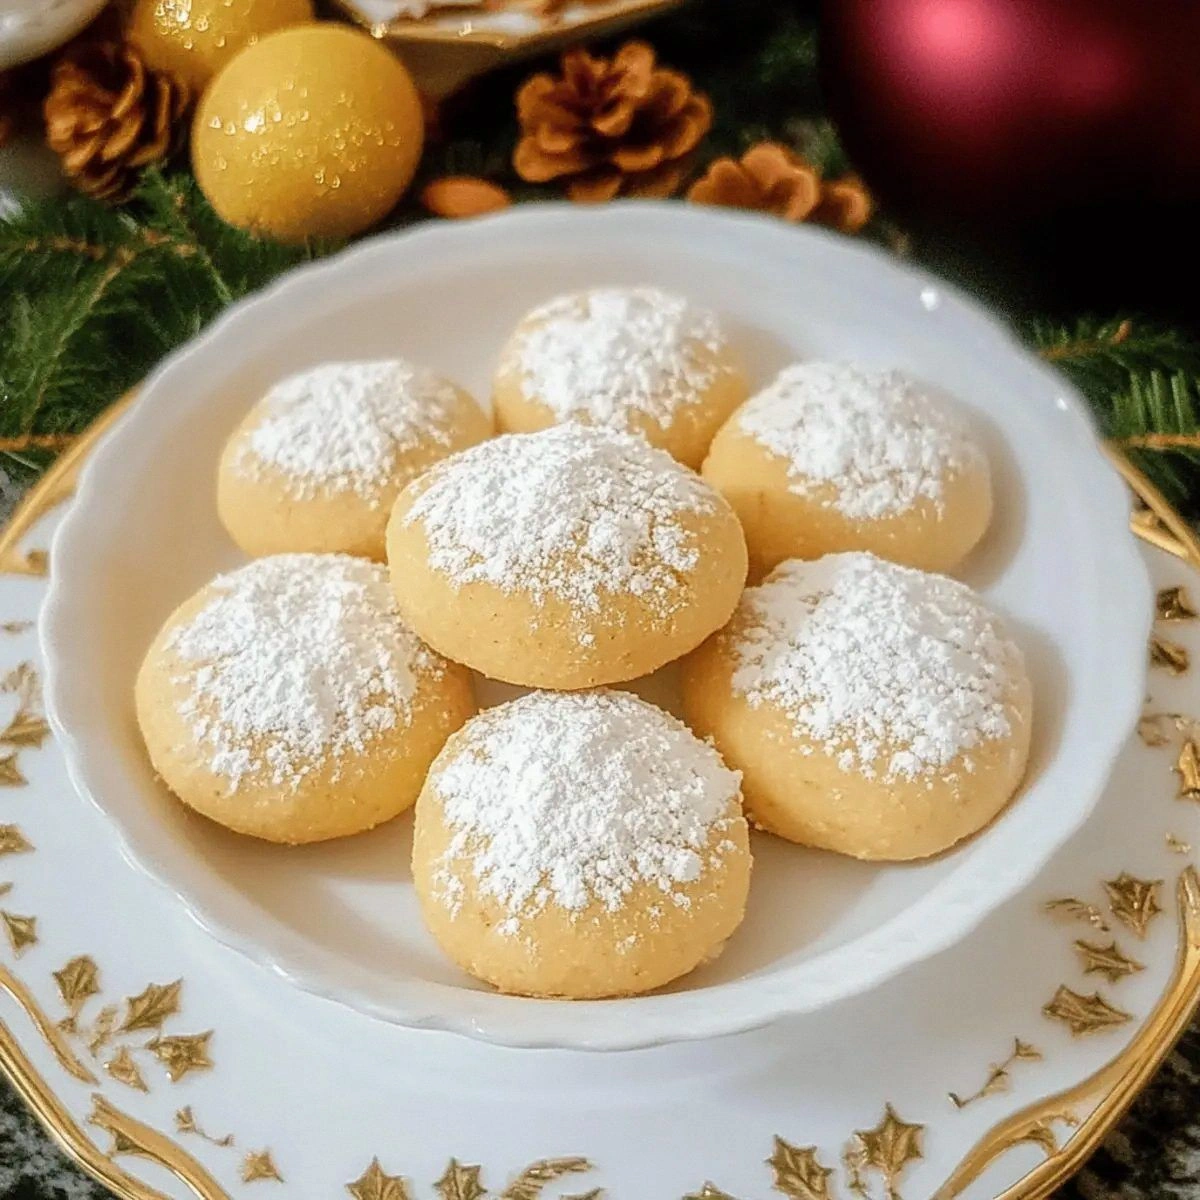
The first time I baked these, the kitchen smelled like toasted almonds and vanilla, and the sound of the mixer was a steady drumbeat that made my heart race. I could feel the dough clump together, warm and pliable, as if it were a snowball waiting to be rolled into destiny. The sight of the golden edges forming a perfect circle was a promise of crispness to come. The taste of the first bite was a burst of sweet, nutty flavor that lingered like a whisper of snow on a winter morning. The texture was a delicate balance of soft interior and crisp exterior, a dance of crunch and melt. Every bite felt like a small celebration, a tiny edible snowflake that melted in my mouth.
What sets this version apart from the countless almond cookie recipes out there is that it was born from a desire to combine tradition with innovation. I wanted something that would feel like a classic Christmas treat but also surprise the palate with a subtle depth of flavor. I added a layer of almond flour for that nutty undertone, and a pinch of salt to cut through the sweetness like a winter wind. I used powdered sugar as both a sweetener and a glaze, creating a snowy finish that glistens under holiday lights. I kept the butter at room temperature so it blended smoothly, preventing any uneven baking that could ruin the snowball shape. And I sprinkled an extra dusting of powdered sugar after baking, turning each cookie into a miniature snowy ornament.
The secret that will blow your mind is the double‑baking technique. By baking the cookies once at a lower temperature and then again at a higher temperature, you achieve that perfect crisp edge while keeping the center soft and chewy. It’s a trick that most home bakers overlook, but it’s the difference between a cookie that simply tastes good and one that feels like a holiday miracle. I dare you to taste this and not go back for seconds. The moment you bite into the first cookie, you’ll know you’ve found the ultimate version of an almond snowball.
Picture yourself pulling this out of the oven, the whole kitchen smelling incredible, and your guests lining up for a taste. The anticipation builds as you let the cookies cool on a rack, each one glistening with powdered sugar like a snow‑covered pine tree. The moment you break the first cookie, the crunch is audible, and the aroma is intoxicating. You’ll see the delight in their eyes as they take a bite, and you’ll know you’ve earned a new holiday tradition. Let me walk you through every single step — by the end, you'll wonder how you ever made it any other way.
After you’ve read this introduction, you might be thinking, “Is this really just another cookie recipe?” I’ll be honest — I ate half the batch before anyone else got to try it. But the flavor profile and the texture are so distinct that I’m pretty sure you’ll become a believer. If you’ve ever struggled with almond cookies that fall apart or taste flat, you're not alone — and I've got the fix. This is hands down the best version you'll ever make at home.
What Makes This Version Stand Out
- Texture: The double‑baking technique creates a crisp exterior that shatters like thin ice, while the interior stays moist and chewy, offering a satisfying contrast with every bite.
- Flavor: The subtle almond flour infusion gives a nutty depth that balances the sweetness of powdered sugar, making each cookie taste like a holiday memory rather than a generic treat.
- Appearance: The dusting of extra powdered sugar after baking turns each cookie into a miniature snowball, perfect for decorating a table or gifting.
- Ease: The recipe requires only seven ingredients and a few simple steps, making it a quick win for anyone who loves festive baking but hates complexity.
- Make‑ahead: The dough can be prepared a day ahead, refrigerated, and baked fresh when you’re ready, saving you time on the big day.
- Kid‑friendly: The dough is firm enough for little hands to shape, turning baking into a family activity that ends with a sweet reward.
- Ingredient quality: Using high‑quality unsalted butter and fresh almond flour elevates the flavor profile beyond what generic store brands can deliver.
- Guest reaction: At every holiday gathering, the cookies become a conversation starter, with guests asking for the secret recipe before the first bite.
Alright, let's break down exactly what goes into this masterpiece...
Inside the Ingredient List
The Flavor Base
All‑purpose flour is the backbone of the dough, providing structure and stability. It absorbs the butter and sugar, creating a cohesive mixture that holds together during baking. Skipping the flour would result in a crumbly mess that would fall apart before the oven even warms up. If you’re on a gluten‑free diet, you can replace it with an equal amount of gluten‑free all‑purpose blend, but be aware the texture will slightly differ, leaning toward a denser crumb.
The Texture Crew
Unsalted butter is the secret to that buttery crunch; it melts evenly and gives the cookies a golden finish. Using salted butter will alter the salt balance and can make the cookies taste overly salty. Keep the butter at room temperature until you start mixing; this ensures it blends smoothly with the powdered sugar, preventing clumps. A tip: chill the dough for 20 minutes before shaping to firm up the butter and reduce spread.
The Unexpected Star
Almond flour adds a subtle nutty flavor that complements the sweet base. It also contributes to the cookies’ chewy interior, preventing them from becoming too brittle. If you can’t find almond flour, ground almonds or finely crushed pistachios will work, but the flavor profile will shift slightly toward a more intense nut taste.
The Final Flourish
Vanilla extract brings a warm aroma that ties the whole dough together. A teaspoon is enough to lift the sweetness without overpowering the almond. If you’re avoiding dairy, you can use a vanilla‑flavored plant milk or a splash of vanilla syrup, but adjust the sugar slightly to compensate. The extra powdered sugar is what gives the cookies their signature snowy look; dust it lightly after baking while the cookies are still warm, so the sugar adheres and glistens.
Everything's prepped? Good. Let's get into the real action...
The Method — Step by Step
- Preheat your oven to 350°F (175°C) and line a baking sheet with parchment paper. The parchment prevents sticking and allows the cookies to cool evenly. Place the sheet on a rack so heat circulates around the cookies, ensuring a uniform bake. If you’re in a hurry, you can skip the parchment, but the cookies will cling to the sheet and be harder to remove.
- In a large bowl, whisk together the all‑purpose flour, almond flour, powdered sugar, and salt until the mixture is uniform. The dry blend forms the base that will hold the butter together. Keep this mixture aside while you prepare the wet ingredients. A quick way to avoid lumps is to sift the flour and almond flour together before mixing.
- Using a stand mixer or a hand mixer, beat the butter on medium speed until it’s pale and fluffy. This aerates the butter, giving the cookies a lighter texture. When the butter is ready, add the vanilla extract and continue mixing for an additional minute to incorporate the flavor fully. The mixture should look like a smooth, creamy batter.
- Gradually add the dry mixture to the butter, one cup at a time, mixing on low speed until a dough forms. The dough should be slightly sticky but manageable. If it’s too dry, add a tablespoon of milk; if too wet, add a teaspoon of flour. The key is to keep the dough from clumping while maintaining its shape.
- Shape the dough into small balls, about 1.5 inches in diameter, using a melon baller or a tablespoon. Place each ball on the prepared baking sheet, spacing them about 2 inches apart. The spacing allows the cookies to expand without merging. If you prefer a more uniform look, use a cookie scoop to ensure consistency.
- Bake for 12 to 15 minutes, or until the edges turn a light golden brown. The center should still look slightly pale, signaling that the cookies will finish baking at a higher temperature. Watch the timer closely; overbaking will result in hard, cracker‑like cookies. The aroma during this stage is a hint of toasted nuts and butter.
- Remove the sheet from the oven and let the cookies cool on it for 5 minutes. This brief cooling period allows the cookies to firm up, making them easier to flip. During this time, the cookies will still be soft, so be careful not to handle them too soon.
- Preheat the oven to 400°F (200°C). While it heats, dust the cooled cookies lightly with powdered sugar. The sugar will cling to the surface, creating a snowy finish. The higher temperature will crisp the edges, giving the cookies that signature crunch.
- Return the cookies to the oven for an additional 5 minutes, or until they’re golden brown on the edges and slightly firm. The final bake should be quick to prevent the cookies from drying out. Keep a close eye on them; the aroma at this stage is unmistakably sweet and nutty.
- Remove the cookies from the oven and let them cool completely on a wire rack. The cookies will continue to set as they cool, developing a crisp exterior and a chewy interior. Once cooled, store them in an airtight container for up to a week. For longer storage, freeze them and thaw when ready to serve.
That's it — you did it. But hold on, I've got a few more tricks that'll take this to another level...
Insider Tricks for Flawless Results
The Temperature Rule Nobody Follows
Many bakers bake almond cookies at a single temperature, but the double bake is the secret to that perfect crisp. The first lower bake allows the interior to set without overcooking the exterior. The second high bake crisps the edges just enough to give a satisfying crunch while preserving a chewy center. I once tried skipping the second bake, and the cookies came out soft and doughy. The texture was flat, and the almond flavor was muted.
Why Your Nose Knows Best
The aroma of toasted almonds and butter is a reliable indicator that your cookies are baking correctly. If you smell a faint nutty scent, the cookies are likely still in the early stages. A stronger, caramelized smell means the edges are ready to brown. Trust your nose, and you’ll avoid overbaking or underbaking.
The 5‑Minute Rest That Changes Everything
Letting the cookies rest on the baking sheet for 5 minutes after the first bake is essential. This rest period allows the cookies to firm up, preventing them from breaking when you transfer them to the cooling rack. I once rushed the cookies and they shattered on the rack, ruining the presentation. The rest period is a simple step that saves time and improves texture.
Use a Cookie Scoop for Uniformity
Using a cookie scoop ensures each cookie is the same size, which leads to even baking. Evenness is key to achieving consistent texture and appearance. A scoop also helps prevent the cookies from spreading too much, keeping their round shape intact.
Dusting Technique Matters
Dust the cookies with powdered sugar while they’re still warm so the sugar adheres better. If you wait until they’re cool, the sugar will slide off. Lightly tap the sheet after dusting to distribute the sugar evenly. This step creates that signature snowy look and adds a sweet finish.
Creative Twists and Variations
This recipe is a playground. Here are some of my favorite ways to switch things up:
Chocolate Drizzle
After the final bake, drizzle melted dark chocolate over the cookies. The chocolate adds richness and a glossy finish, turning the snowball into a decadent treat. Dark chocolate pairs beautifully with the almond base, creating a sophisticated flavor profile.
Spiced Almond Snowball
Incorporate a pinch of ground ginger and a dash of nutmeg into the dry mix. The spices add warmth and depth, making the cookies perfect for a winter menu. The spices also give a subtle kick that balances the sweetness.
Gluten‑Free Edition
Replace the all‑purpose flour with a gluten‑free blend that contains xanthan gum. Keep the almond flour and powdered sugar the same. The result is a cookie that’s just as fluffy and chewy, suitable for gluten‑sensitive guests.
Nutty Layer
Fold in chopped pecans or walnuts into the dough before shaping. The added nuts give a delightful crunch and a nutty flavor that complements the almond base. The cookies become a layered nut experience.
Salted Caramel Dust
Swap the extra powdered sugar for a blend of powdered sugar and finely grated sea salt. The salted caramel dust gives a sweet‑salty contrast that’s surprisingly harmonious. The cookies will have a caramelized finish with a subtle crunch.
Minty Fresh
Add a few drops of peppermint extract to the dough for a minty twist. The mint pairs well with the almond flavor and gives a refreshing aftertaste. The result is a holiday cookie that feels like a cool breeze on a winter day.
Storing and Bringing It Back to Life
Fridge Storage
Store the cooled cookies in an airtight container at room temperature for up to a week. The airtight seal prevents the cookies from absorbing moisture, keeping them crisp. If you notice the cookies becoming soft, reheat them briefly in the oven at 300°F for 5 minutes to restore crispness.
Freezer Friendly
Place the cookies on a parchment‑lined tray and freeze them for up to 3 months. Once frozen, transfer them to a freezer bag for longer storage. When ready to serve, thaw at room temperature for 30 minutes before reheating.
Best Reheating Method
To revive frozen cookies, preheat the oven to 350°F and bake them for 8 to 10 minutes. The cookies will regain their golden edges and chewy centers. Add a splash of water to the baking sheet before reheating to create steam, which helps keep the cookies moist.